双目深度算法
功能介绍
双目深度估计算法是使用地平线OpenExplorer
在SceneFlow
数据集上训练出来的StereoNet模型。
算法输入为双目图像数据,分别是左右视图。算法输出为左视图的深度。
此示例使用双目相机作为图像数据输入源,利用BPU进行算法推理,发布包含双目图像左图和感知结果的话题消息,在PC端rviz2上渲染算法结果。
支持平台
| 平台 | 运行方式 | 示例功能 |
|---|---|---|
| RDK X5, RDK X5 Module, RDK S100目前只支持ZED双目相机启动 | Ubuntu 22.04 (Humble) | · 启动双目相机、推理出深度结果,并在Web端显示 |
准备工作
RDK平台
-
RDK已烧录好Ubuntu 22.04系统镜像。
-
RDK已成功安装TogetheROS.Bot。
-
RDK已安装MIPI或者USB双目相机,目前支持RDK X5官方MIPI双目相机和ZED双目相机接入,没有双目相机的情况下,用户也可以采用离线数据进行回灌获取深度估计结果。
-
确认PC机能够通过网络访问RDK。
使用介绍
功能安装和更新
- 在运行双目深度算法之前,需要确保系统镜像版本在
3.2.1版本之上,查询系统版本的命令如下:
cat /etc/version

-
如果系统版本不符合要求,请参考文档
1.2章节进行镜像烧录 -
此外,还需要确保
tros-humble-hobot-stereonet功能包在2.4.2版本,查询功能包版本的命令如下:
apt list | grep tros-humble-hobot-stereonet/

- 如果使用到RDK X5官方MIPI双目相机,还需要确保
tros-humble-mipi-cam功能包在2.3.8版本,查询功能包版本的命令如下:
apt list | grep tros-humble-mipi-cam/

- 如果使用到ZED双目相机,还需要确保
tros-humble-hobot-zed-cam功能包在2.3.3版本,查询功能包版本的命令如下:
apt list | grep tros-humble-hobot-zed-cam/

- 如果功能包版本不符合要求,需要进行升级,在RDK系统的终端中运行如下指令,即可更新:
apt update
apt upgrade
注意
如果sudo apt update命令执行失败或报错,请查看常见问题章节的Q10: apt update 命令执行失败或报错如何处理?解决。
双目算法的版本
目前双目算法已有如下版本可供使用:
| 算法版本 | 算法特性 |
|---|---|
| V2.0 | 精度较高、帧率较低,输出15FPS分辨率640*352的深度图 |
| V2.2 | 精度较低、帧率较高,输出23FPS分辨率640*352的深度图 |
| V2.3 | 帧率进一步提升,输出27FPS分辨率640*352的深度图 |
启动双目图像发布、算法推理和图像可视化
注意:请用root用户执行文档中的命令,其它用户执行可能权限不够,造成一些不必要的错误

双目深度算法支持多款相机,MIPI相机和USB相机都可以支持,启动命令有一些区别,具体启动命令如下:
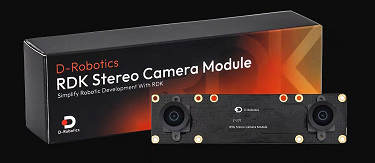
(1) 搭配RDK X5官方MIPI双目相机启动
- RDK X5官方MIPI双目相机如图所示:
- 安装方式如图所示,接线请勿接反,会导致左右图对调,双目算法运行错误:

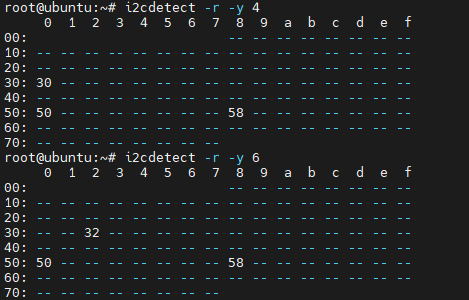
- 确认相机连接是否正常,通过ssh连接RDK X5,执行以下命令,如果输出如图所示结果,则代表相机连接正常:
i2cdetect -r -y 4
i2cdetect -r -y 6
- 通过不同的launch文件,启动相应版本的双目算法,通过ssh连接RDK X5,执行以下命令:
- V2.0
- V2.2
- V2.3
# 配置tros.b humble环境
source /opt/tros/humble/setup.bash

# 启动双目模型launch文件,其包含了算法和双目相机节点的启动
ros2 launch hobot_stereonet stereonet_model_web_visual_v2.0.launch.py \
mipi_image_width:=640 mipi_image_height:=352 mipi_lpwm_enable:=True mipi_image_framerate:=15.0 \
need_rectify:=False height_min:=-10.0 height_max:=10.0 pc_max_depth:=5.0
# 配置tros.b humble环境
source /opt/tros/humble/setup.bash

# 启动双目模型launch文件,其包含了算法和双目相机节点的启动
ros2 launch hobot_stereonet stereonet_model_web_visual_v2.2.launch.py \
mipi_image_width:=640 mipi_image_height:=352 mipi_lpwm_enable:=True mipi_image_framerate:=25.0 \
need_rectify:=False height_min:=-10.0 height_max:=10.0 pc_max_depth:=5.0
# 配置tros.b humble环境
source /opt/tros/humble/setup.bash

# 启动双目模型launch文件,其包含了算法和双目相机节点的启动
ros2 launch hobot_stereonet stereonet_model_web_visual_v2.3.launch.py \
mipi_image_width:=640 mipi_image_height:=352 mipi_lpwm_enable:=True mipi_image_framerate:=30.0 \
need_rectify:=False height_min:=-10.0 height_max:=10.0 pc_max_depth:=5.0
参数含义如下:
| 名称 | 参数值 | 说明 |
|---|---|---|
| mipi_image_width | 设置为640 | MIPI相机的输出分辨率是640*352 |
| mipi_image_height | 设置为352 | MIPI相机的输出分辨率是640*352 |
| mipi_lpwm_enable | 设置为True | MIPI相机开启硬件同步 |
| mipi_image_framerate | 设置为30.0 | MIPI相机输出帧率为30.0FPS |
| need_rectify | 设置为False | 因为官方相机出厂自带标��定参数,会自动矫正,不需要加载自定义标定文件进行矫正 |
| height_min | 设置为-10.0 | 点云最小高度为-10.0m |
| height_max | 设置为10.0 | 点云最大高度为10.0m |
| pc_max_depth | 设置为5.0 | 是点云最大距离为5.0m |
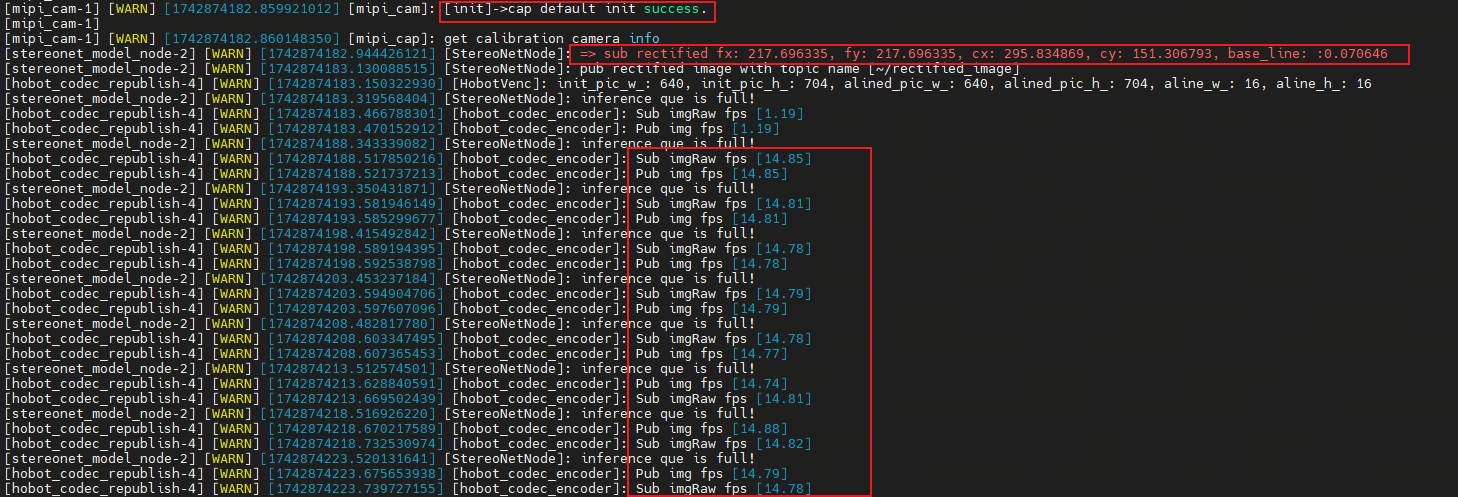
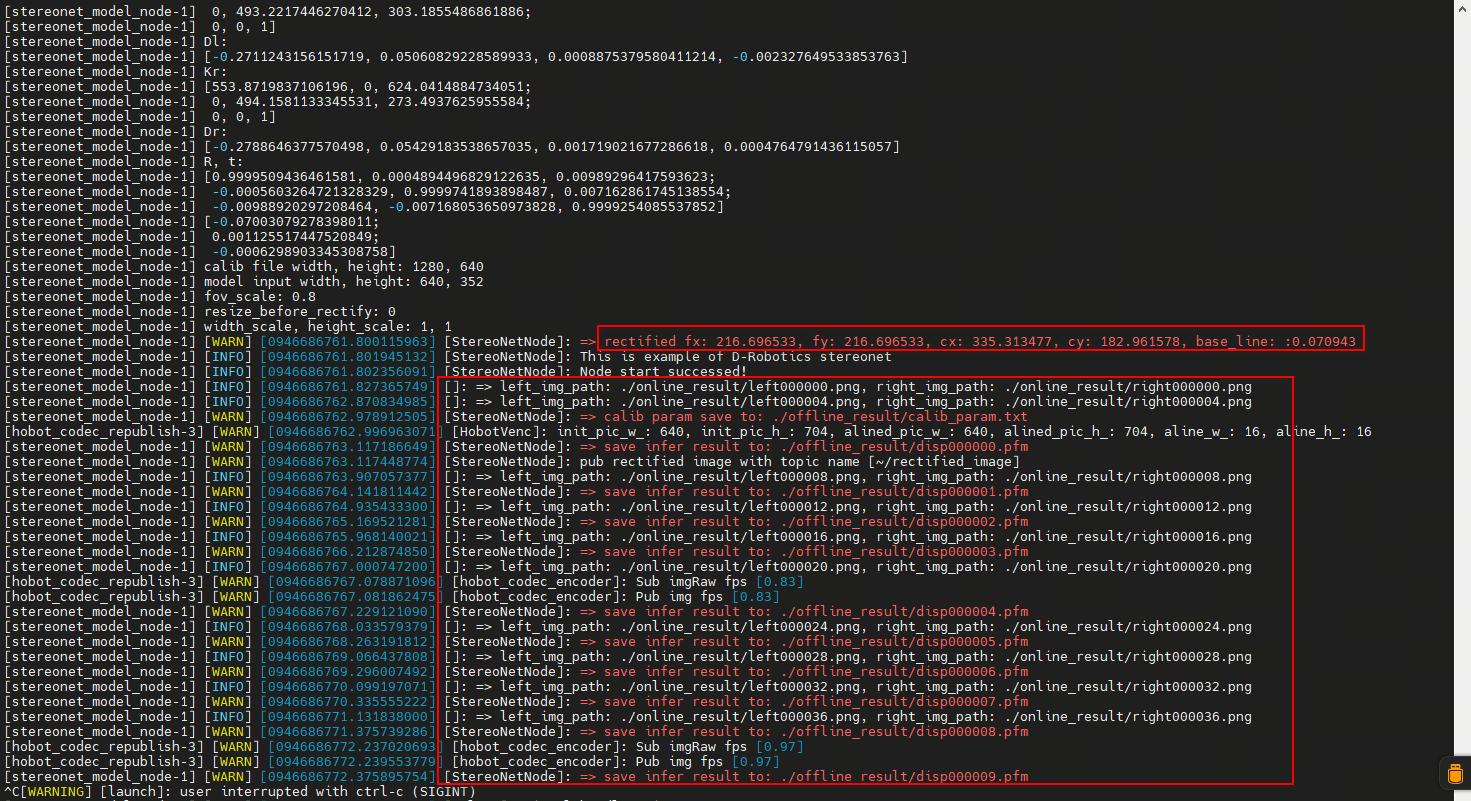
- 出现如下日志表示双目算法启动成功,
fx/fy/cx/cy/base_line是相机内参,如果深度图正常,但估计出来的距离有偏差,可能是相机内参存在问题:
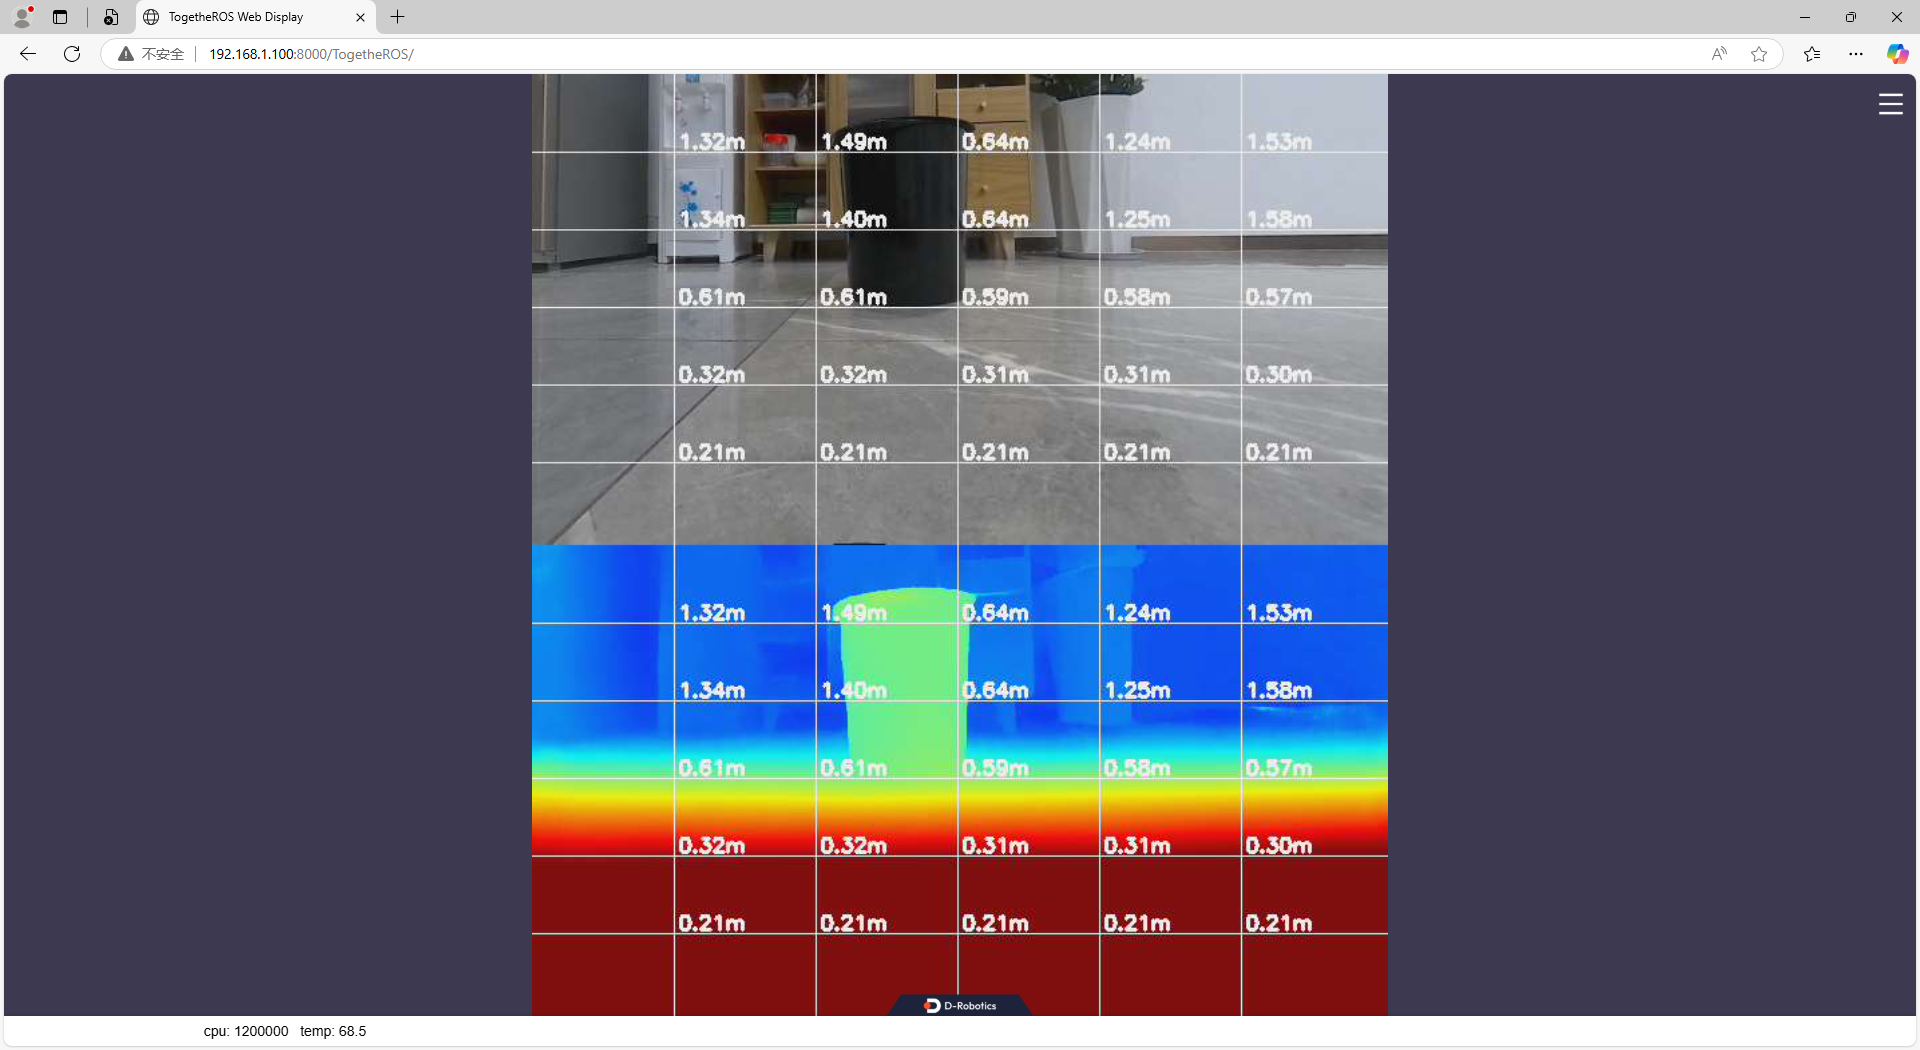
- 通过网页端查看深度图,在浏览器输入 http://ip:8000 (图中RDK X5 ip是192.168.1.100):
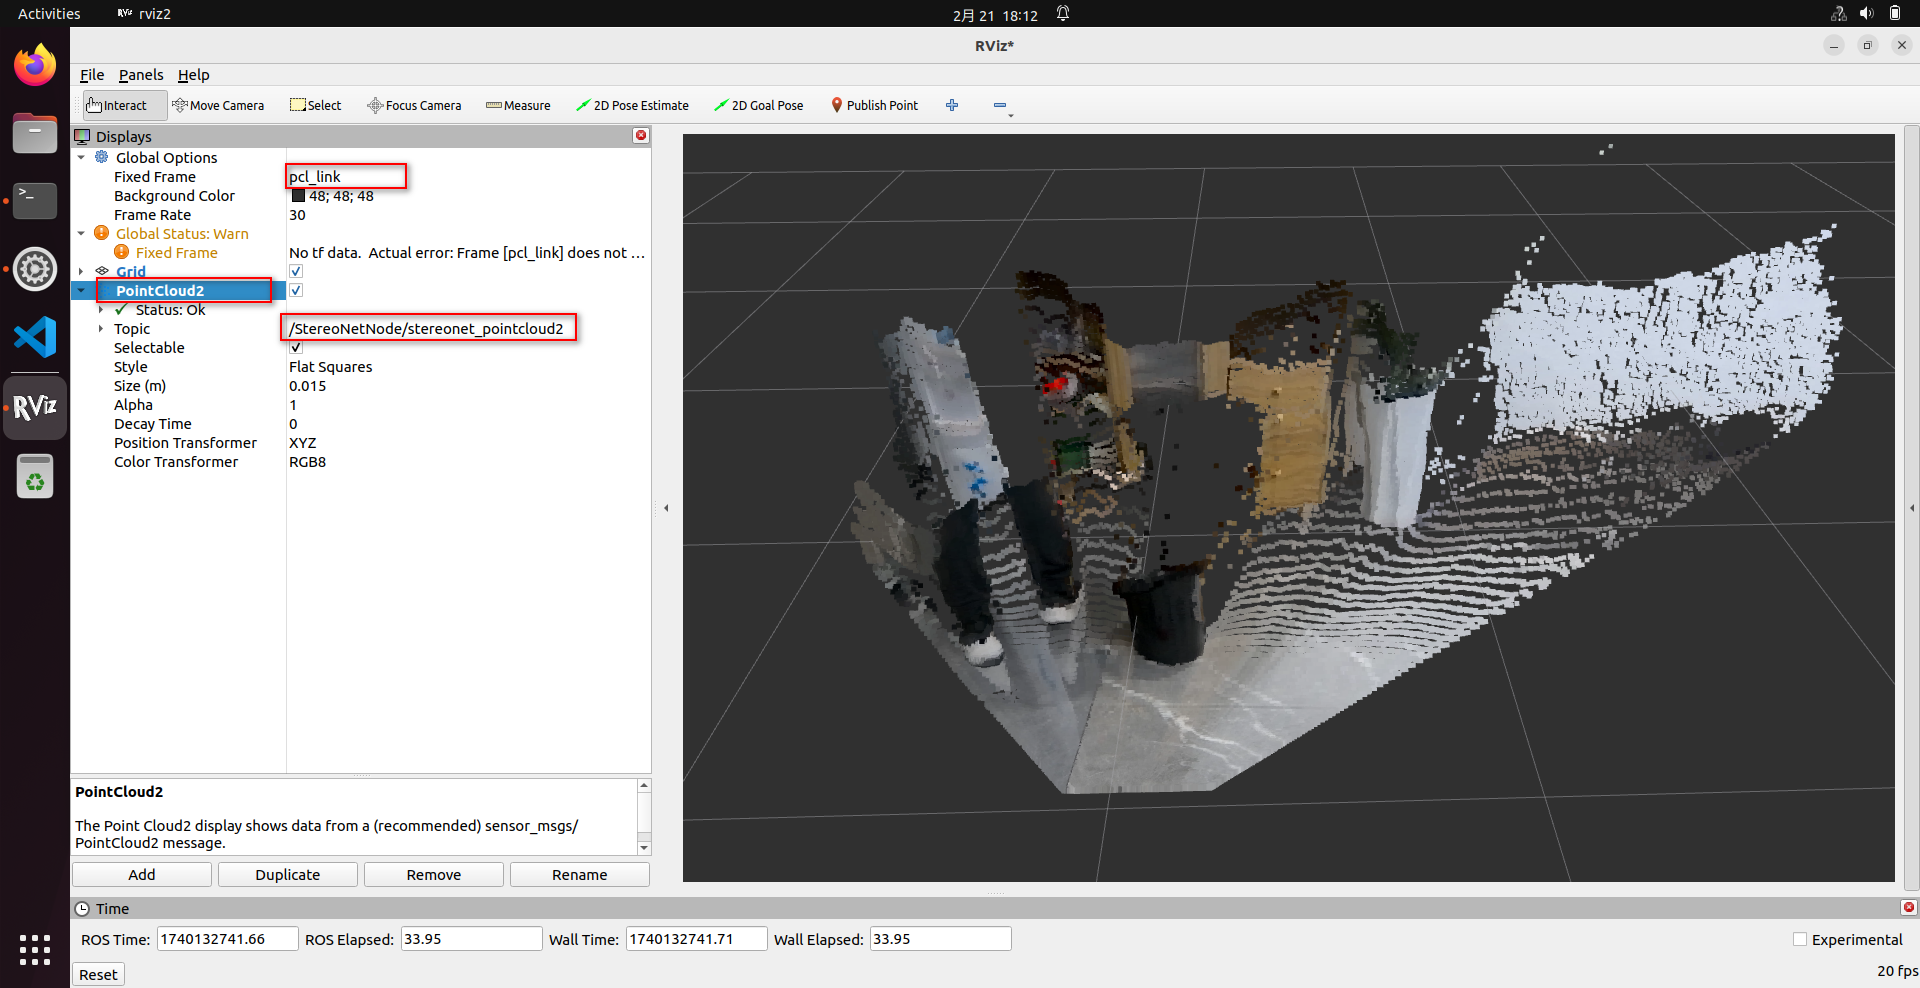
- 通过rviz2查看点云,需要用户具备一定的ROS2基础,将PC和RDK X5配置到同一个网段,能够相互ping通,订阅双目模型节点发布的相关话题,才可以在rviz2中显示点云,注意rviz2中需要做如下配置:
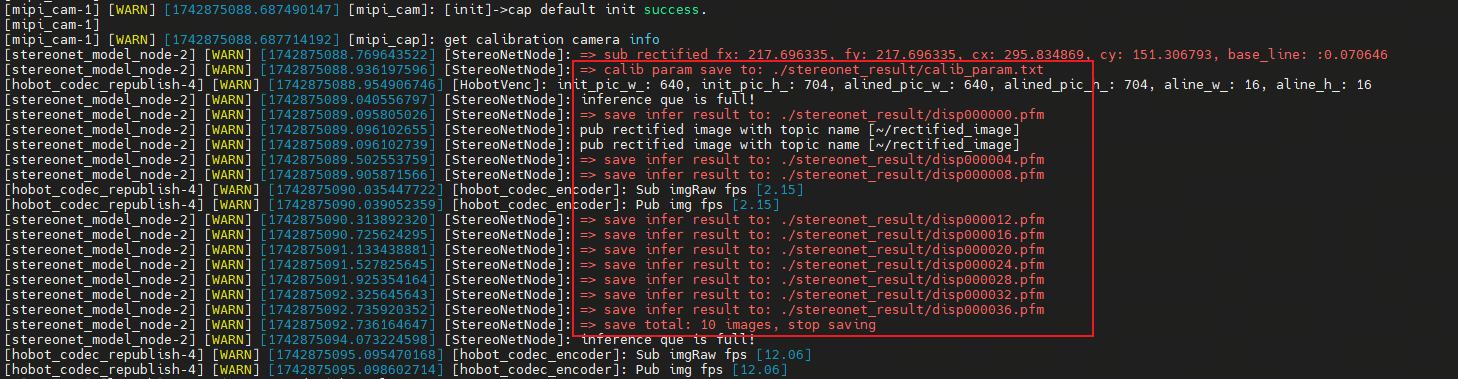
- 如果用户想保存深度估计结果,可以添加如下参数实现,
save_image_all打开保存开关,save_freq控制保存频率,save_dir控制保存的目录(如果目录不存在会自动创建),save_total控制保存的总数。程序运行将会保��存相机内参、左右图、视差图、深度图、可视化图:
# 配置tros.b humble环境
source /opt/tros/humble/setup.bash

# 这里以V2.0版本的算法为例,其它版本的算法类似加入对应参数即可
ros2 launch hobot_stereonet stereonet_model_web_visual_v2.0.launch.py \
mipi_image_width:=640 mipi_image_height:=352 mipi_lpwm_enable:=True mipi_image_framerate:=15.0 \
need_rectify:=False height_min:=-10.0 height_max:=10.0 pc_max_depth:=5.0 \
save_image_all:=True save_freq:=4 save_dir:=./online_result save_total:=10
参数含义如下:
| 名称 | 参数值 | 说明 |
|---|---|---|
| save_image_all | 设置为True | 保存图像开关 |
| save_freq | 设置为4 | 每隔4帧保存一次,可修改为任意正数 |
| save_dir | 设置为保存图像的目录 | �可根据需要设置保存位置 |
| save_total | 设置为10 | 总共保存10张图像,设置为-1则代表为一直保存 |
(2) 本地图片离线回灌
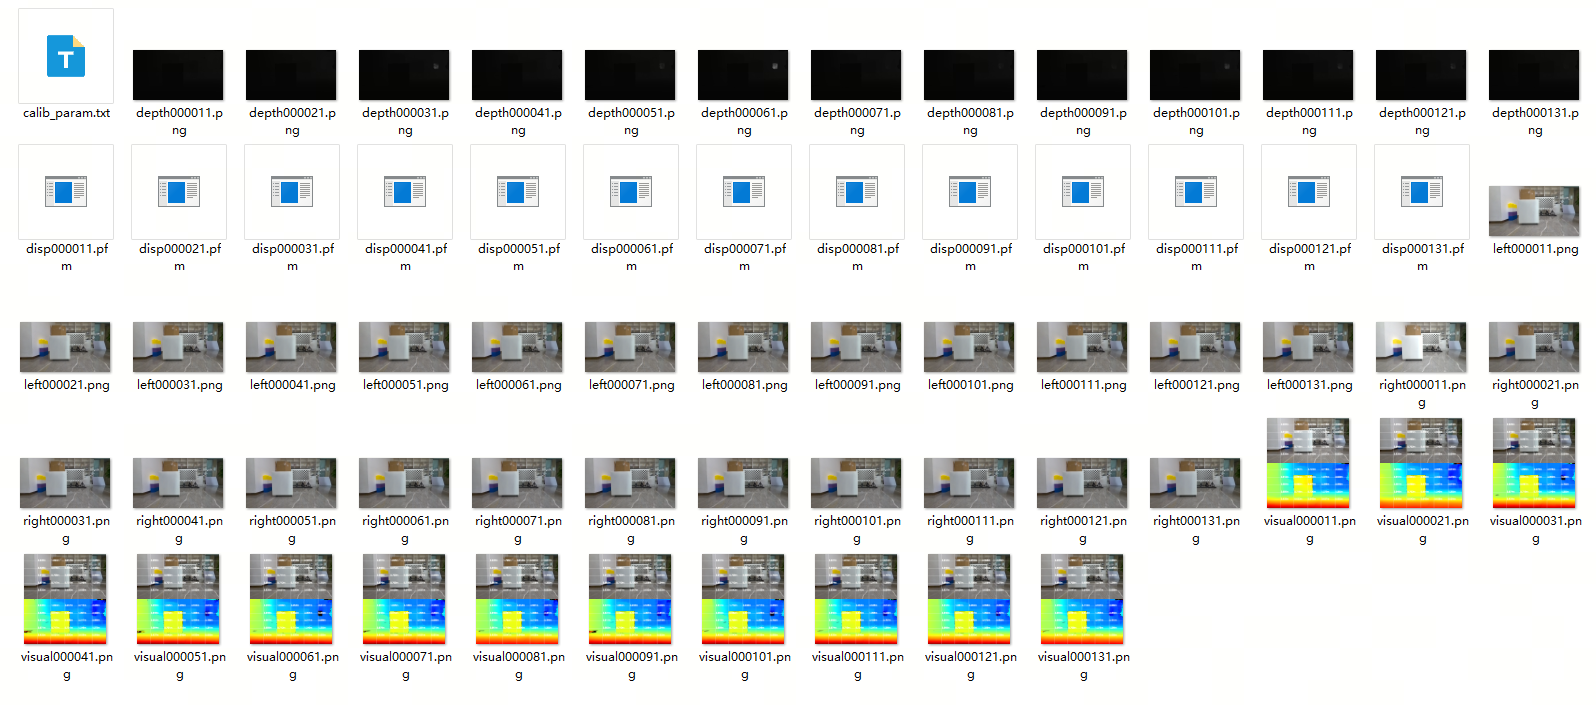
- 如果想利用本地图片评估算法效果,可以使用下列命令指定算法运行模式、图像数据地址以及相机内参,同时要保证图像数据经过去畸变、极线对齐。图片的格式如下图所示,第一张左目图像的命名为left000000.png,第二张左目图像的命名为left000001.png,以此类推。对应的第一张右目图像的命名为right000000.png,第二张右目图像的命名为right000001.png,以此类推。算法按序号遍历图像,直至图像全部计算完毕:

- 算法离线运行方式如下,通过ssh连接RDK X5,执行以下命令:
- V2.0
- V2.2
- V2.3
# 配置tros.b humble环境
source /opt/tros/humble/setup.bash

# 启动双目模型launch文件,注意相机参数的设置,需要手动输入矫正后参数
ros2 launch hobot_stereonet stereonet_model_web_visual.launch.py \
stereonet_model_file_path:=/opt/tros/humble/share/hobot_stereonet/config/x5baseplus_alldata_woIsaac.bin postprocess:=v2 \
use_local_image:=True local_image_path:=./online_result \
need_rectify:=False camera_fx:=216.696533 camera_fy:=216.696533 camera_cx:=335.313477 camera_cy:=182.961578 base_line:=0.070943 \
height_min:=-10.0 height_max:=10.0 pc_max_depth:=5.0 \
save_image_all:=True save_dir:=./offline_result
# 配置tros.b humble环境
source /opt/tros/humble/setup.bash

# 启动双目模型launch文件,注意相机参数的设置,需要手动输入矫正后参数
ros2 launch hobot_stereonet stereonet_model_web_visual.launch.py \
stereonet_model_file_path:=/opt/tros/humble/share/hobot_stereonet/config/DStereoV2.2.bin postprocess:=v2.2 \
use_local_image:=True local_image_path:=./online_result \
need_rectify:=False camera_fx:=216.696533 camera_fy:=216.696533 camera_cx:=335.313477 camera_cy:=182.961578 base_line:=0.070943 \
height_min:=-10.0 height_max:=10.0 pc_max_depth:=5.0 \
save_image_all:=True save_dir:=./offline_result
# 配置tros.b humble环境
source /opt/tros/humble/setup.bash

# 启动双目模型launch文件,注意相机参数的设置,需要手动输入矫正后参数
ros2 launch hobot_stereonet stereonet_model_web_visual.launch.py \
stereonet_model_file_path:=/opt/tros/humble/share/hobot_stereonet/config/V22_disp96.bin postprocess:=v2.3 \
use_local_image:=True local_image_path:=./online_result \
need_rectify:=False camera_fx:=216.696533 camera_fy:=216.696533 camera_cx:=335.313477 camera_cy:=182.961578 base_line:=0.070943 \
height_min:=-10.0 height_max:=10.0 pc_max_depth:=5.0 \
save_image_all:=True save_dir:=./offline_result
参数含义如下:
| 名称 | 参数值 | 说明 |
|---|---|---|
| stereonet_model_file_path | 不同版本的双目算法模型文件 | 根据模型版本设置 |
| postprocess | 不同版本的双目算法模型对应的后处理方法 | 根据模型版本设置 |
| use_local_image | 设置为True | 图片回灌模式开关 |
| local_image_path | 设置为离线数据目录 | 回灌图像的地址目录 |
| need_rectify | 设置为False | 回灌图像要求经过极线矫正,不需要开启此开关,但要手动传入矫正后参数 |
| camera_fx | 设置为相机矫正后内参fx | 相机内参 |
| camera_fy | 设置为相机矫正后内参fy | 相机内参 |
| camera_cx | 设置为相机矫正后内参cx | 相机内参 |
| camera_cy | 设置为相机矫正后内参cy | 相机内参 |
| base_line | 设置为相机矫正后基线 | 基线距离,单位为m |
| height_min | 设置为-10.0 | 点云最小高度为-10.0m |
| height_max | 设置为10.0 | 点云最大高度为10.0m |
| pc_max_depth | 设置为5.0 | 是点云最大距离为5.0m |
| save_image_all | 设置为True | 保存回灌结果 |
| save_dir | 设置为保存图像的目录 | 可根据需要设置保存位置 |
- 算法运行成功后�,同样可以通过网页端和rviz显示实时渲染数据,参考上文,离线运行的结果将会保存在
离线数据目录下的result子目录中,同样会保存相机内参、左右图、视差图、深度图、可视化图
(3) 搭配ZED双目摄像头启动
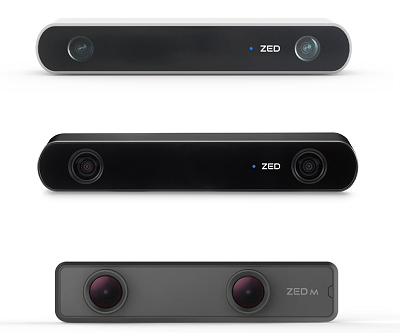
- ZED双目摄像头如图所示:
- 将ZED相机通过USB连接RDK X5,然后启动双目算法,通过ssh连接RDK X5,执行以下命令:
ping www.baidu.com
- V2.0
- V2.2
- V2.3
- S100
# 配置tros.b humble环境
source /opt/tros/humble/setup.bash

# 启动双目模型launch文件,其包含了算法和双目相机节点的启动
ros2 launch hobot_zed_cam test_stereo_zed_rectify.launch.py \
resolution:=720p dst_width:=640 dst_height:=352 \
stereonet_model_file_path:=/opt/tros/humble/share/hobot_stereonet/config/x5baseplus_alldata_woIsaac.bin postprocess:=v2 \
height_min:=-10.0 height_max:=10.0 pc_max_depth:=5.0
# 配置tros.b humble环境
source /opt/tros/humble/setup.bash

# 启动双目模型launch文件,其包含了算法和双目相机节点的启动
ros2 launch hobot_zed_cam test_stereo_zed_rectify.launch.py \
resolution:=720p dst_width:=640 dst_height:=352 \
stereonet_model_file_path:=/opt/tros/humble/share/hobot_stereonet/config/DStereoV2.2.bin postprocess:=v2.2 \
height_min:=-10.0 height_max:=10.0 pc_max_depth:=5.0
# 配置tros.b humble环境
source /opt/tros/humble/setup.bash

# 启动双目模型launch文件,其包含了算法和双目相机节点的启动
ros2 launch hobot_zed_cam test_stereo_zed_rectify.launch.py \
resolution:=720p dst_width:=640 dst_height:=352 \
stereonet_model_file_path:=/opt/tros/humble/share/hobot_stereonet/config/V22_disp96.bin postprocess:=v2.3 \
height_min:=-10.0 height_max:=10.0 pc_max_depth:=5.0
# 配置tros.b humble环境
source /opt/tros/humble/setup.bash

# 启动双目模型launch文件,其包含了算法和双目相机节点的启动
ros2 launch hobot_zed_cam test_stereo_zed_rectify.launch.py \
resolution:=720p dst_width:=640 dst_height:=352 \
stereonet_model_file_path:=/opt/tros/humble/share/hobot_stereonet/config/ds2.hbm postprocess:=v2 \
height_min:=-10.0 height_max:=10.0 pc_max_depth:=5.0
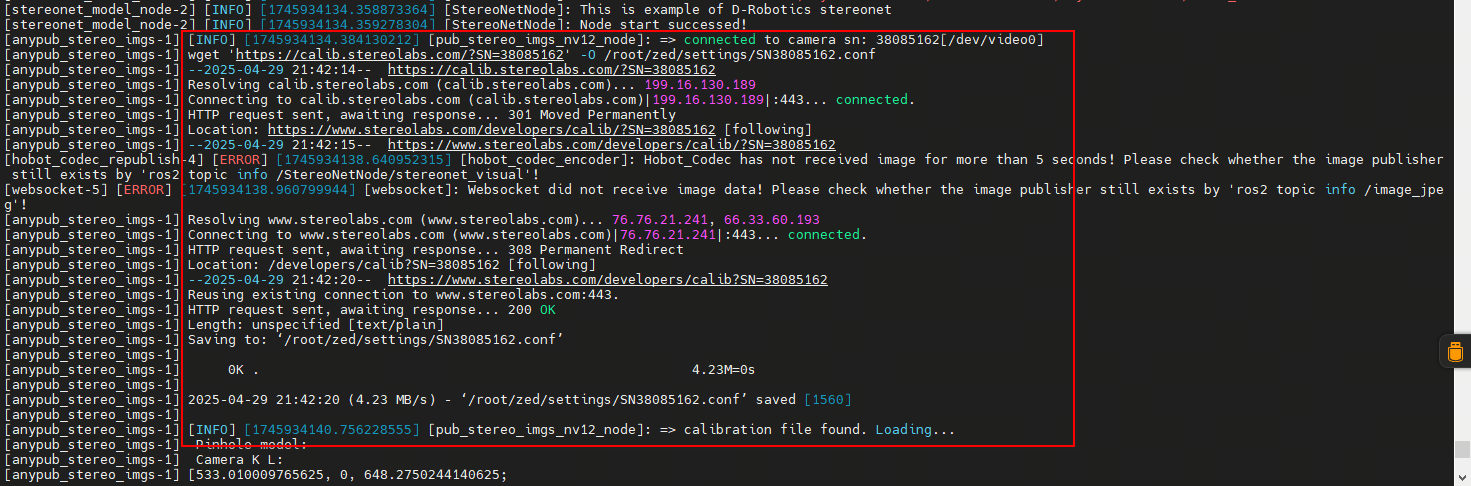
联网的情况下程序会自动下载标定文件,如果RDK X5没有联网,可以手动下载标定文件然后上传到RDK X5的/root/zed/settings/目录下
- 通过网页端查看深度图,在浏览器输入 http://ip:8000 ,更多点云可视化和保存图像相关的内容请参考上文设置对应参数
hobot_stereonet功能包说明
订阅话题
| 名称 | 消息类型 | 说明 |
|---|---|---|
| /image_combine_raw | sensor_msgs::msg::Image | 双目相机节点发布的左右目拼接图像话题,用于模型推理深度 |
| /camera_info_topic | sensor_msgs::msg::CameraInfo | 双目相机节点发布的左右目拼接图像话题,用于模型推理深度 |
发布话题
| 名称 | 消息类型 | 说明 |
|---|---|---|
| /StereoNetNode/stereonet_depth | sensor_msgs::msg::Image | 发布的深度图像,像素值为深度,单位为毫米 |
| /StereoNetNode/stereonet_visual | sensor_msgs::msg::Image | 发布的比较直观的可视化渲染图像 |
| /StereoNetNode/stereonet_pointcloud2 | sensor_msgs::msg::PointCloud2 | 发布的点云深度话题 |
其它重要参数
| 名称 | 参数值 | 说明 |
|---|---|---|
| stereo_image_topic | 默认 /image_combine_raw | 订阅双目图像消息的话题名 |
| camera_info_topic | 默认 /image_right_raw/camera_info | 订阅相机矫正参数消息的话题名 |
| need_rectify | 默认 True | 是否指定自定义标定文件对图像进行矫正开关 |
| stereo_calib_file_path | 默认 stereo.yaml | need_rectify=True的情况下,加载该路径下的标定文件进行标定 |
| stereo_combine_mode | 默认 1 | 左右目图像往往拼接在一张图上再发布出去,1为上下拼接,0为左右拼接,指示双目算法如何拆分图像 |
| KMean | 默认 10 | 过滤稀疏离群点时每个点的临近点的数目,统计每个点与周围最近10个点的距离 |
| stdv | 默认 0.01 | 过滤稀疏离群点时判断是否为离群点的阈值,将标准差的倍数设置为0.01 |
| leaf_size | 默认 0.05 | 设置点云的单�位密度,表示半径0.05米的三维球内只有一个点 |
注意事项
- 模型的输入尺寸为宽:640,高352,相机发布的图像分辨率应为640x352
- 如果双目相机发布图像的格式为NV12,那么双目图像的拼接方式必须为上下拼接