Stereo Depth Algorithm
Function Introduction
The stereo depth estimation algorithm uses the StereoNet model trained by Horizon OpenExplorer on the SceneFlow dataset.
The algorithm takes stereo image data (left and right views) as input and outputs the depth map for the left view.
This example uses a stereo camera as the image data input source, leverages the BPU for algorithm inference, and publishes topic messages containing the left image of the stereo pair and the perception results, which are then rendered on rviz2 on a PC.
Supported Platforms
| Platform | Operating Mode | Supported Features |
|---|---|---|
| RDK X5, RDK X5 Module, The RDK S100 currently only supports starting with the ZED stereo camera. | Ubuntu 22.04 (Humble) | · Start stereo camera, infer depth results, and display on Web interface |
Preparation
RDK Platform
-
The RDK has been flashed with the Ubuntu 22.04 system image.
-
TogetheROS.Bot has been successfully installed on the RDK.
-
An MIPI or USB stereo camera has been installed on the RDK. Currently, the official MIPI stereo camera for RDK X5 and the ZED stereo camera are supported. If no stereo camera is available, users can also use offline data for replay to obtain depth estimation results.
-
Ensure that the PC can access the RDK over the network.
Usage Instructions
Function Installation and Update
- Before running the stereo depth algorithm, ensure that the system image version is
3.2.1or above. Use the following command to check the system version:
cat /etc/version

-
If the system version does not meet the requirement, refer to section
1.2for instructions on flashing the image. -
Additionally, ensure that the
tros-humble-hobot-stereonetpackage is at version 2.4.2. Use the following command to check the package version:
apt list | grep tros-humble-hobot-stereonet/

- If using the official MIPI stereo camera for RDK X5, ensure that the
tros-humble-mipi-campackage is at version 2.3.8. Use the following command to check the package version:
apt list | grep tros-humble-mipi-cam/

- If using the ZED stereo camera, ensure that the
tros-humble-hobot-zed-campackage is at version 2.3.3. Use the following command to check the package version:
apt list | grep tros-humble-hobot-zed-cam/

- If the package versions do not meet the requirements, update them by running the following commands in the RDK terminal:
apt update
apt upgrade
Stereo Algorithm Versions
The following versions of the stereo algorithm are currently available:
| Algorithm Version | Algorithm Characteristics |
|---|---|
| V2.0 | High accuracy, low frame rate, outputs a 15FPS depth map with a resolution of 640*352 |
| V2.2 | Lower accuracy, higher frame rate, outputs a 23FPS depth map with a resolution of 640*352 |
| V2.3 | Further improved frame rate, outputs a 27FPS depth map with a resolution of 640*352 |
Starting Stereo Image Publishing, Algorithm Inference, and Image Visualization
Note: Please execute the commands in this document using theroot user. Other users may encounter permission issues leading to unnecessary errors.

The stereo depth algorithm supports multiple cameras, including both MIPI and USB cameras. The startup commands differ slightly depending on the camera used. The specific startup commands are as follows:
(1) Startup with Official RDK X5 MIPI Stereo Camera
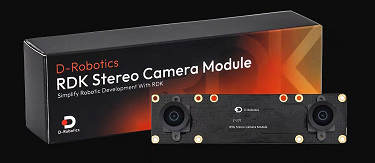
- The official MIPI stereo camera for RDK X5 is shown below:
- The installation method is shown below. Ensure the wiring is correct to avoid swapping the left and right images, which would cause the stereo algorithm to run incorrectly:

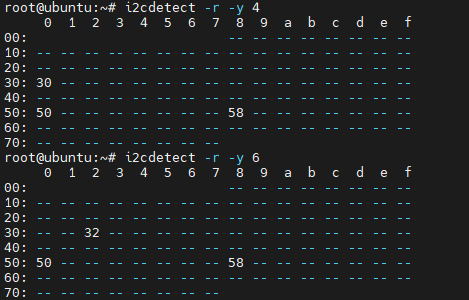
- Verify that the camera is connected properly. Connect to the RDK X5 via SSH and execute the following commands. If the output matches the image below, the camera is connected correctly:
i2cdetect -r -y 4
i2cdetect -r -y 6
- Start the corresponding version of the stereo algorithm using different launch files. Connect to the RDK X5 via SSH and execute the following commands:
- V2.0
- V2.2
- V2.3
# Configure the tros.b humble environment
source /opt/tros/humble/setup.bash

# Start the stereo model launch file, which includes the algorithm and stereo camera node
ros2 launch hobot_stereonet stereonet_model_web_visual_v2.0.launch.py \
mipi_image_width:=640 mipi_image_height:=352 mipi_lpwm_enable:=True mipi_image_framerate:=15.0 \
need_rectify:=False height_min:=-10.0 height_max:=10.0 pc_max_depth:=5.0
# Configure the tros.b humble environment
source /opt/tros/humble/setup.bash

# Start the stereo model launch file, which includes the algorithm and stereo camera node
ros2 launch hobot_stereonet stereonet_model_web_visual_v2.2.launch.py \
mipi_image_width:=640 mipi_image_height:=352 mipi_lpwm_enable:=True mipi_image_framerate:=25.0 \
need_rectify:=False height_min:=-10.0 height_max:=10.0 pc_max_depth:=5.0
# Configure the tros.b humble environment
source /opt/tros/humble/setup.bash

# Start the stereo model launch file, which includes the algorithm and stereo camera node
ros2 launch hobot_stereonet stereonet_model_web_visual_v2.3.launch.py \
mipi_image_width:=640 mipi_image_height:=352 mipi_lpwm_enable:=True mipi_image_framerate:=30.0 \
need_rectify:=False height_min:=-10.0 height_max:=10.0 pc_max_depth:=5.0
Parameter explanations:
| Parameter Name | Parameter Value | Explanation |
|---|---|---|
| mipi_image_width | 640 | The output resolution of the MIPI camera is 640*352 |
| mipi_image_height | 352 | The output resolution of the MIPI camera is 640*352 |
| mipi_lpwm_enable | True | Enable hardware synchronization for the MIPI camera |
| mipi_image_framerate | 30.0 | The output frame rate of the MIPI camera is 30.0FPS |
| need_rectify | False | Since the official camera comes with pre-calibrated parameters, automatic rectification is performed, and no custom calibration file is needed |
| height_min | -10.0 | The minimum height of the point cloud is -10.0m |
| height_max | 10.0 | The maximum height of the point cloud is 10.0m |
| pc_max_depth | 5.0 | The maximum depth of the point cloud is 5.0m |
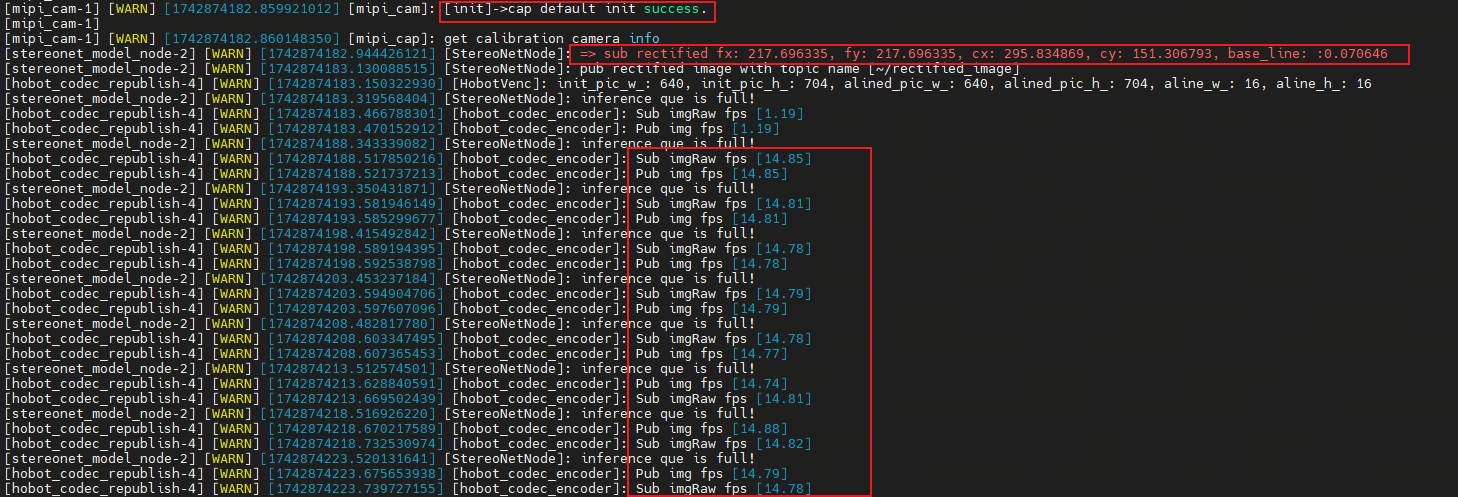
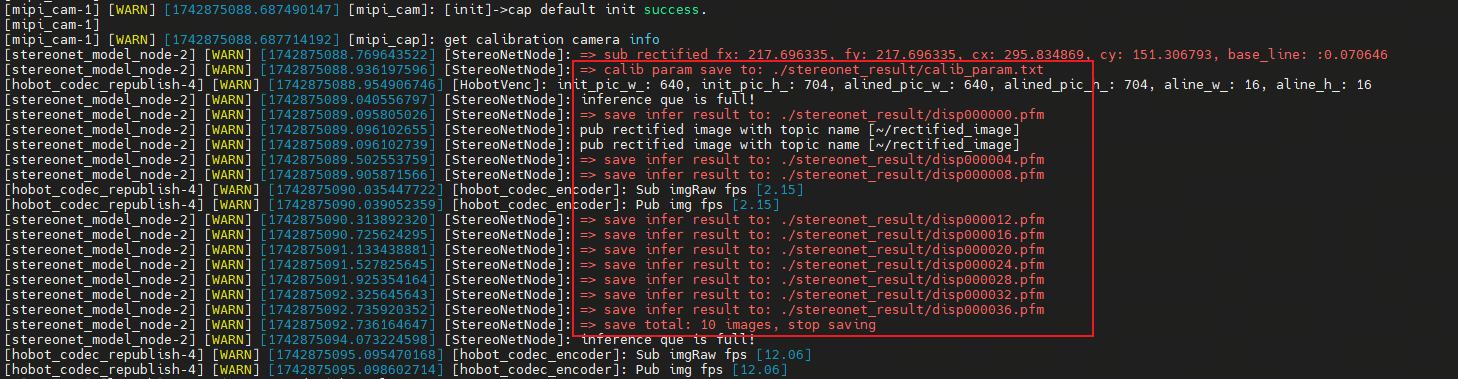
- The following log indicates that the stereo algorithm has started successfully.
fx/fy/cx/cy/base_lineare the camera intrinsic parameters. If the depth map is normal but the estimated distance is inaccurate, there may be an issue with the camera intrinsic parameters:
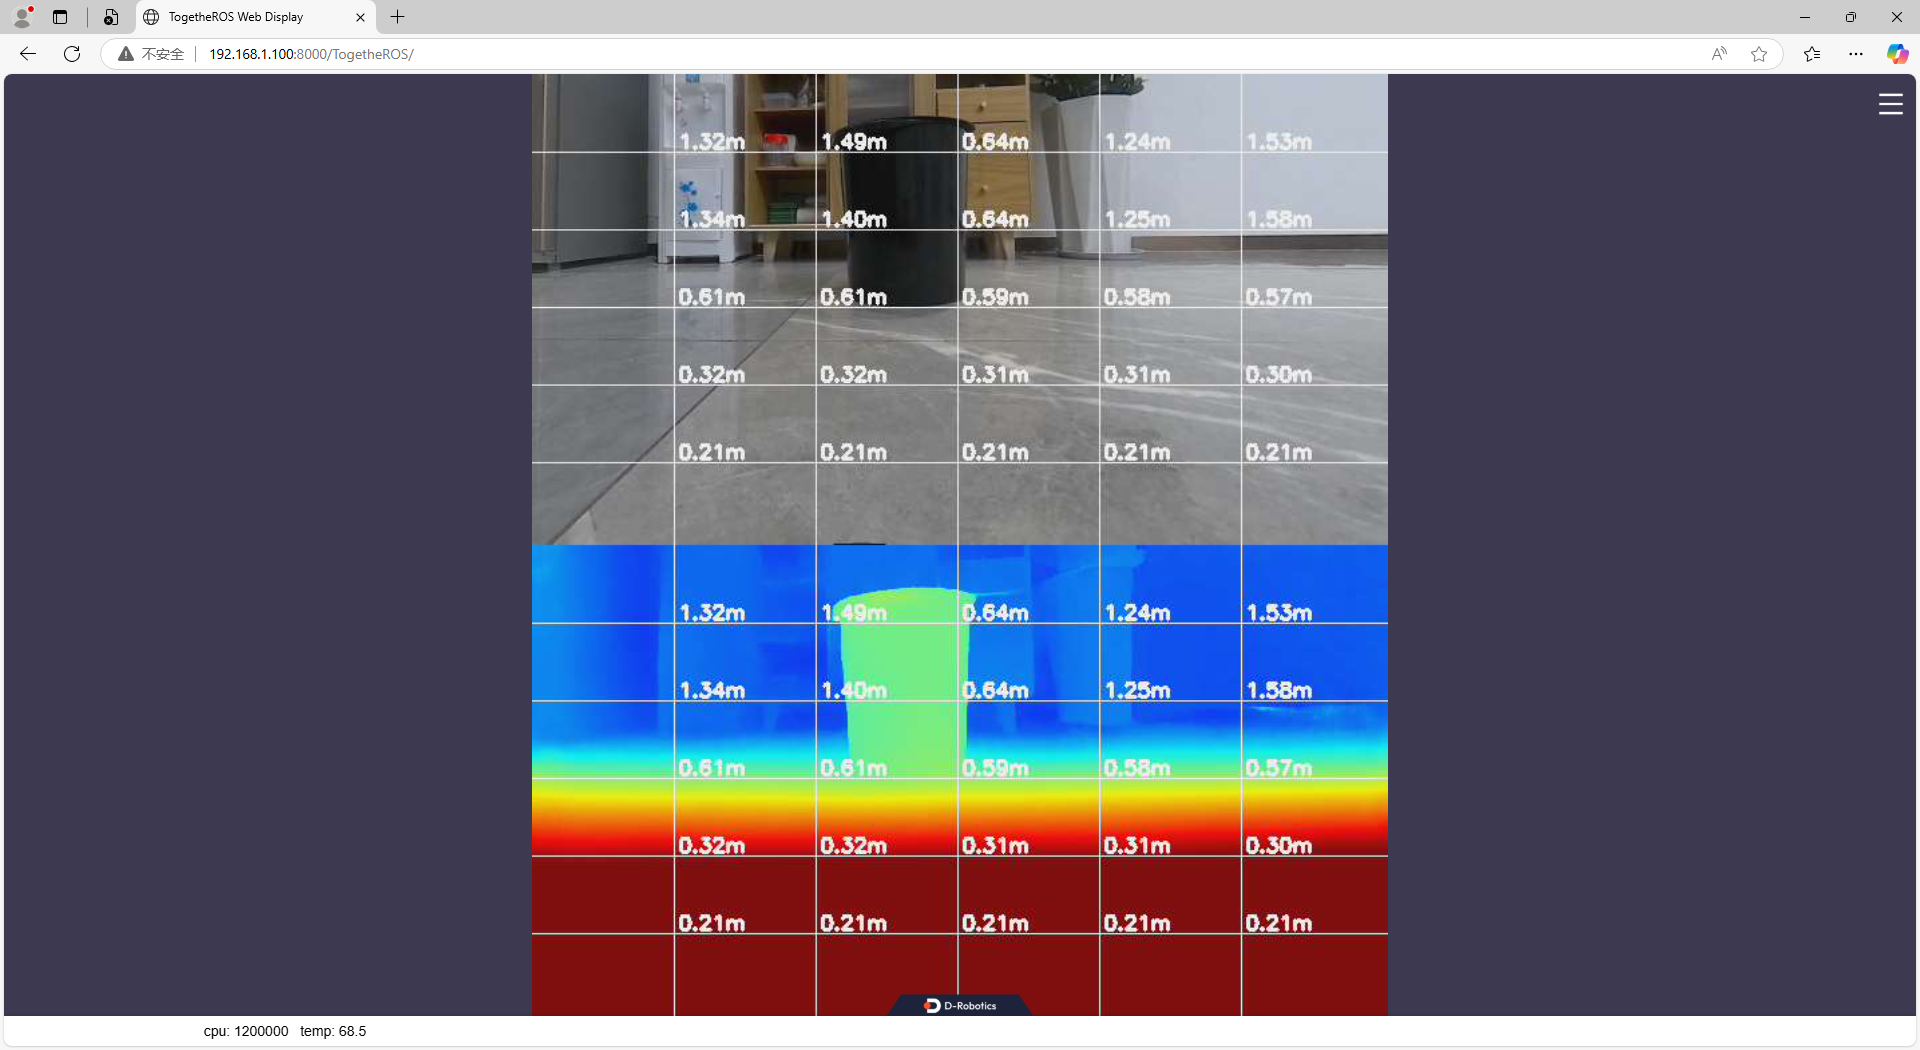
- View the depth map on the web interface by entering http://ip:8000 in the browser (the RDK X5 IP in the image is 192.168.1.100):
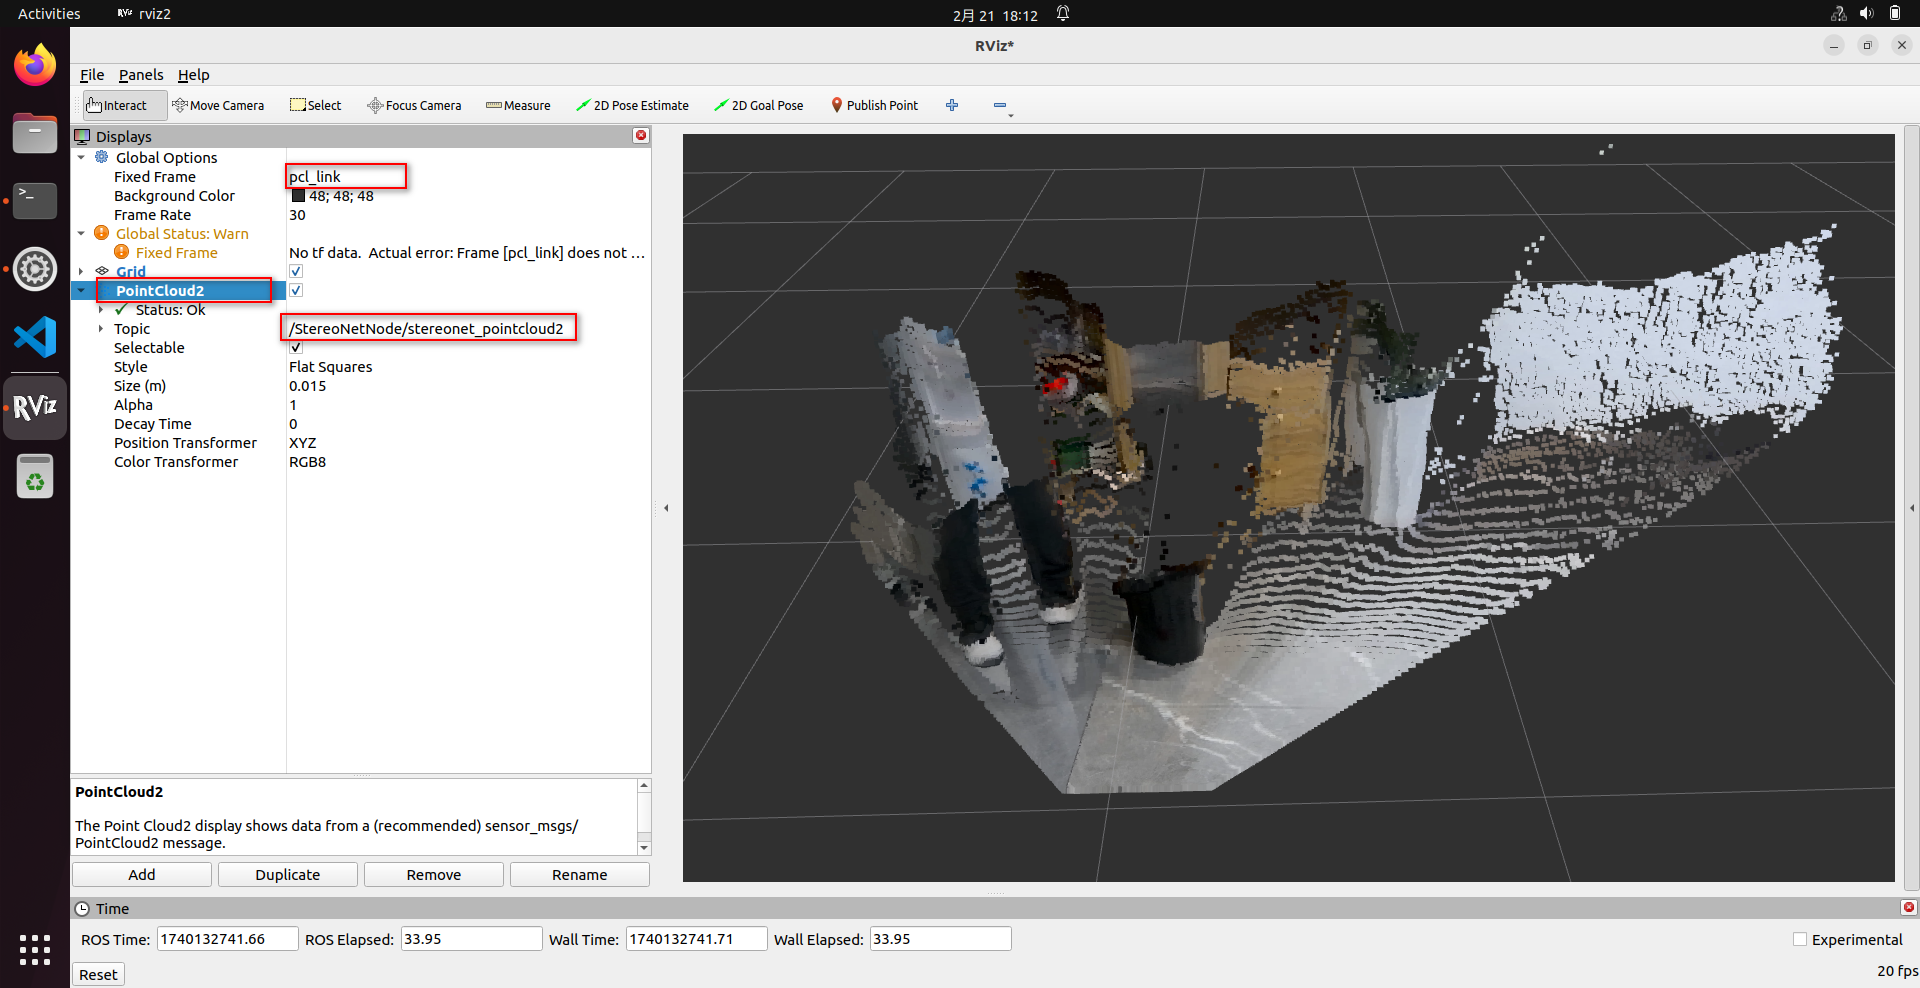
- View the point cloud in rviz2. This requires some basic ROS2 knowledge. Configure the PC and RDK X5 to be in the same network segment and ensure they can ping each other. Subscribe to the relevant topics published by the stereo model node to display the point cloud in rviz2. Note the following configurations in rviz2:
- If you want to save the depth estimation results, you can add the following parameters to enable saving, control the saving frequency, specify the saving directory (which will be created automatically if it does not exist), and control the total number of saves. The program will save camera intrinsic parameters, left and right images, disparity map, depth map, and visualization image:
# Configure the tros.b humble environment
source /opt/tros/humble/setup.bash

# Here, we use the V2.0 version of the algorithm as an example. Similar parameters can be added for other versions.
ros2 launch hobot_stereonet stereonet_model_web_visual_v2.0.launch.py \
mipi_image_width:=640 mipi_image_height:=352 mipi_lpwm_enable:=True mipi_image_framerate:=15.0 \
need_rectify:=False height_min:=-10.0 height_max:=10.0 pc_max_depth:=5.0 \
save_image_all:=True save_freq:=4 save_dir:=./online_result save_total:=10
Parameter explanations:
| Parameter Name | Parameter Value | Explanation |
|---|---|---|
| save_image_all | True | Enable image saving |
| save_freq | 4 | Save once every 4 frames. Can be modified to any positive number. |
| save_dir | Directory to save images | The directory to save the images. Can be set as needed. |
| save_total | 10 | Save a total of 10 images. Set to -1 for continuous saving. |
(2) Offline Replay with Local Images
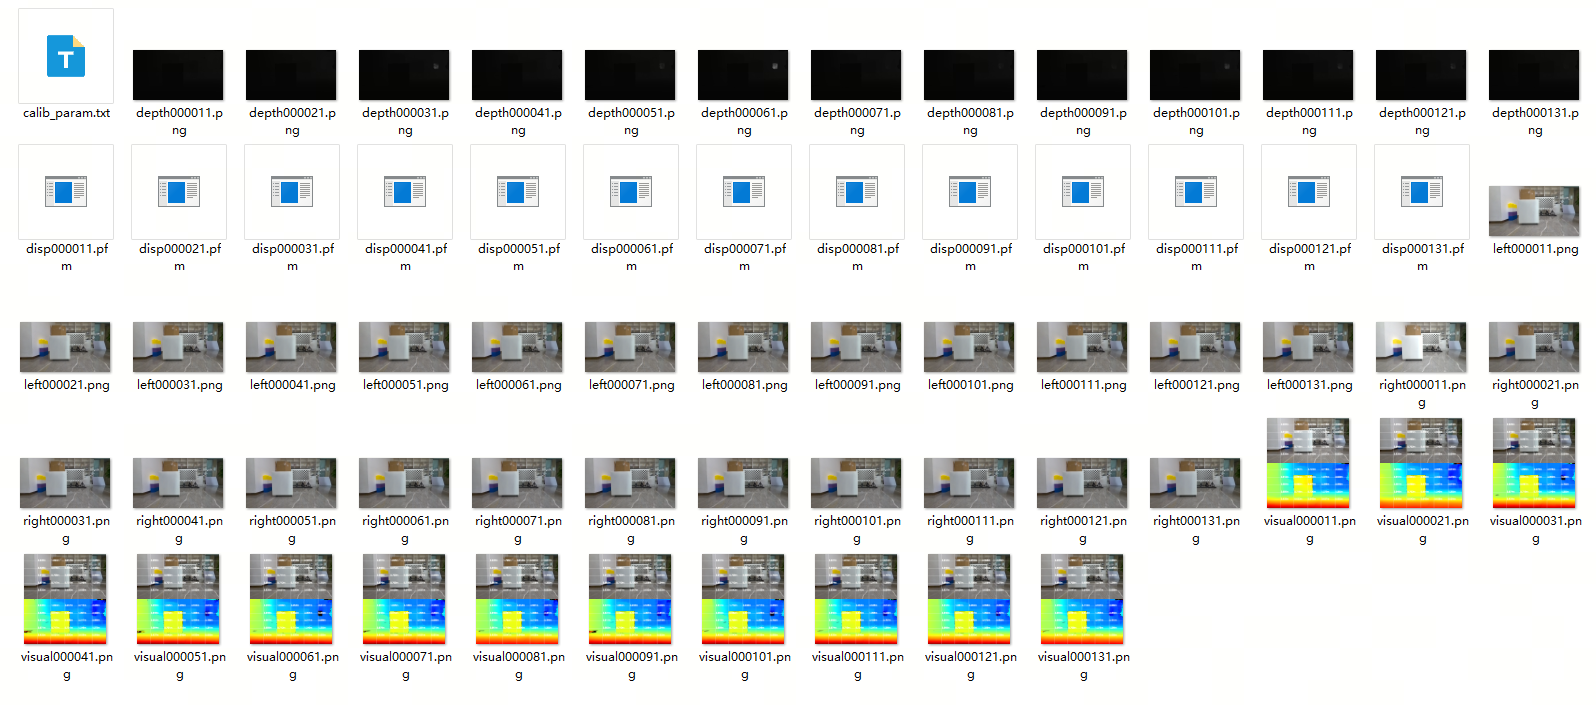
- If you want to evaluate the algorithm using local images, you can use the following command to specify the algorithm's running mode, image data path, and camera intrinsic parameters. Ensure that the image data has been undistorted and epipolar-aligned. The image format is shown below. The first left-eye image is named left000000.png, the second left-eye image is named left000001.png, and so on. The corresponding first right-eye image is named right000000.png, the second right-eye image is named right000001.png, and so on. The algorithm processes the images in sequence until all images are processed:

- To run the algorithm offline, connect to the RDK X5 via SSH and execute the following command:
- V2.0
- V2.2
- V2.3
# Configure the tros.b humble environment
source /opt/tros/humble/setup.bash

# Start the stereo model launch file. Note the camera parameter settings, which need to be manually input after rectification
ros2 launch hobot_stereonet stereonet_model_web_visual.launch.py \
stereonet_model_file_path:=/opt/tros/humble/share/hobot_stereonet/config/x5baseplus_alldata_woIsaac.bin postprocess:=v2 \
use_local_image:=True local_image_path:=./online_result \
need_rectify:=False camera_fx:=216.696533 camera_fy:=216.696533 camera_cx:=335.313477 camera_cy:=182.961578 base_line:=0.070943 \
height_min:=-10.0 height_max:=10.0 pc_max_depth:=5.0 \
save_image_all:=True save_dir:=./offline_result
# Configure the tros.b humble environment
source /opt/tros/humble/setup.bash

# Start the stereo model launch file. Note the camera parameter settings, which need to be manually input after rectification
ros2 launch hobot_stereonet stereonet_model_web_visual.launch.py \
stereonet_model_file_path:=/opt/tros/humble/share/hobot_stereonet/config/DStereoV2.2.bin postprocess:=v2.2 \
use_local_image:=True local_image_path:=./online_result \
need_rectify:=False camera_fx:=216.696533 camera_fy:=216.696533 camera_cx:=335.313477 camera_cy:=182.961578 base_line:=0.070943 \
height_min:=-10.0 height_max:=10.0 pc_max_depth:=5.0 \
save_image_all:=True save_dir:=./offline_result
# Configure the tros.b humble environment
source /opt/tros/humble/setup.bash

# Start the stereo model launch file. Note the camera parameter settings, which need to be manually input after rectification
ros2 launch hobot_stereonet stereonet_model_web_visual.launch.py \
stereonet_model_file_path:=/opt/tros/humble/share/hobot_stereonet/config/V22_disp96.bin postprocess:=v2.3 \
use_local_image:=True local_image_path:=./online_result \
need_rectify:=False camera_fx:=216.696533 camera_fy:=216.696533 camera_cx:=335.313477 camera_cy:=182.961578 base_line:=0.070943 \
height_min:=-10.0 height_max:=10.0 pc_max_depth:=5.0 \
save_image_all:=True save_dir:=./offline_result
Parameter explanations:
| Parameter Name | Parameter Value | Explanation |
|---|---|---|
| stereonet_model_file_path | Model file path for different stereo algorithm versions | Set according to the model version |
| postprocess | Post-processing method for different stereo algorithm versions | Set according to the model version |
| use_local_image | True | Enable image replay mode |
| local_image_path | Directory of offline data | Address directory of replay images |
| need_rectify | False | Replay images require epipolar rectification. This switch does not need to be enabled, but the rectified parameters must be manually input |
| camera_fx | Rectified intrinsic parameter fx of the camera | Camera intrinsic parameters |
| camera_fy | Rectified intrinsic parameter fy of the camera | Camera intrinsic parameters |
| camera_cx | Rectified intrinsic parameter cx of the camera | Camera intrinsic parameters |
| camera_cy | Rectified intrinsic parameter cy of the camera | Camera intrinsic parameters |
| base_line | Rectified baseline of the camera | Baseline distance in meters |
| height_min | -10.0 | The minimum height of the point cloud is -10.0m |
| height_max | 10.0 | The maximum height of the point cloud is 10.0m |
| pc_max_depth | 5.0 | The maximum depth of the point cloud is 5.0m |
| save_image_all | True | Save replay results |
| save_dir | Directory to save images | The directory to save the images. Can be set as needed. |
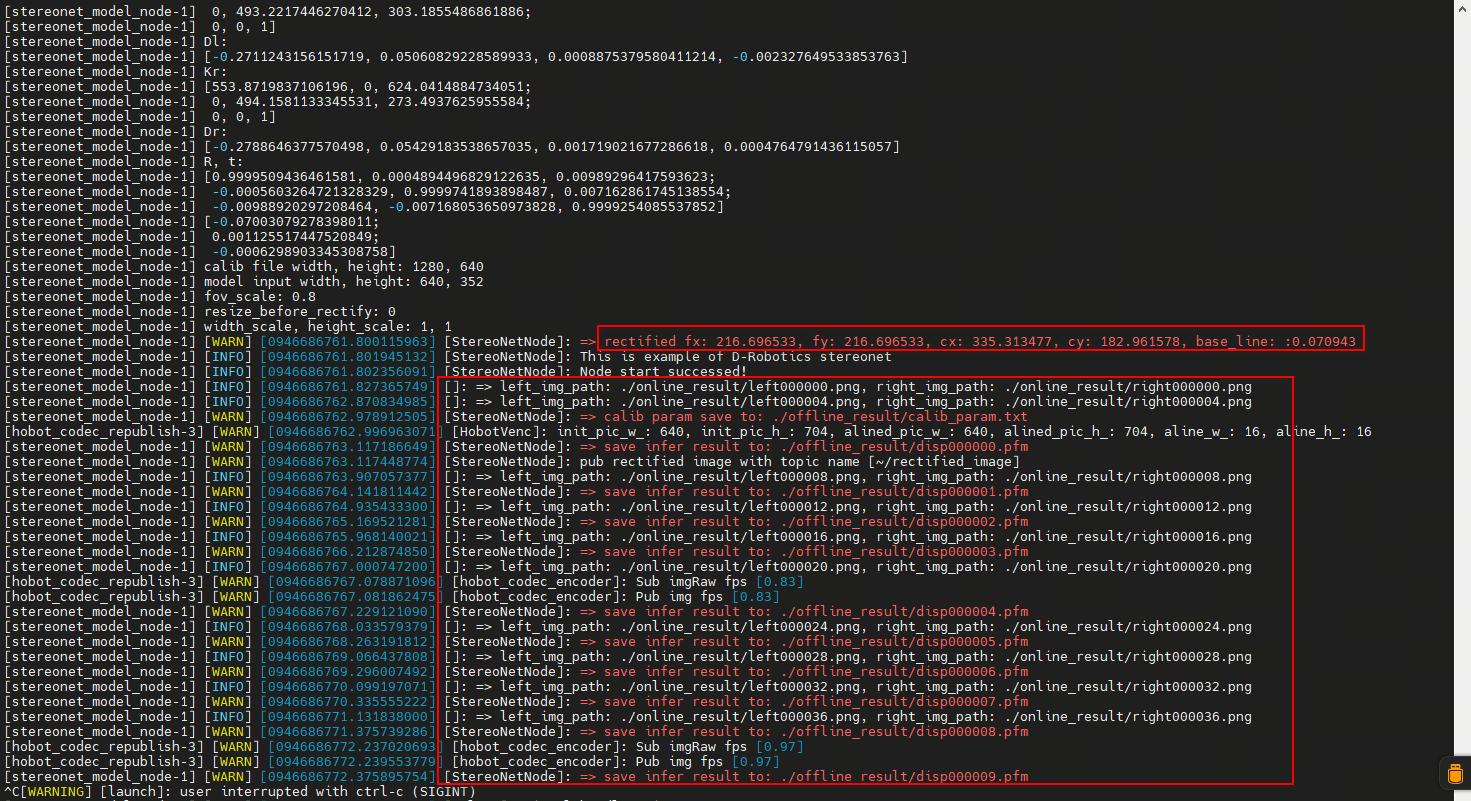
- After the algorithm runs successfully, you can also view the real-time rendered data on the web interface and in rviz2, as mentioned above. The offline run results will be saved in the
result subdirectory under the offline data directory. It will also save camera intrinsic parameters, left and right images, disparity map, depth map, and visualization image.
(3) Startup with ZED Stereo Camera
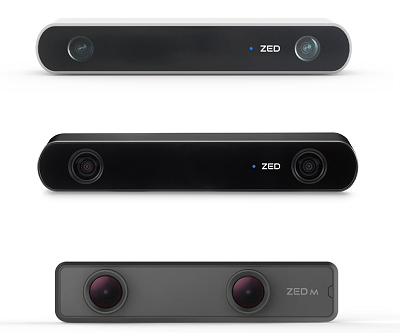
- The ZED stereo camera is shown below:
- Connect the ZED camera to the RDK X5 via USB, then start the stereo algorithm. Connect to the RDK X5 via SSH and execute the following command:
ping www.baidu.com
- V2.0
- V2.2
- V2.3
- S100
# Configure the tros.b humble environment
source /opt/tros/humble/setup.bash

# Start the stereo model launch file, which includes the algorithm and stereo camera node
ros2 launch hobot_zed_cam test_stereo_zed_rectify.launch.py \
resolution:=720p dst_width:=640 dst_height:=352 \
stereonet_model_file_path:=/opt/tros/humble/share/hobot_stereonet/config/x5baseplus_alldata_woIsaac.bin postprocess:=v2 \
height_min:=-10.0 height_max:=10.0 pc_max_depth:=5.0
# Configure the tros.b humble environment
source /opt/tros/humble/setup.bash

# Start the stereo model launch file, which includes the algorithm and stereo camera node
ros2 launch hobot_zed_cam test_stereo_zed_rectify.launch.py \
resolution:=720p dst_width:=640 dst_height:=352 \
stereonet_model_file_path:=/opt/tros/humble/share/hobot_stereonet/config/DStereoV2.2.bin postprocess:=v2.2 \
height_min:=-10.0 height_max:=10.0 pc_max_depth:=5.0
# Configure the tros.b humble environment
source /opt/tros/humble/setup.bash

# Start the stereo model launch file, which includes the algorithm and stereo camera node
ros2 launch hobot_zed_cam test_stereo_zed_rectify.launch.py \
resolution:=720p dst_width:=640 dst_height:=352 \
stereonet_model_file_path:=/opt/tros/humble/share/hobot_stereonet/config/V22_disp96.bin postprocess:=v2.3 \
height_min:=-10.0 height_max:=10.0 pc_max_depth:=5.0
# Configure the tros.b humble environment
source /opt/tros/humble/setup.bash

# Start the stereo model launch file, which includes the algorithm and stereo camera node
ros2 launch hobot_zed_cam test_stereo_zed_rectify.launch.py \
resolution:=720p dst_width:=640 dst_height:=352 \
stereonet_model_file_path:=/opt/tros/humble/share/hobot_stereonet/config/ds2.hbm postprocess:=v2 \
height_min:=-10.0 height_max:=10.0 pc_max_depth:=5.0
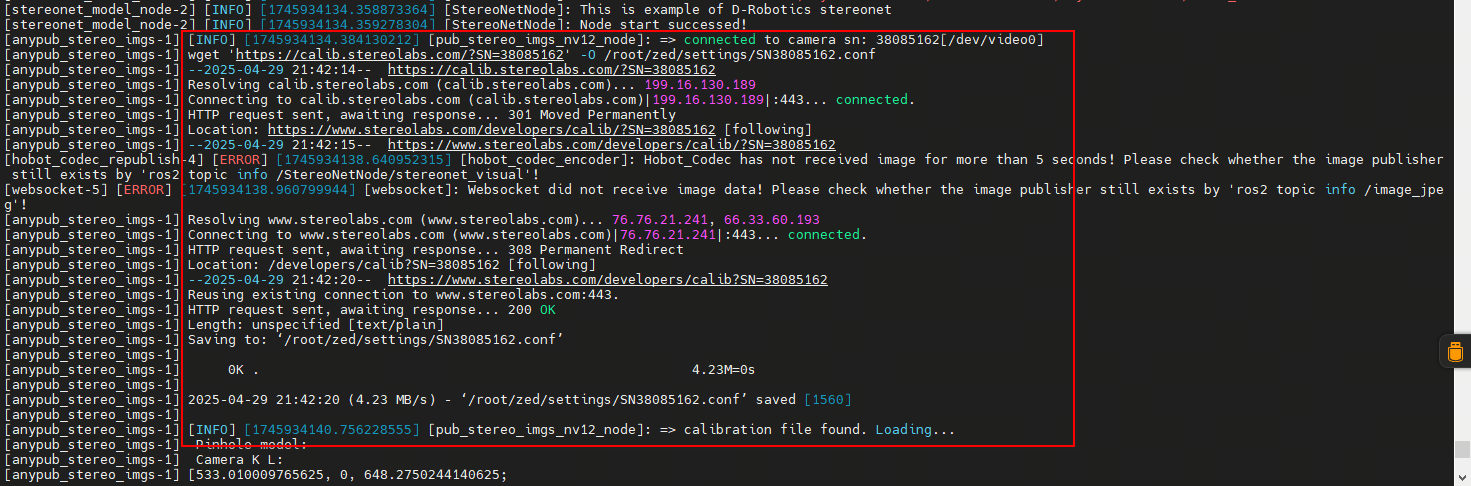
When connected to the internet, the program will automatically download the calibration files. If the RDK X5 is not connected to the internet, you can manually download the calibration files and upload them to the /root/zed/settings/ directory on the RDK X5.
- View the depth map on the web interface by entering http://ip:8000 in the browser. For more information on point cloud visualization and image saving, refer to the corresponding parameter settings above.
hobot_stereonet Package Description
Subscribed Topics
| Topic Name | Message Type | Explanation |
|---|---|---|
| /image_combine_raw | sensor_msgs::msg::Image | The topic for the left and right images combined by the stereo camera node, used for model inference |
| /camera_info_topic | sensor_msgs::msg::CameraInfo | The topic for the camera calibration parameters, used for model inference |
Published Topics
| Topic Name | Message Type | Explanation |
|---|---|---|
| /StereoNetNode/stereonet_depth | sensor_msgs::msg::Image | The published depth image, with pixel values representing depth in millimeters |
| /StereoNetNode/stereonet_visual | sensor_msgs::msg::Image | The published intuitive visualization image |
| /StereoNetNode/stereonet_pointcloud2 | sensor_msgs::msg::PointCloud2 | The published point cloud depth topic |
Other Important Parameters
| Parameter Name | Parameter Value | Explanation |
|---|---|---|
| stereo_image_topic | Default /image_combine_raw | The topic name for subscribing to stereo image messages |
| camera_info_topic | Default /image_right_raw/camera_info | The topic name for subscribing to camera calibration parameter messages |
| need_rectify | Default True | Whether to specify a custom calibration file for image rectification |
| stereo_calib_file_path | Default stereo.yaml | The path to the calibration file loaded when need_rectify=True for calibration |
| stereo_combine_mode | Default 1 | Left and right images are often combined into one image before publishing. 1 indicates vertical combination, 0 indicates horizontal combination, indicating how the stereo algorithm splits the image |
| KMean | Default 10 | The number of neighboring points for filtering sparse outliers, counting the distance between each point and its 10 nearest points |
| stdv | Default 0.01 | The threshold for filtering sparse outliers, setting the multiple of standard deviation to 0.01 |
| leaf_size | Default 0.05 | Sets the unit density of the point cloud, indicating that there is only one point within a 3D sphere of radius 0.05 meters |
Notes
- The input size of the model is 640 in width and 352 in height. The resolution of the images published by the camera should be 640x352.
- If the image format published by the stereo camera is NV12, the stereo images must be combined vertically.