3.7 System Flashing
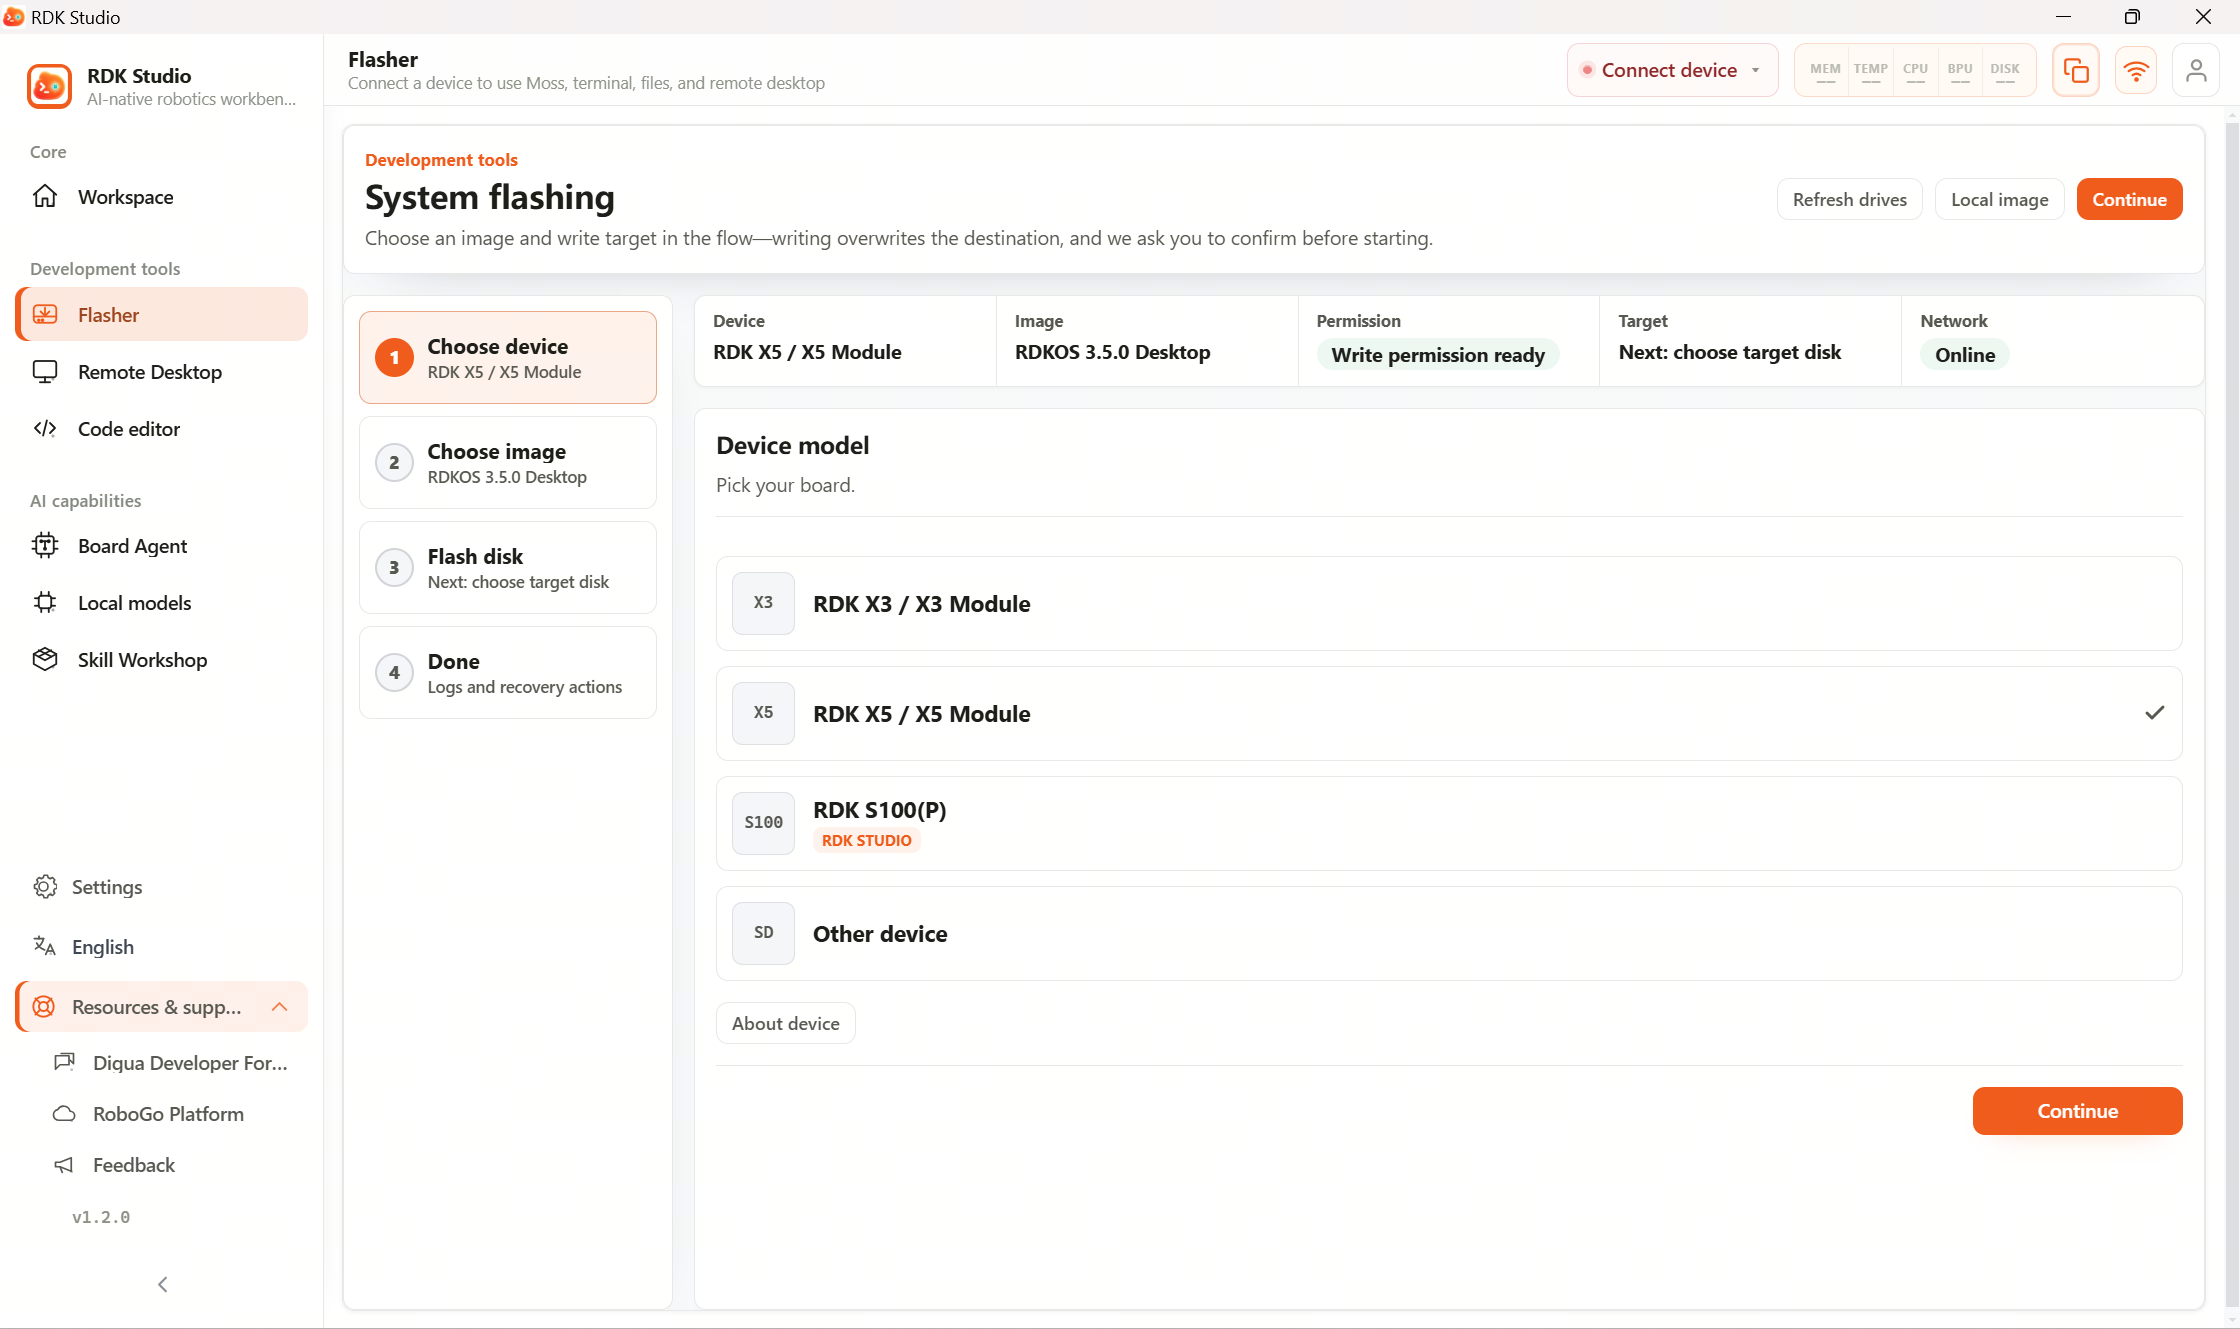
The Flashing page is used to install or reinstall the system on your board. Follow the prompts to select the board type, choose an image, pick the write target, then wait until it finishes.
2.2 Flash system image covers the fastest path to get started. The sections below go into detail by device and storage type.
Suggested order
| Step | What to do |
|---|---|
| 1 | Confirm the board type you are flashing |
| 2 | Choose the officially recommended image, or upload an image provided by your team |
| 3 | Select the write target—double‑check it is not your PC’s system disk |
| 4 | After starting the flash, wait until it completes—do not unplug cables or let the PC sleep |
| 5 | When flashing is done, boot the device and connect it to RDK Studio |
Common choices are straightforward: RDK X3 / X5 usually start with TF‑card flashing; RDK X5 boards with eMMC can use eMMC flashing; RDK S100 uses the dedicated xburn tool.
Read next
- 3.7.2 TF card flashing: common way to install the system on RDK X3 and RDK X5
- 3.7.3 eMMC flashing: flashing and backup/restore for RDK X5 with eMMC
- 3.7.4 S100 flashing: dedicated flashing flow for RDK S100