1.9.7.1 Install and Configure OpenClaw
This section describes how to use RDK Studio to quickly install and configure OpenClaw on RDK X5/RDK S100.
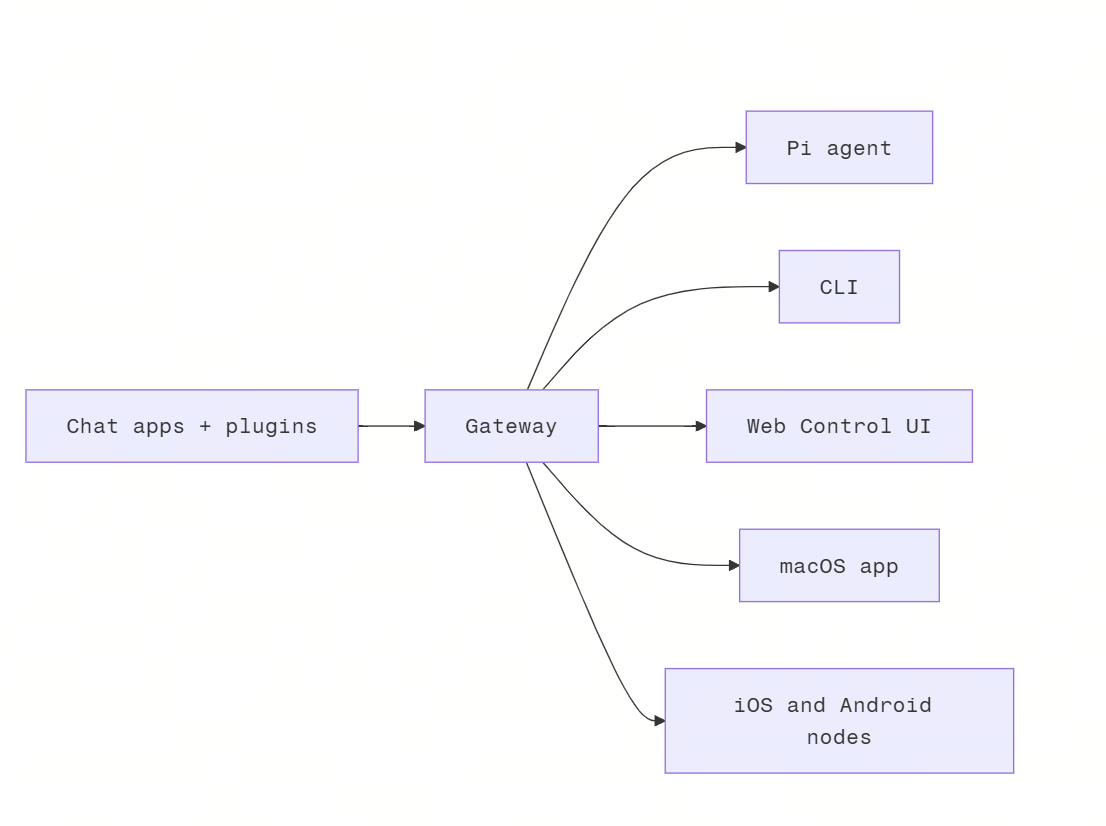
OpenClaw is an open-source, self-hostable AI execution engine that understands natural language instructions and automatically performs real-world actions. By configuring communication tools such as Feishu or QQ, it can become your 24/7 personal digital assistant.
Its technical architecture is as follows:
Install OpenClaw Using RDK Studio
Install RDK Studio and Add Device
Before installing OpenClaw, ensure that RDK Studio is installed and the device is connected.
- For RDK Studio download and installation steps, refer to RDK Studio Download and Installation.
- For adding a device using RDK Studio, refer to RDK Studio Add Device.
Install OpenClaw
-
Enter the RDK Studio page and click the
OpenClawicon on the left to access the configuration page.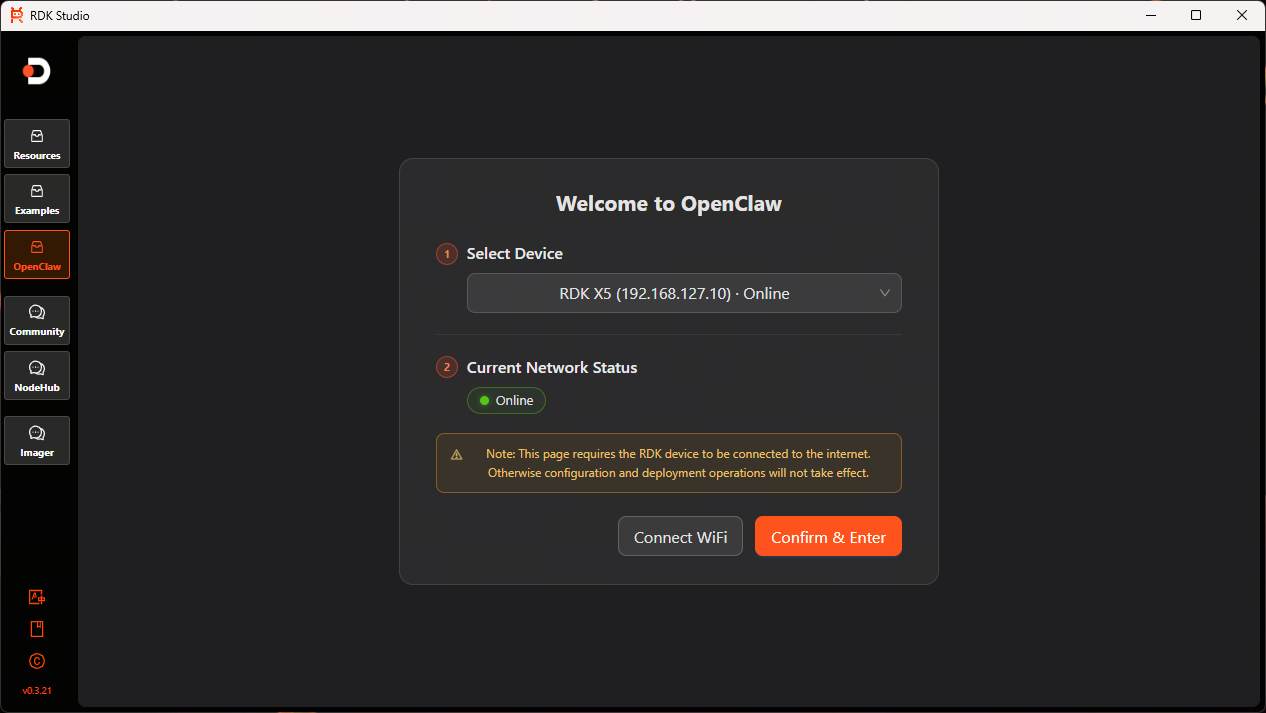
-
Ensure the current device is connected to the internet. If not, click the
Connect WiFibutton to go to the WiFi connection page.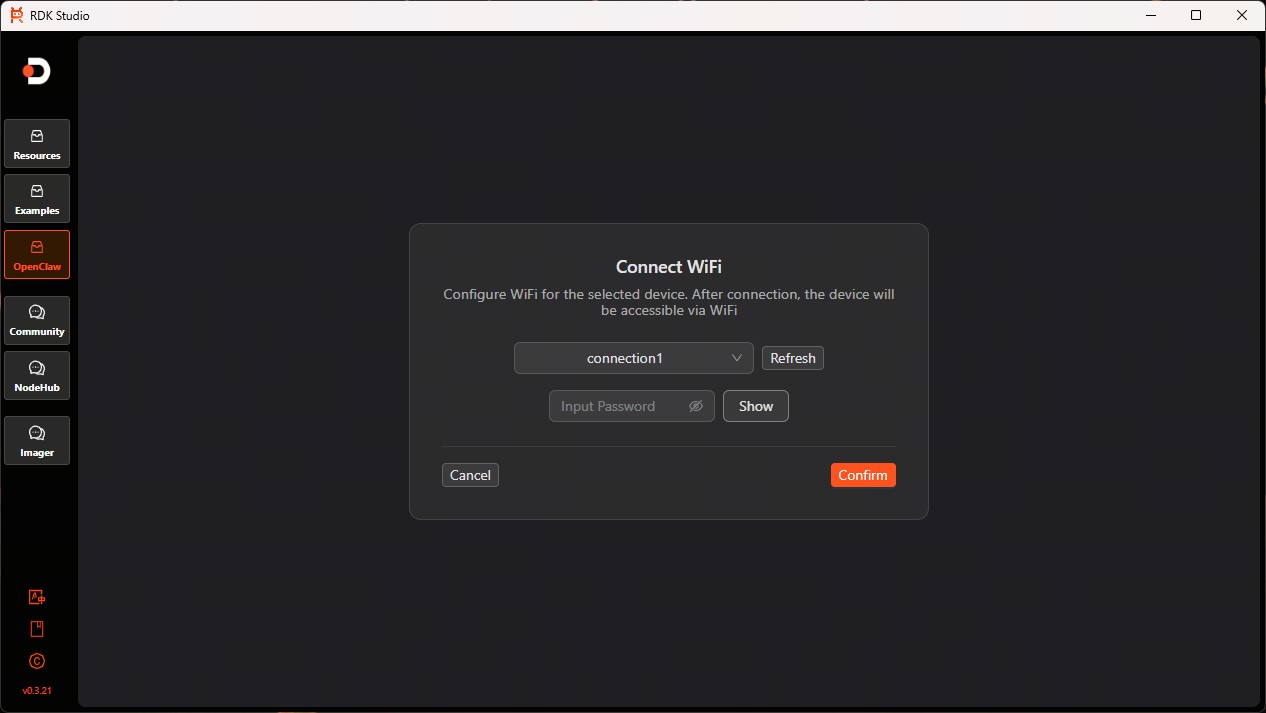
-
After connecting to WiFi, click the
Confirmbutton to enter the first-time installation wizard page for model configuration. Register on the model provider platform and obtain the model API base URL and API Key. This document uses Alibaba's coding plan as an example, with the configuration shown in the figure below.
-
Click the
Execute Installbutton and wait for the installation to complete. You can also clickView Install Log; the installation status will be displayed in the terminal. If issues occur during installation, repair instructions will be provided. Copy and execute the instructions in the terminal to continue the installation process.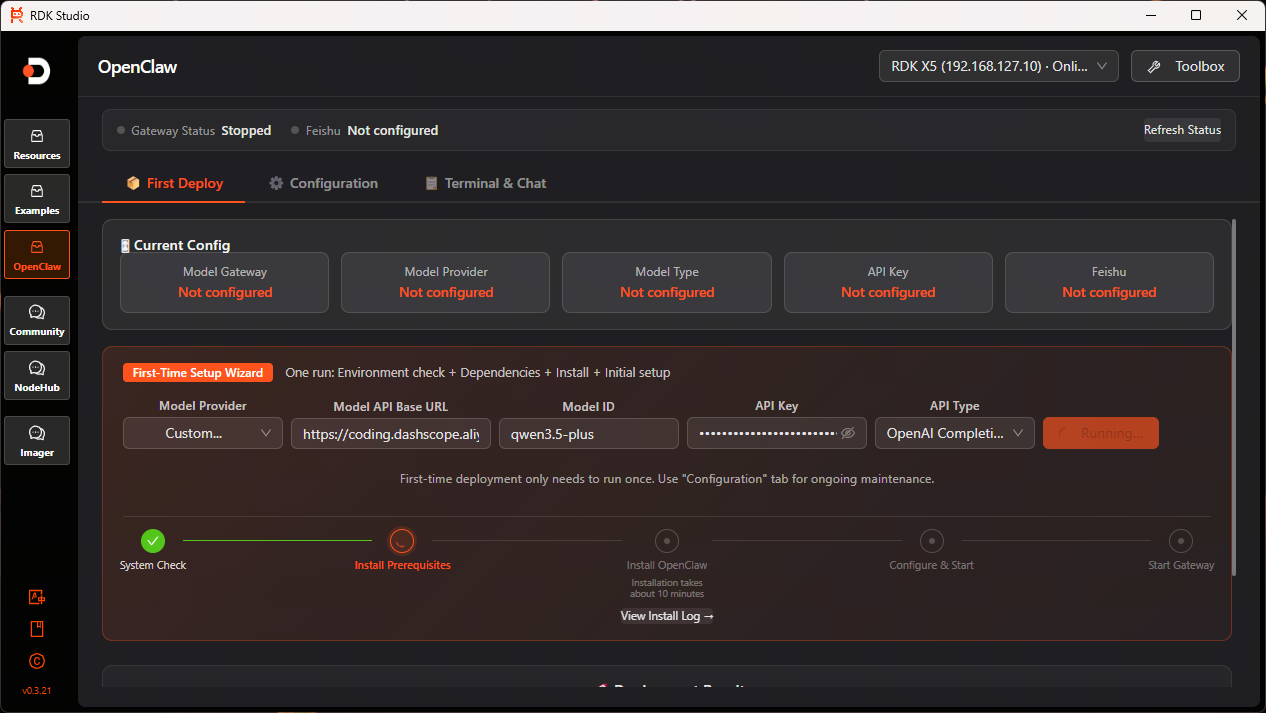
-
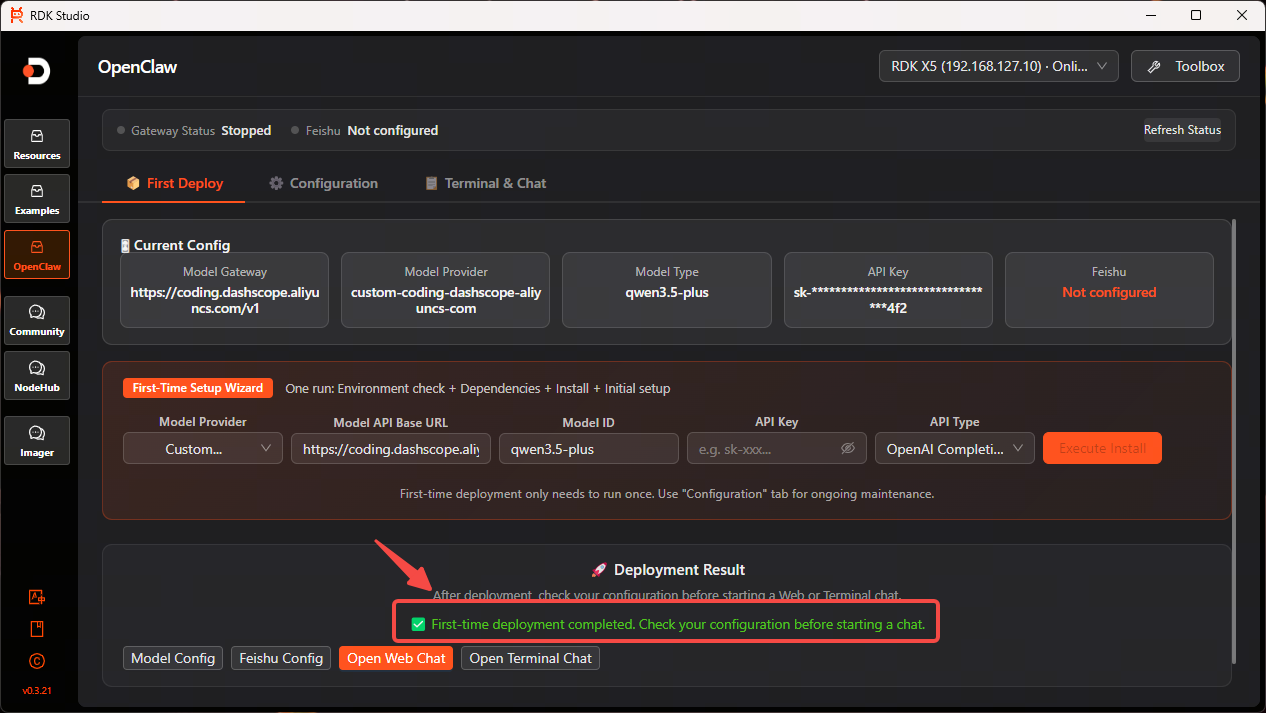
Verify the installation:
-
After installation, the quick actions area will indicate that the first-time deployment is complete.
-
The gateway status will show
Running. If the gateway status does not appear, click theRefresh Statusbutton to the right of the gateway, or clickRestartunder theRestart Gatewayoption in the toolbox at the top right corner.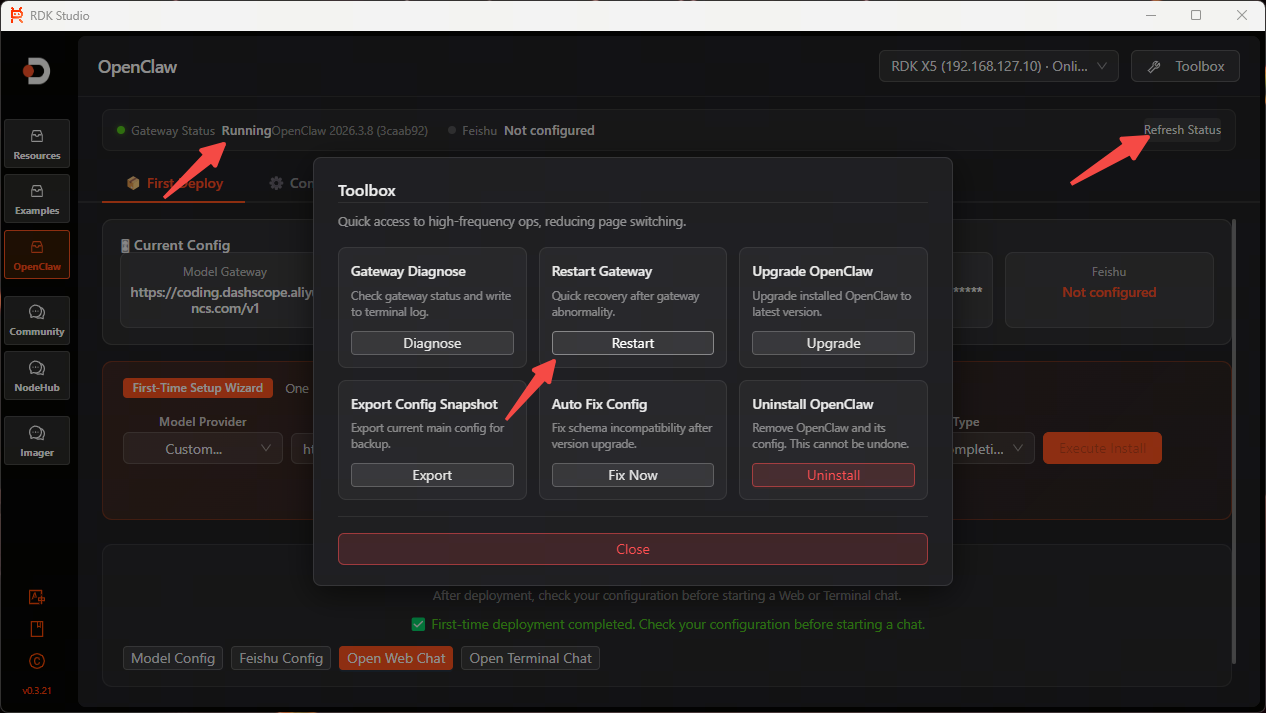
-
Verify OpenClaw Installation
-
After installation, click
Open Web Chatin the quick actions area to enter the graphical conversation interface.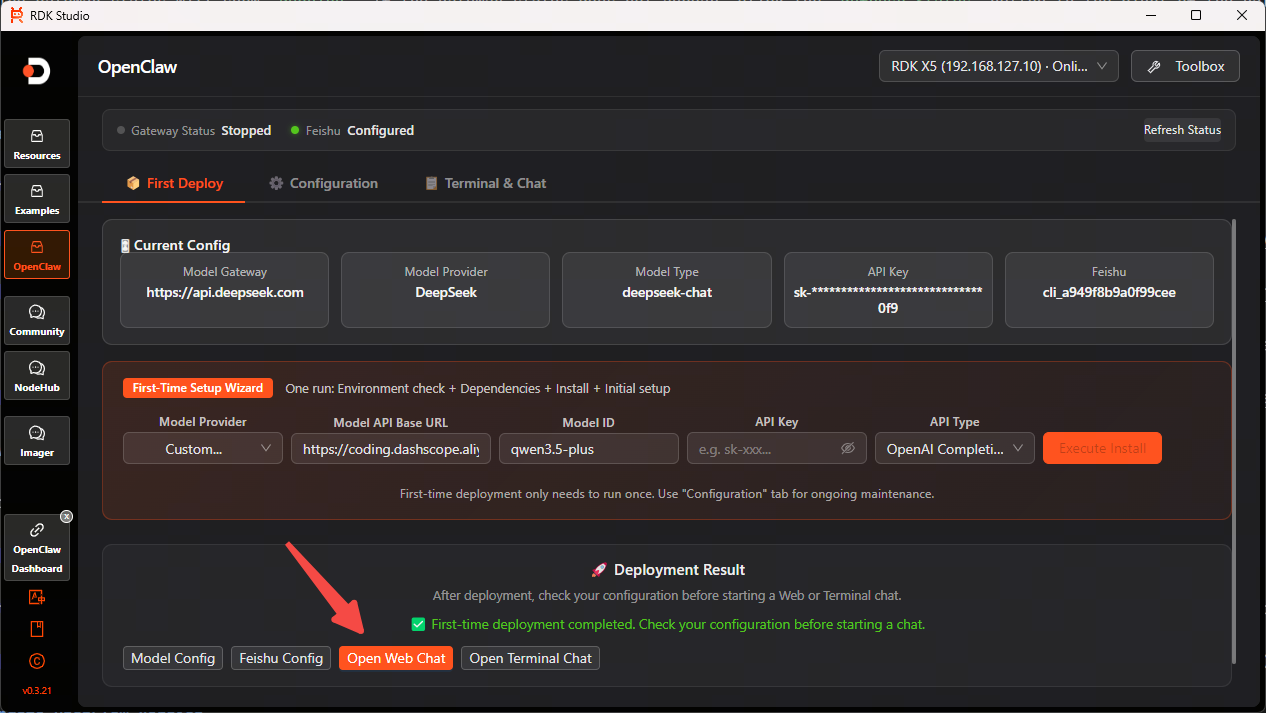

-
If you need multi-window conversations, click
Open Terminal Chatin the quick actions area to open a new terminal window. In the terminal window, you can selectTerminalorChat.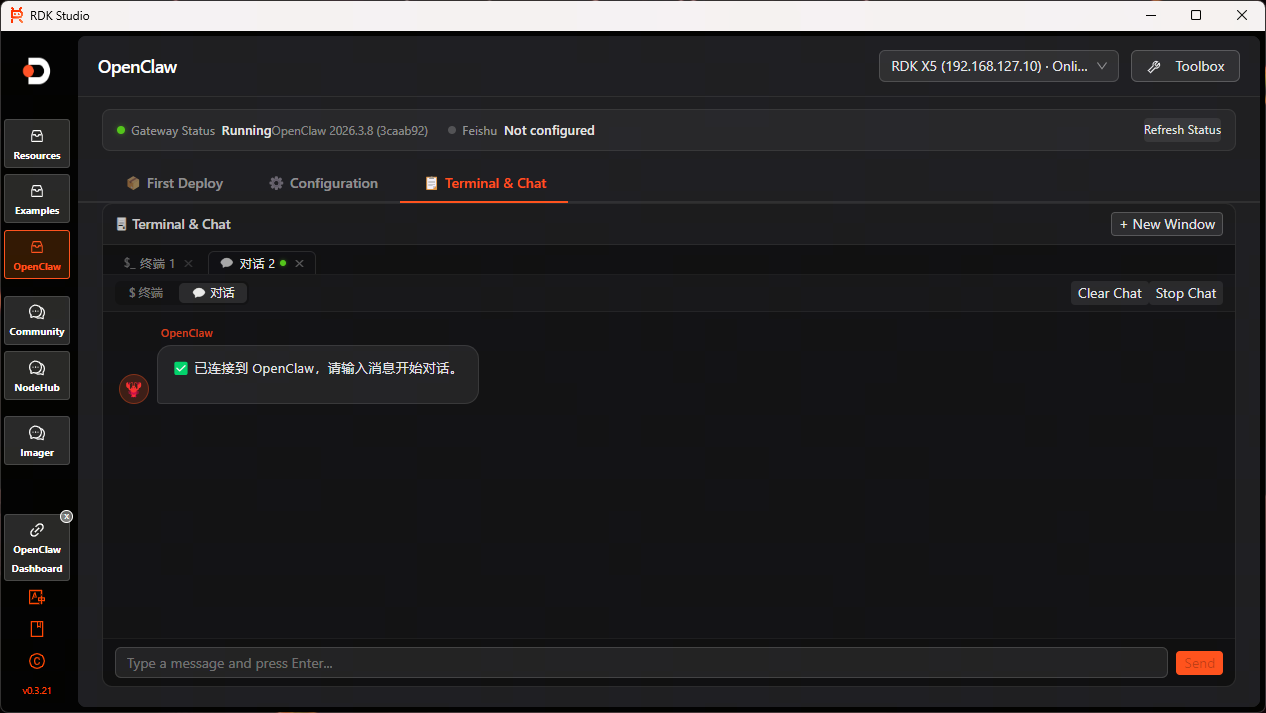
Switch Models
-
Click
Model Configin the quick actions area, then click+ Add Providerto configure the model provider and model information.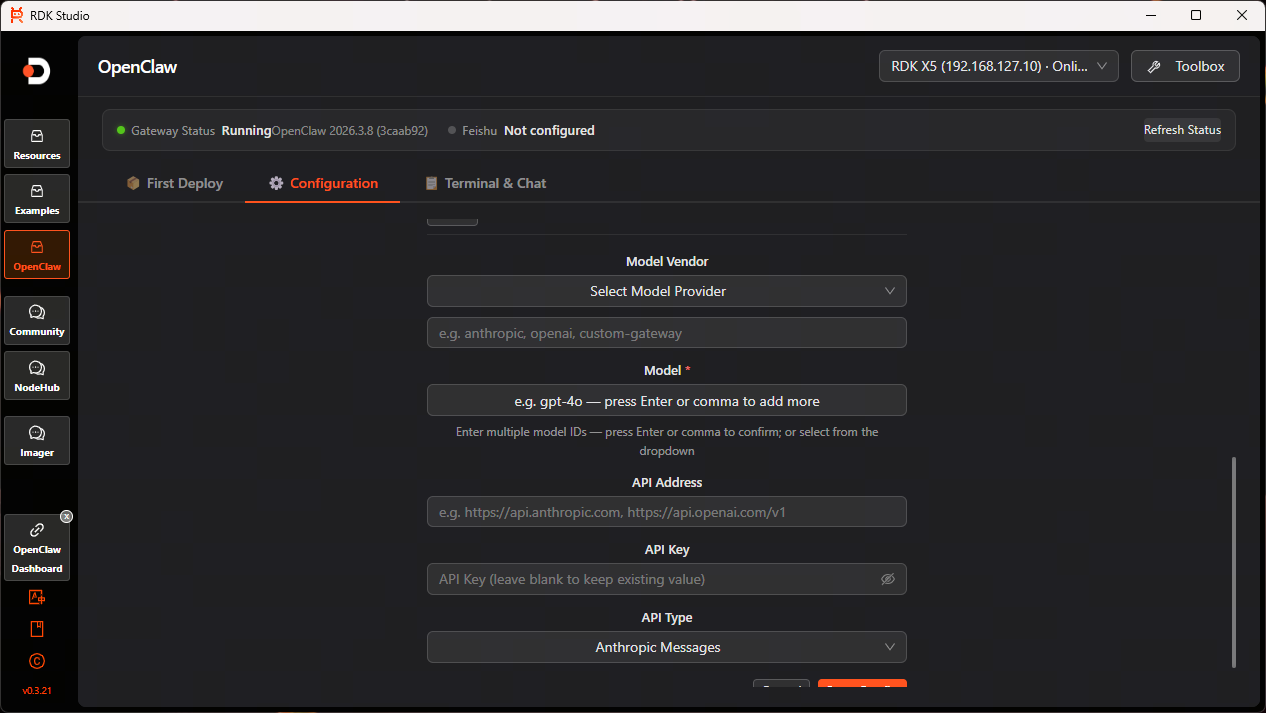
-
After configuration, select the target model you wish to switch to from the model list and click
Set Primaryto complete the switch.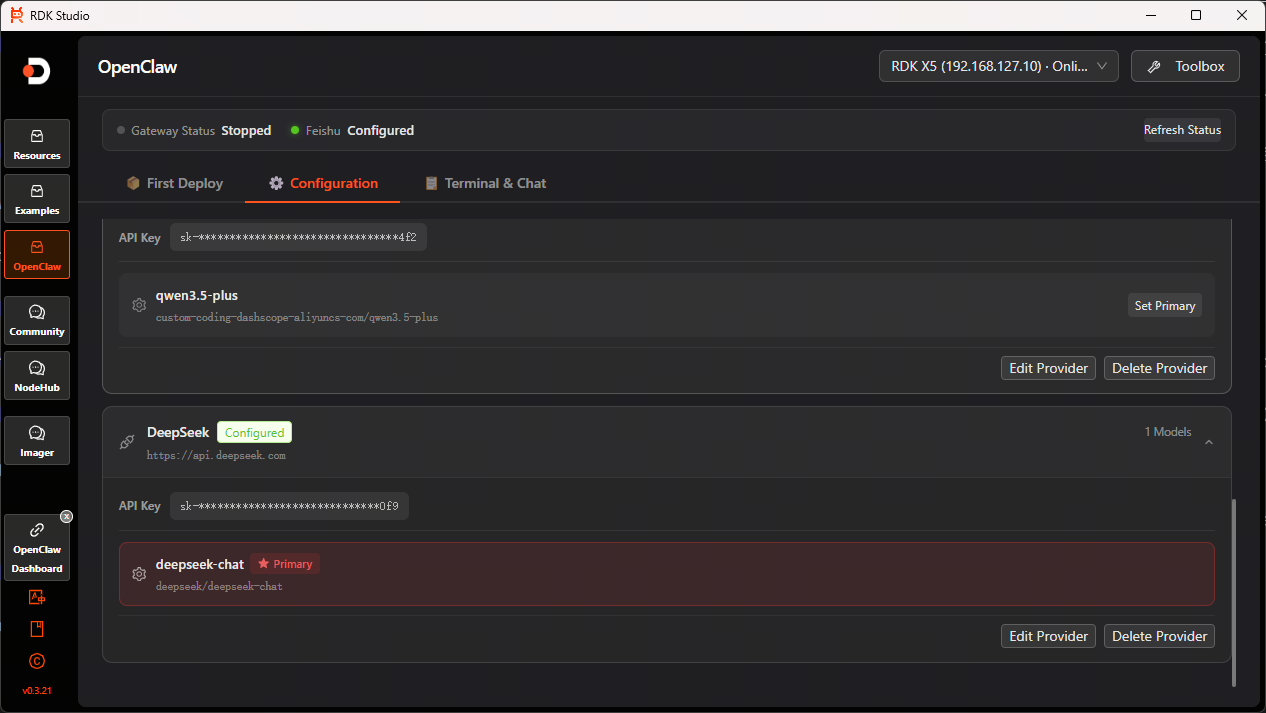
Update OpenClaw Version
Click the Toolbox in the top right corner, then click the Upgrade button under the Upgrade OpenClaw option to update OpenClaw to the latest version.
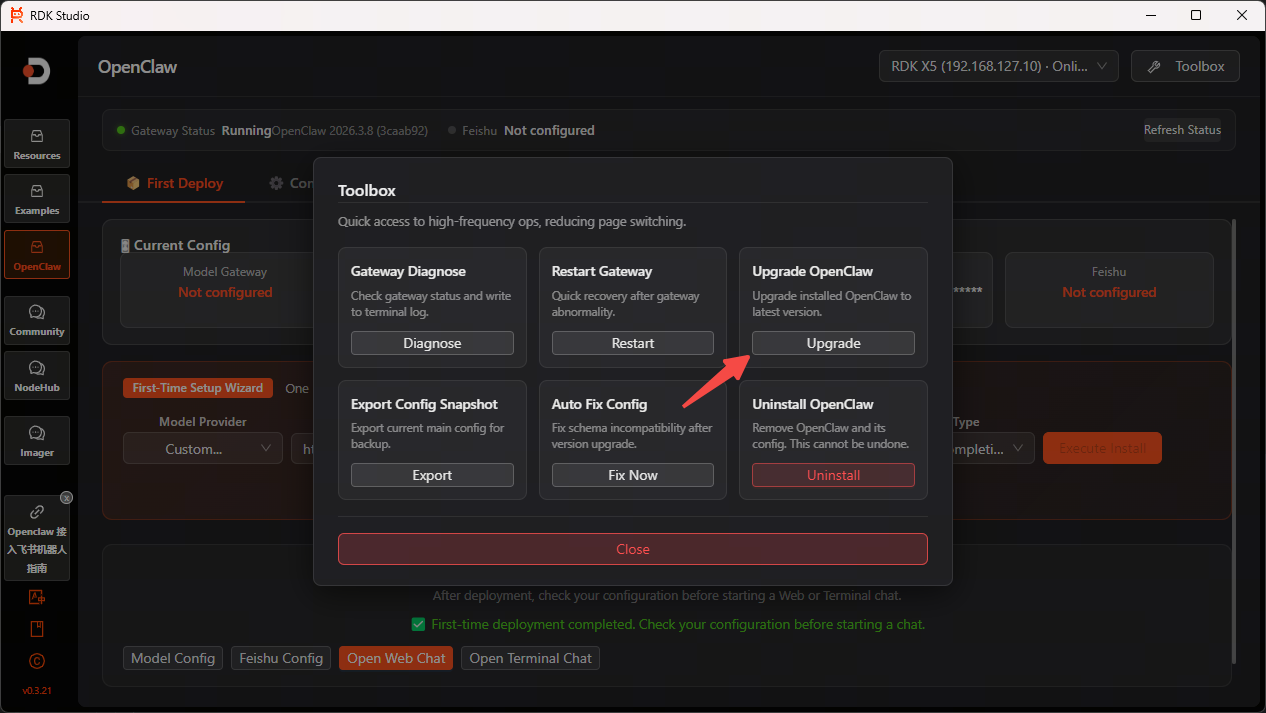
Uninstall OpenClaw
Click the Toolbox in the top right corner, then click the Uninstall button under the Uninstall OpenClaw option to uninstall OpenClaw.
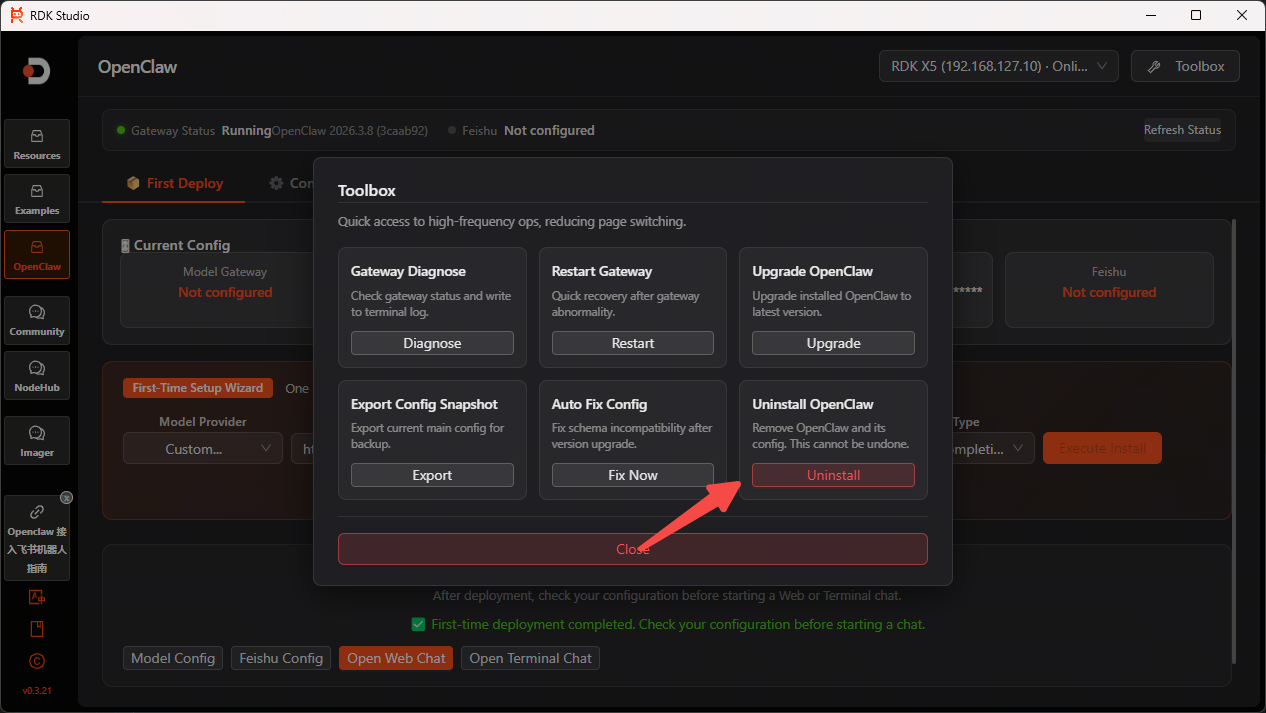
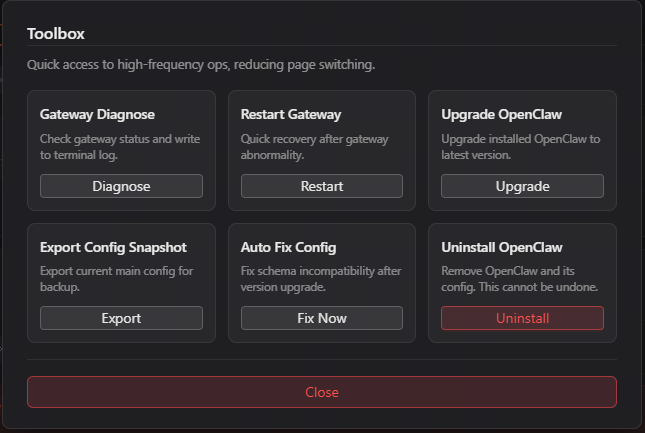
Toolbox
Quick access to high-frequency ops, reducing page switching.
-
Gateway Diagnosis: Check gateway status and write to terminal log.
-
Restart Gateway: Quick recovery after gateway abnormality.
-
Upgrade OpenClaw: Upgrade installed OpenClaw to latest version.
-
Export Configuration Snapshot: Export current main config for backup.
-
Auto Fix Configuration: Fix schema incompatibility after version upgrade.
-
Uninstall OpenClaw: Remove OpenClaw and its config. This cannot be undone.