1.3 Getting Started Configuration
The getting started configuration methods described in this chapter are only supported on RDK X3 and RDK X3 Module models.
The system version should be no lower than 2.1.0.
Please complete system installation before configuration. For system image downloads, refer to: Download Resources Summary
Connecting to Wi-Fi
- Desktop
- Server
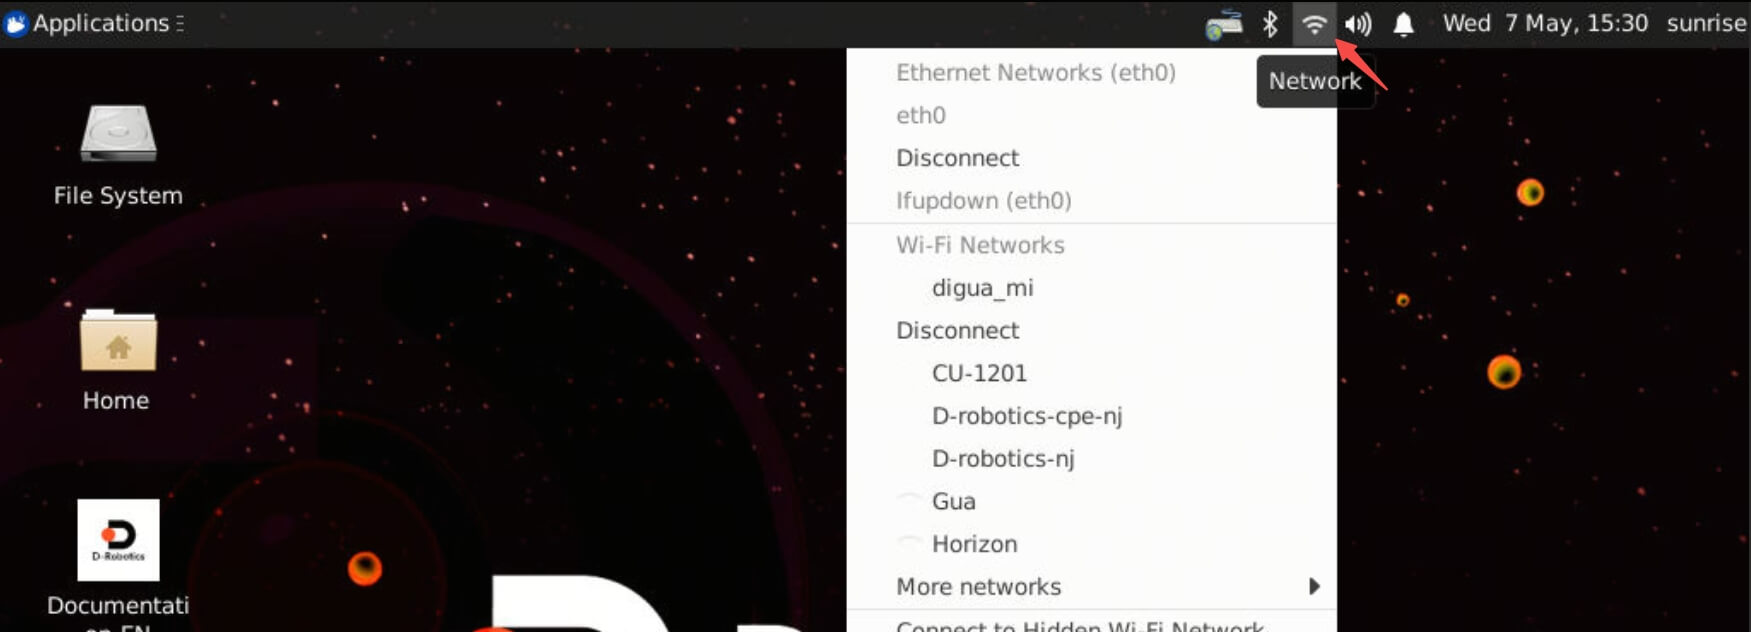
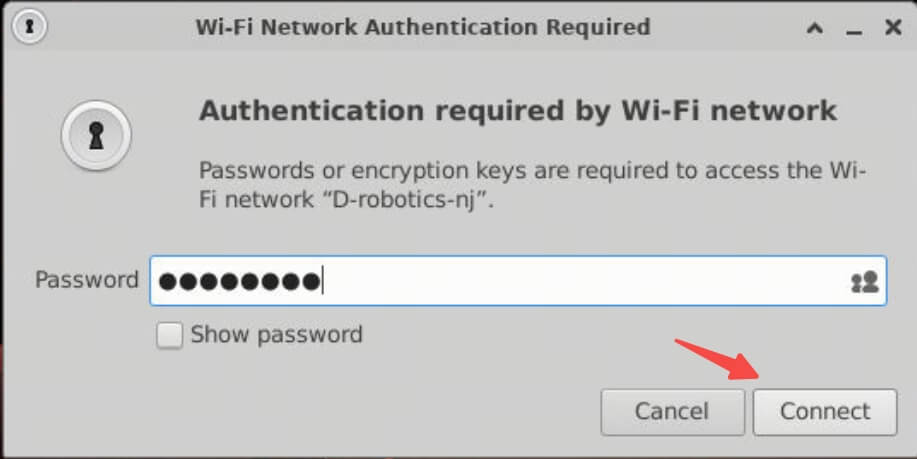
Use the Wi-Fi management tool in the top-right corner of the menu bar to connect to Wi-Fi. As shown in the following figure, click on the Wi-Fi name you need to connect to, and then enter the Wi-Fi password in the pop-up dialog box.
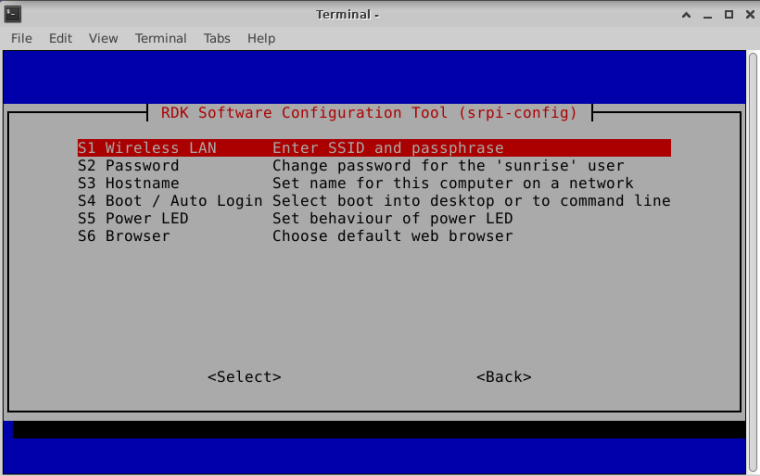
Use the srpi-config tool to connect to Wi-Fi.
Execute the command sudo srpi-config, select System Options -> Wireless LAN, and enter the Wi-Fi name (SSID) and password (passwd) as prompted.
Enabling SSH Service
The SSH login service is enabled by default in the current system version. Users can use this method to toggle the service.
- Desktop
- Server
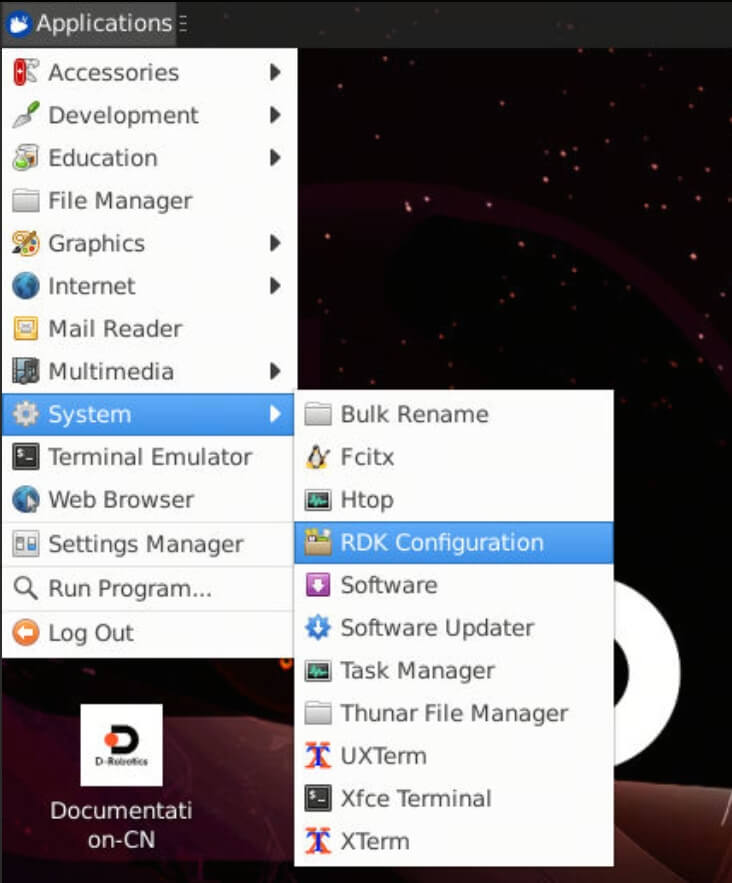
Find the RDK Configuration option through the menu bar and click to open it.
Select Interface Options -> SSH, and follow the prompts to enable or disable the SSH service.
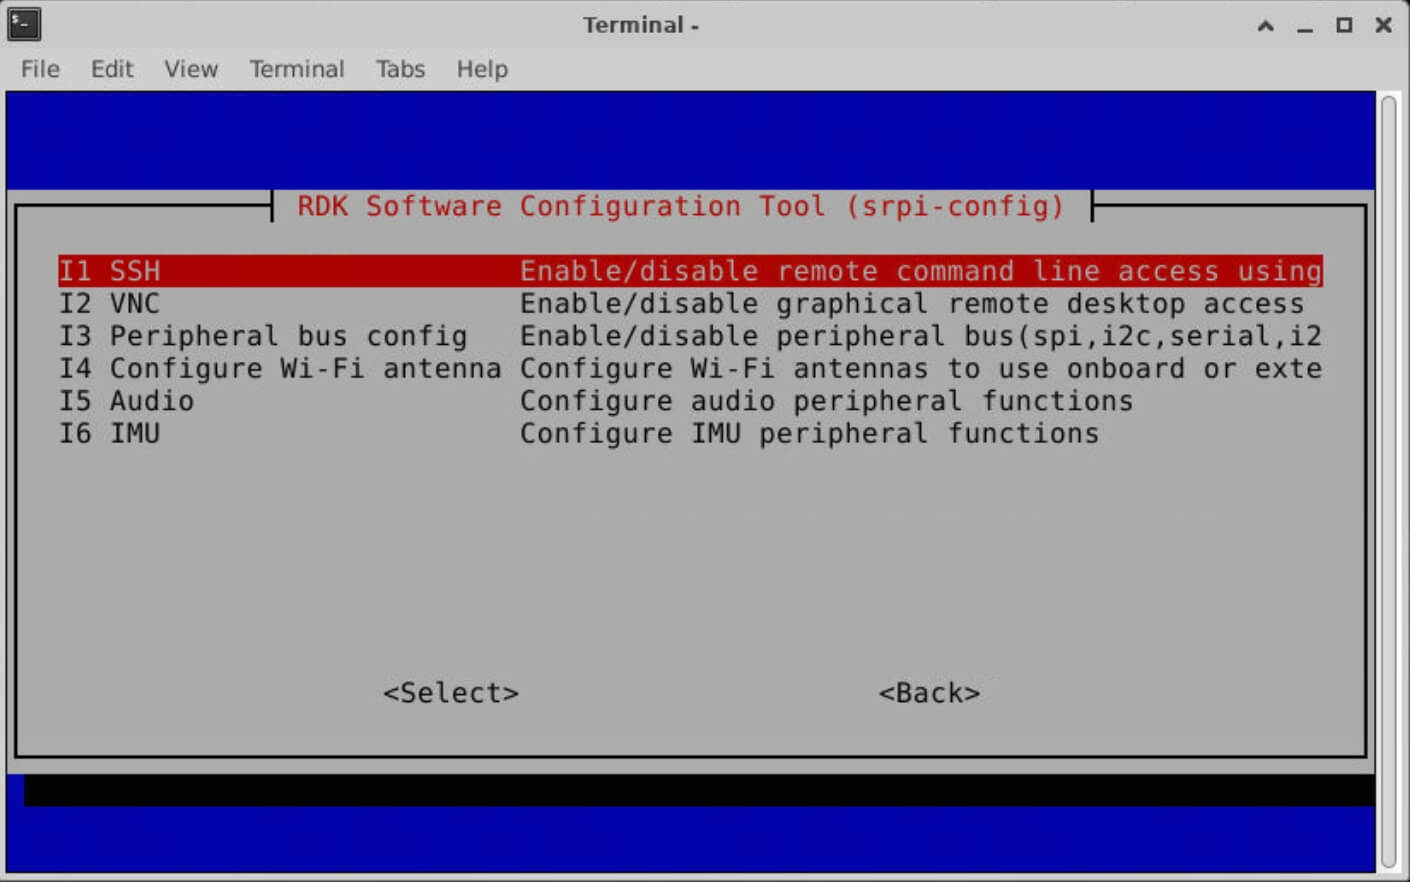
Execute the sudo srpi-config command to enter the configuration menu. Select Interface Options -> SSH, and follow the prompts to enable or disable the SSH service.
Please refer to Remote Login - SSH Login for how to use SSH.
Enable VNC Service
The VNC service is only available on the Desktop software.
- Desktop
Find the RDK Configuration option through the menu bar and click to open it.
Select Interface Options -> VNC, and follow the prompts to enable or disable the VNC service. When enabling VNC, you need to set a login password, which must be an 8-character string composed of numbers and characters.

Please refer to Remote Login - VNC Login for how to use VNC.
Set Login Mode
- Desktop
- Server
The desktop graphical system supports four login modes:
- Start the graphical interface and automatically log in.
- Start the graphical interface and require manual login by the user.
- Character terminal, automatically log in.
- Character Terminal, User Manual Login
The X5 series boards currently do not support Character terminal.
Open RDK Configuration through the menu bar. Select System Options -> Boot / Auto Login to enter the following configuration options. Select the corresponding options according to your needs.
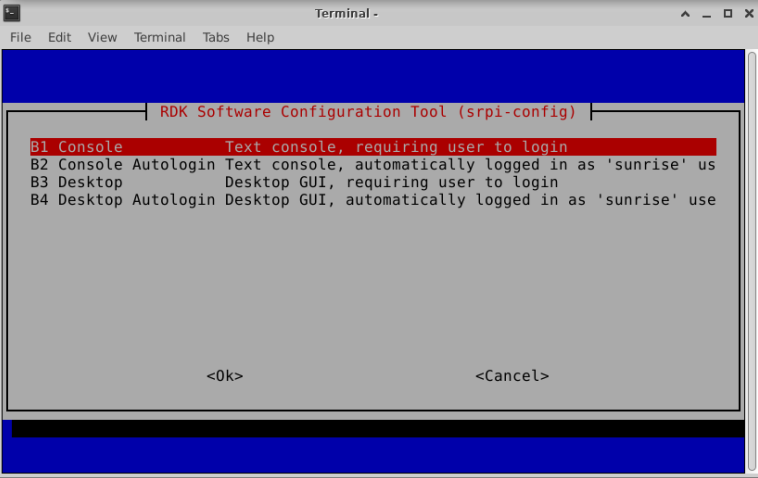
It will take effect after restarting.
The server system supports two login modes:
- Character Terminal, Automatic Login
- Character Terminal, User Manual Login
Execute the command sudo srpi-config to enter the configuration menu. Select System Options -> Boot / Auto Login to enter the following configuration options. Select the corresponding options according to your needs.
It will take effect after restarting.
Set up Chinese Environment (Optional)
- Desktop
- Server
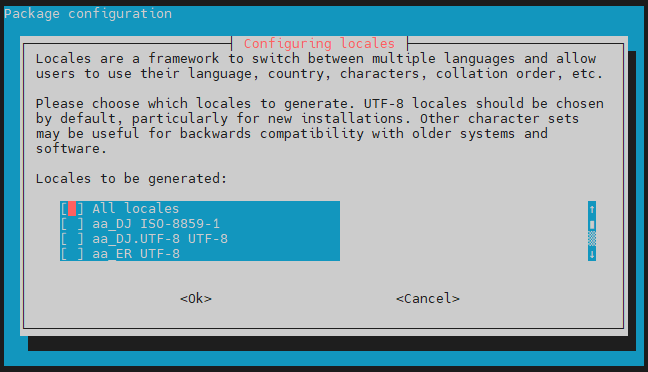
Open RDK Configuration through the menu bar. Select Localisation Options -> Locale to enter the following configuration.
Step 1: Select the language environment(s) you need (multiple choice). Generally, you should choose en_US.UTF-8 UTF-8 and zh_CN.UTF-8 UTF-8. Press Enter to confirm and proceed to the next step.
Step 2: Select the default language environment. Choose zh_CN.UTF-8 UTF-8 for Chinese environment. Press Enter and wait for a while to complete the configuration.
Step 3: Restart the machine to apply the latest configuration using sudo reboot.
After booting, you will be prompted whether to update the names of several commonly used folders in the home directory.
It is recommended to choose Don't ask me again Keep Old Name, so that the directory names such as Desktop Documents Downloads under the user's working directory will not change with the language environment.
To enter the configuration menu, execute the command sudo srpi-config. Select the option "Localisation Options -> Locale" to enter the following configuration.
Step 1: Select the desired language environment(s) (multiple selection). Usually, selecting both en_US.UTF-8 UTF-8 and zh_CN.UTF-8 UTF-8 is sufficient. Press Enter to confirm and proceed to the next step.
Step 2: Select the default language environment. For the Chinese language environment, select zh_CN.UTF-8 UTF-8. Press Enter to confirm and wait for the configuration to complete.
Step 3: Restart the machine to apply the latest configuration. Execute sudo reboot.
Set up Chinese input method (Optional)
- Desktop
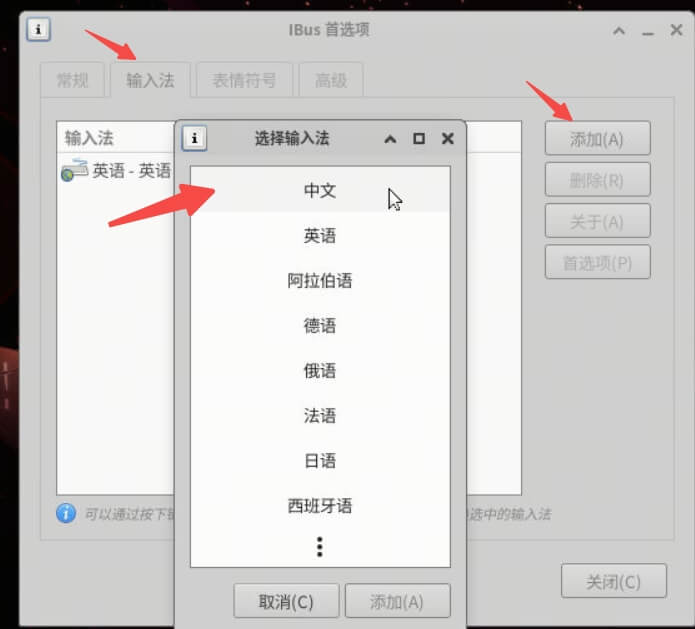
First step: Locate the EN input method icon on the desktop, right-click and select Preferences.
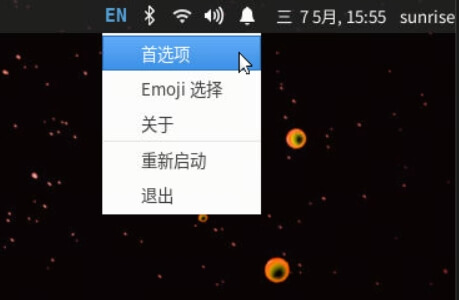
Step two: Click on 'Input Sources' -> 'Add on the right' -> Select 'Chinese'.
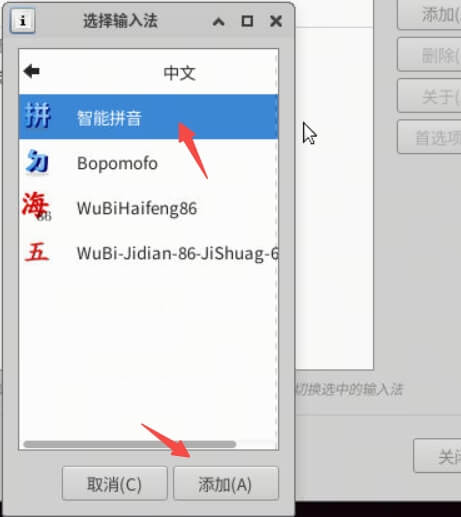
Step three: Select "Intelligent Pinyin" and then you can right-click on the EN in the top right corner to choose "Intelligent Pinyin".
User Management
Modify Username
Taking the new username as usertest as an example:
# Terminate all processes of the sunrise user
sudo pkill -u sunrise
# Rename the sunrise user to usertest
sudo usermod -l usertest sunrise
# Change the user's home directory to /home/usertest
sudo usermod -d /home/usertest -m usertest
# Change the user password
sudo passwd usertest
Finally, modify autologin-user=sunrise to autologin-user=usertest in the file /etc/lightdm/lightdm.conf.d/22-hobot-autologin.conf to update the auto-login username.
Add a New User
Taking adding a new user usertest as an example:
sudo useradd -U -m -d /home/usertest -k /etc/skel/ -s /bin/bash -G disk,kmem,dialout,sudo,audio,video,render,i2c,lightdm,vpu,gdm,weston-launch,graphics,jpu,ipu,vps,misc,gpio usertest
sudo passwd usertest
sudo cp -aRf /etc/skel/. /home/usertest
sudo chown -R usertest:usertest /home/usertest
You can also refer to the steps for modifying the username to set the new user as the auto-login user.