1.2.5 RDK Ultra
Important: The RDK Ultra is available for sale only in Mainland China.
Preparation for Flashing
Power Supply
The RDK Ultra development board is powered via a DC interface. It is recommended to use the power adapter included in the official kit, or use a power adapter with at least 12V/5A output.
Do not use a computer USB port to power the board, as insufficient power supply may cause unexpected shutdowns or repeated reboots.
For more troubleshooting, refer to the FAQ section.
Storage
The RDK Ultra comes with 64GB onboard eMMC storage, so no additional storage card is required.
Display
The RDK Ultra supports HDMI display output. Connect the board to a monitor using an HDMI cable for graphical desktop display.
Network Connection
The RDK Ultra supports both Ethernet and Wi-Fi. You can use either interface to connect to the network.
System Flashing
RDK Ultra currently provides an Ubuntu 20.04 system image, supporting Desktop graphical interaction.
RDK Ultra comes with a pre-installed test version of the system image. To ensure you are using the latest version, it is recommended to follow this document to flash the latest system image.
Image Download
Click Download Image, select the rdk_ultra directory, choose the appropriate version, and enter the file download page. For example, to download version 1.0.0:

After downloading, extract the Ubuntu system image file, such as ubuntu-preinstalled-desktop-arm64-rdkultra.img.
- desktop: Ubuntu system with desktop environment, supports external monitor and mouse operation
- server: Ubuntu system without desktop, can be accessed via serial port or remote network connection
System Flashing
To flash Ubuntu on the RDK Ultra development kit, use the D-Robotics hbupdate flashing tool. The tool is available for both Windows and Linux, named hbupdate_win64 and hbupdate_linux respectively. Download link: hbupdate.
- Extract the tool package. Ensure the extraction path does not contain spaces, Chinese characters, or special characters.
- The tool communicates with RDK Ultra via Ethernet. For optimal flashing speed, ensure your PC supports gigabit Ethernet and is directly connected.
- Configure your PC network to static IP as follows:
- IP: 192.168.1.195
- netmask: 255.255.255.0
- gateway: 192.168.1.1
-
Connect the RDK Ultra and PC directly using an Ethernet cable, and ensure the network connection is working (pingable).
-
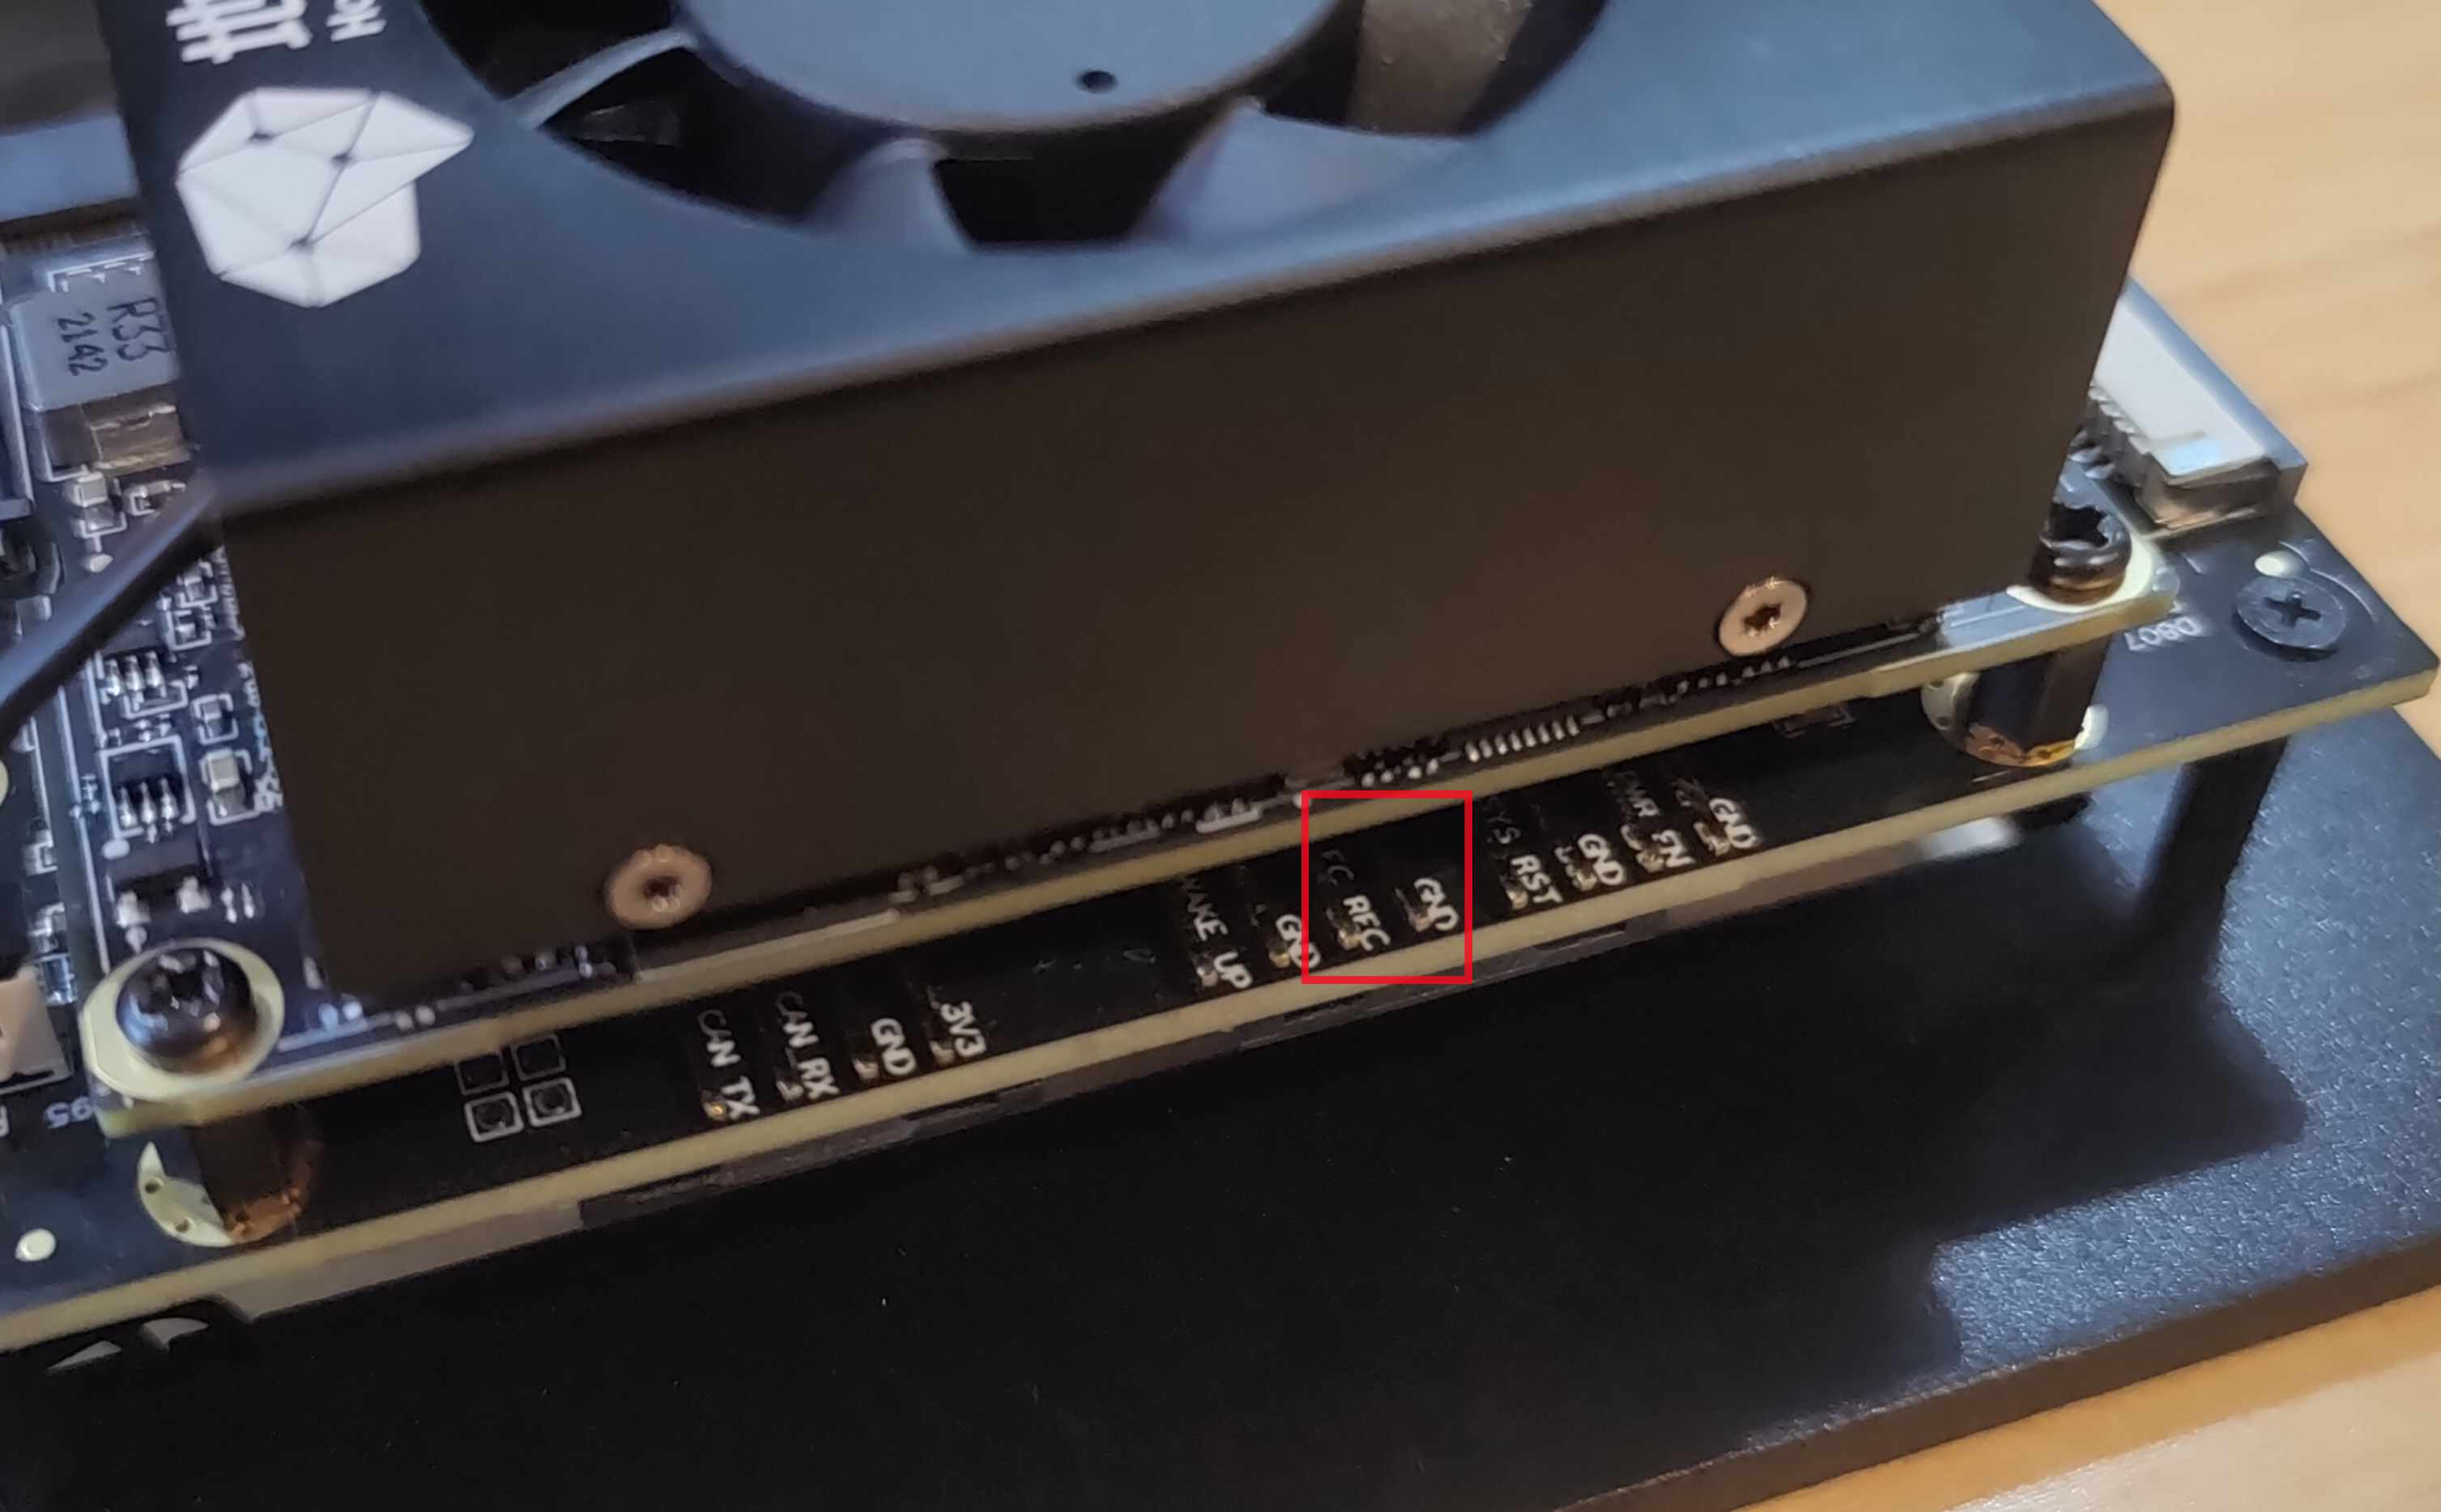
Short the
FC_RECandGNDsignals on the function control interface (interface 10).
- Run the
hbupdatemain program, open the tool, and select the board model asRDK_ULTRA(required).

- Click the
Browsebutton to select the image file to be flashed (required).
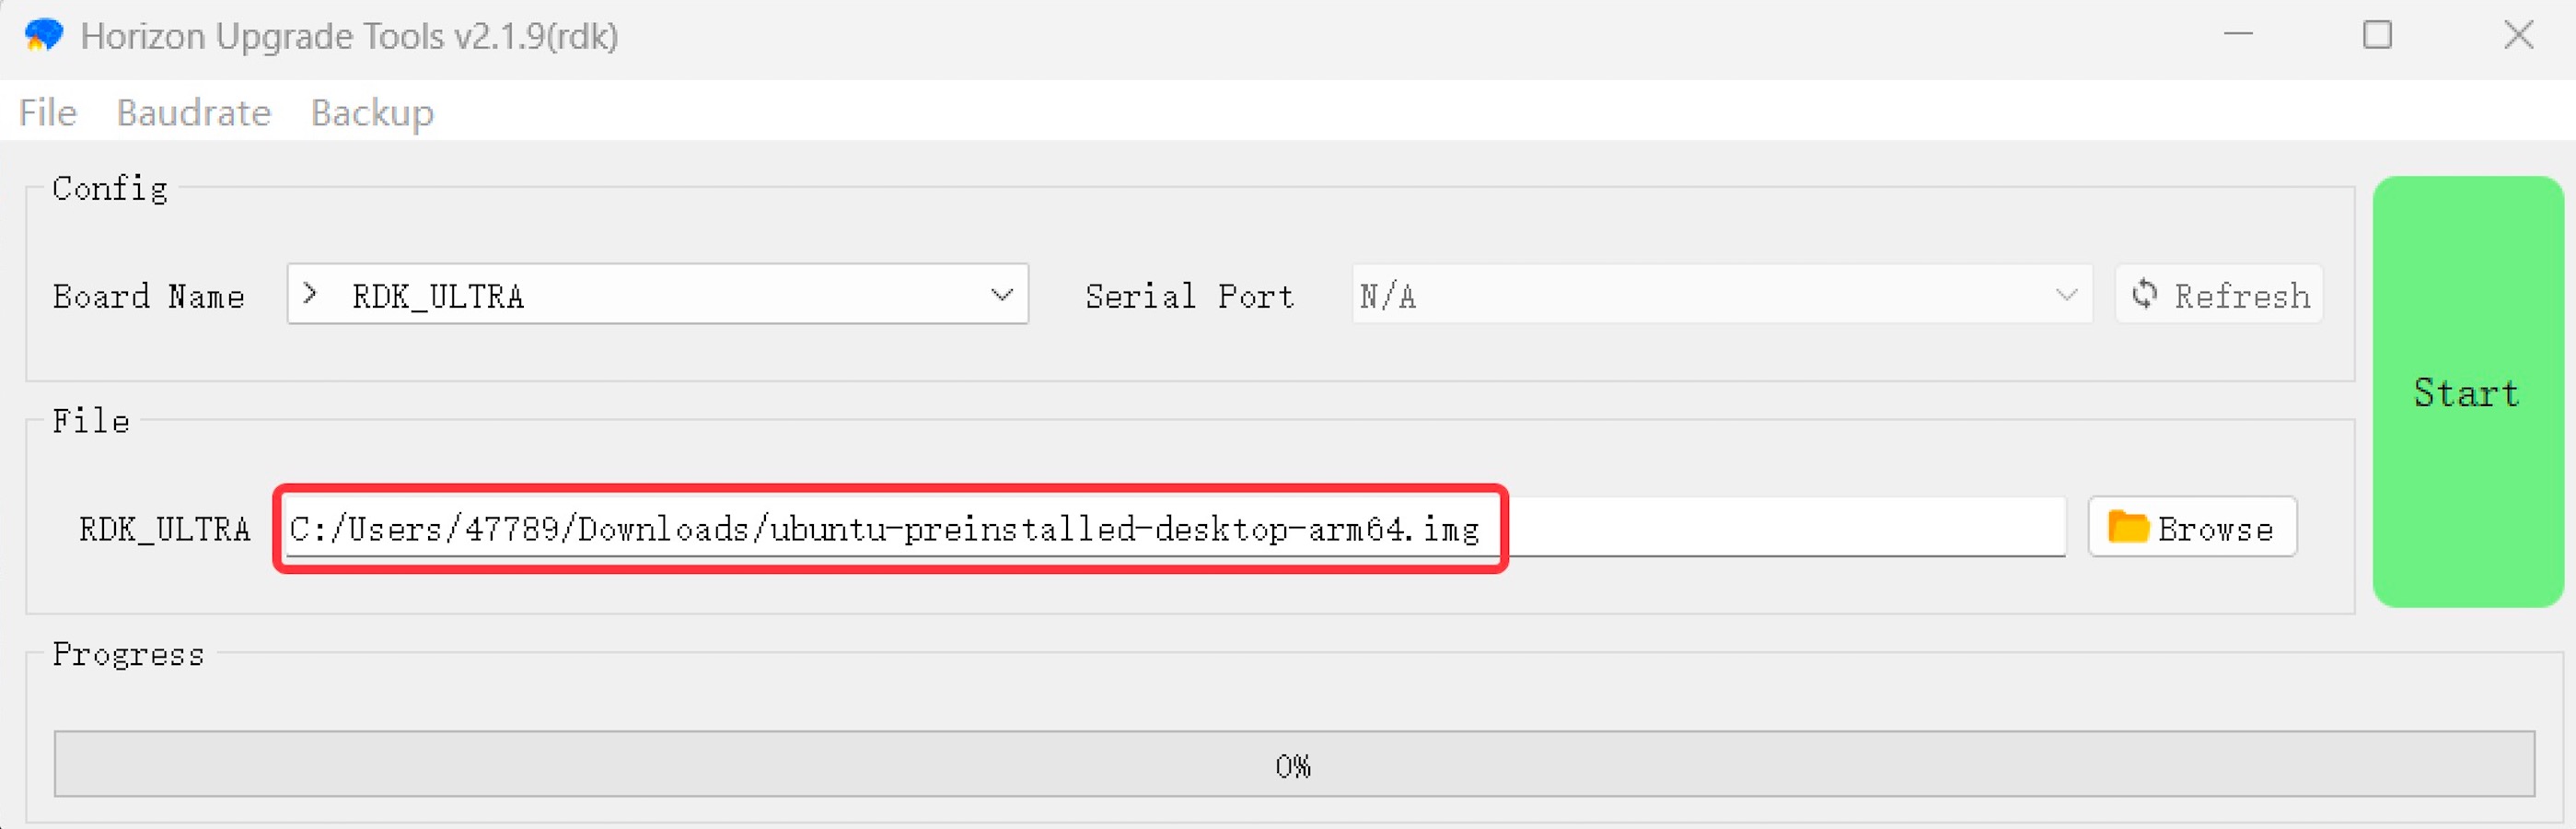
- Click the
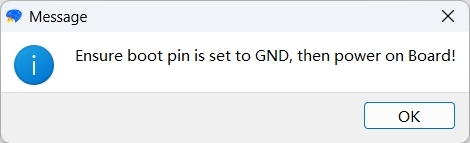
Startbutton to begin flashing. Confirm the operation as prompted, then clickOK:
- When the tool displays the following output, the flashing process has started. The duration depends on network speed, so please wait patiently.
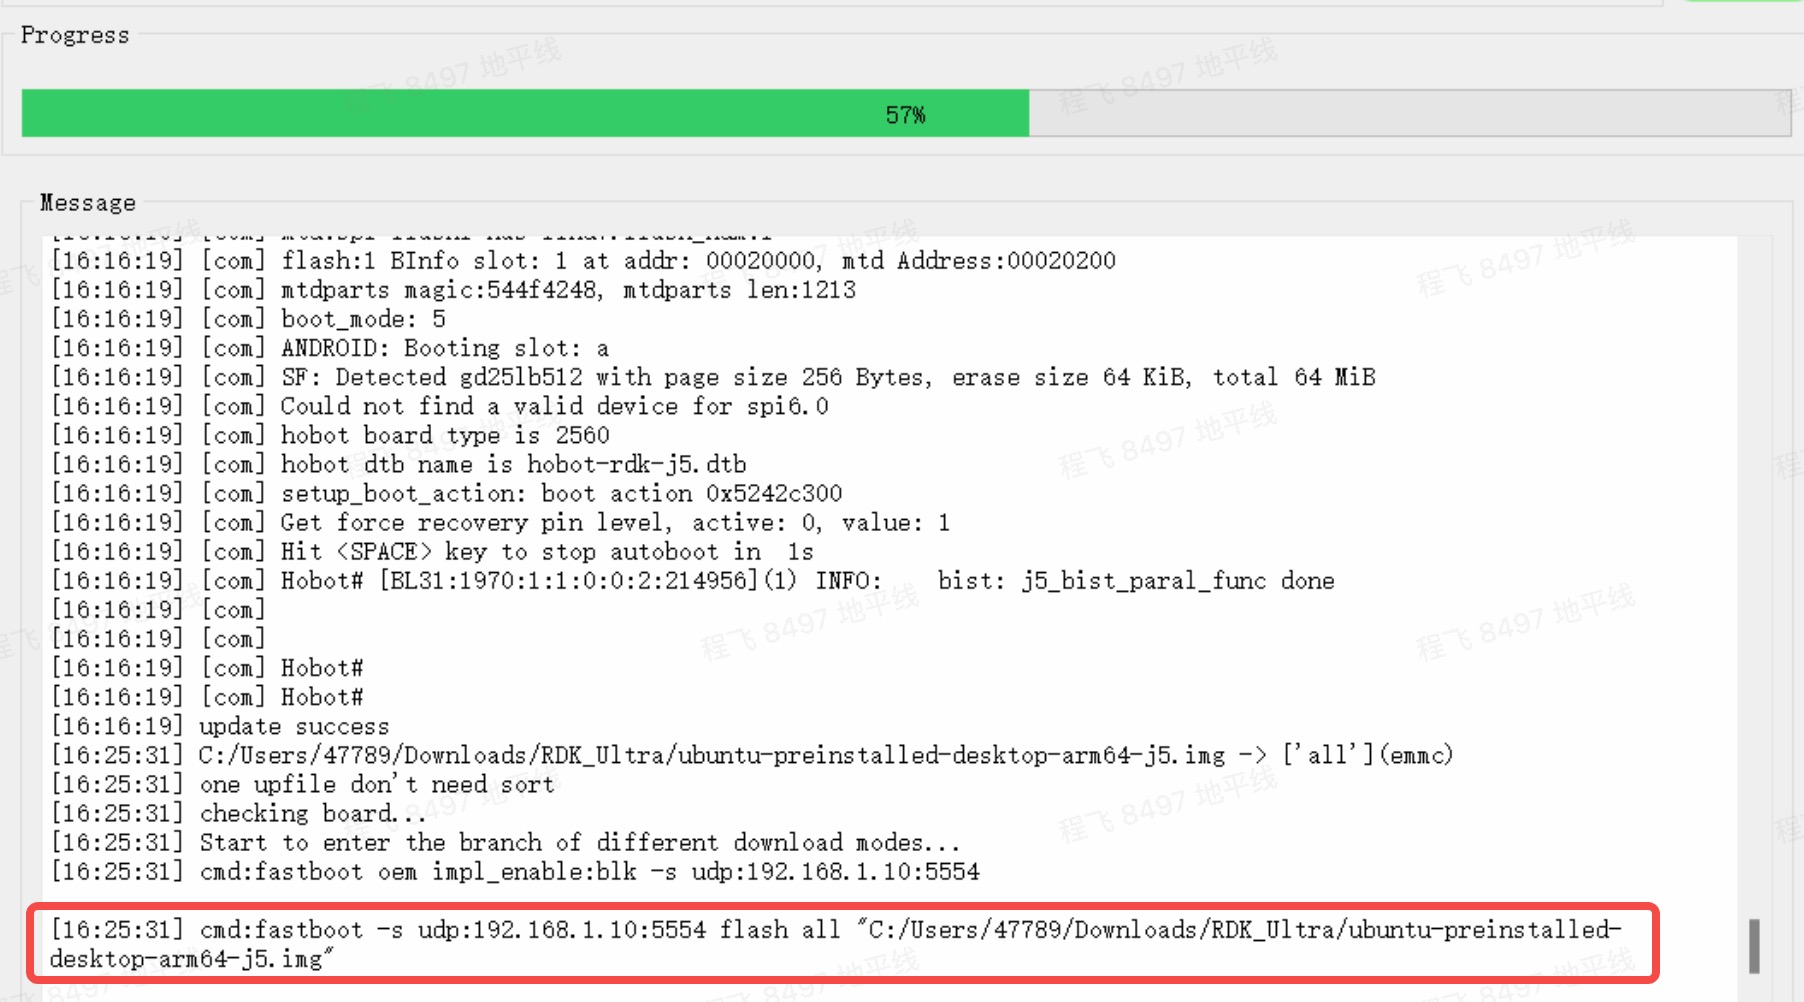
- Wait for the tool to finish flashing and check the result:
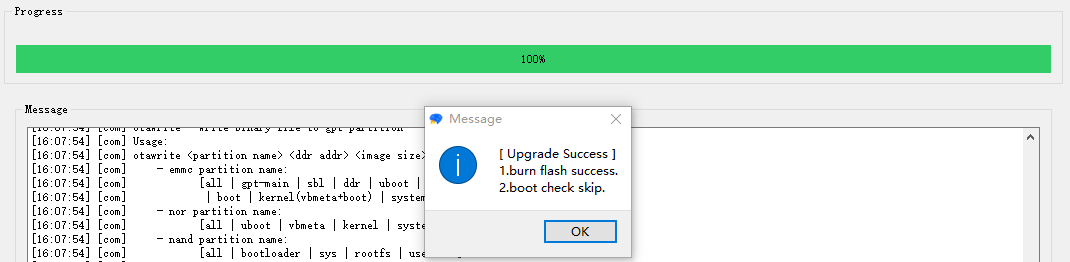
- If flashing is successful, the tool will display:
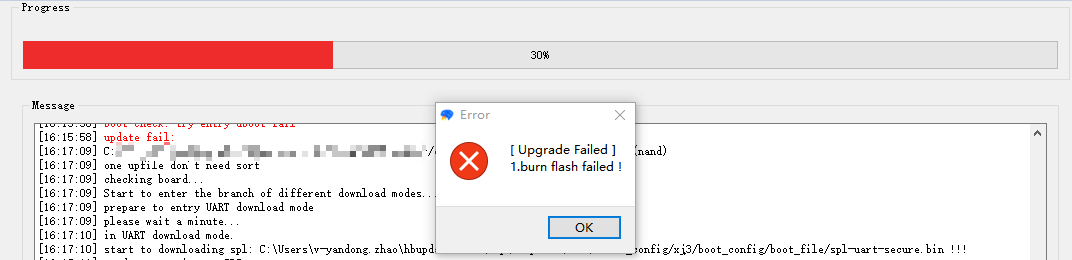
- If the tool displays the following error, please check steps 1~3.
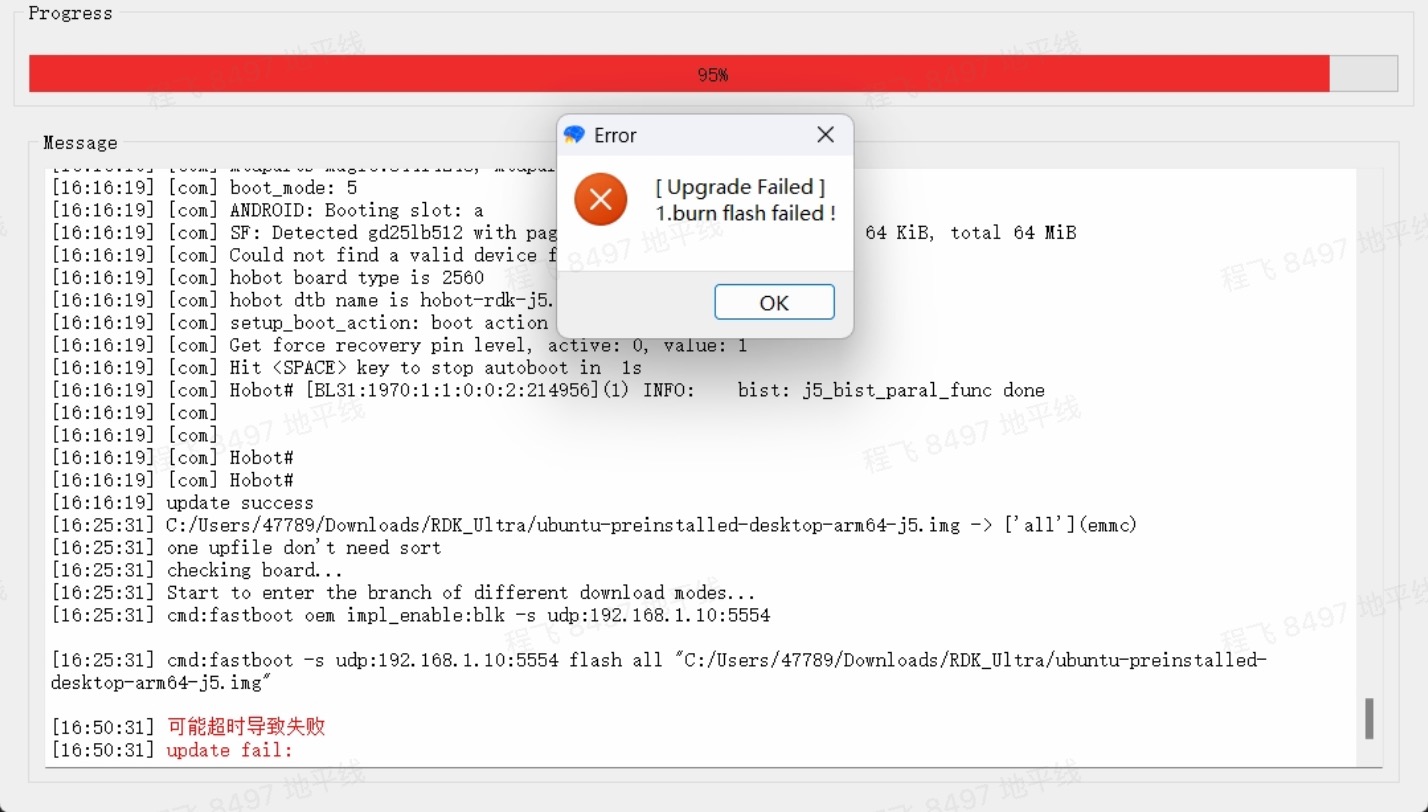
- If the tool displays the following error, the network speed is too slow. It is recommended to use a higher-performance PC and try again.
If the flashing process is interrupted, please repeat the steps above.
Booting the System
First, keep the board powered off. Remove the short between FC_REC and GND on the function control interface (interface 10). Connect the board to a monitor via HDMI, then power on the board.
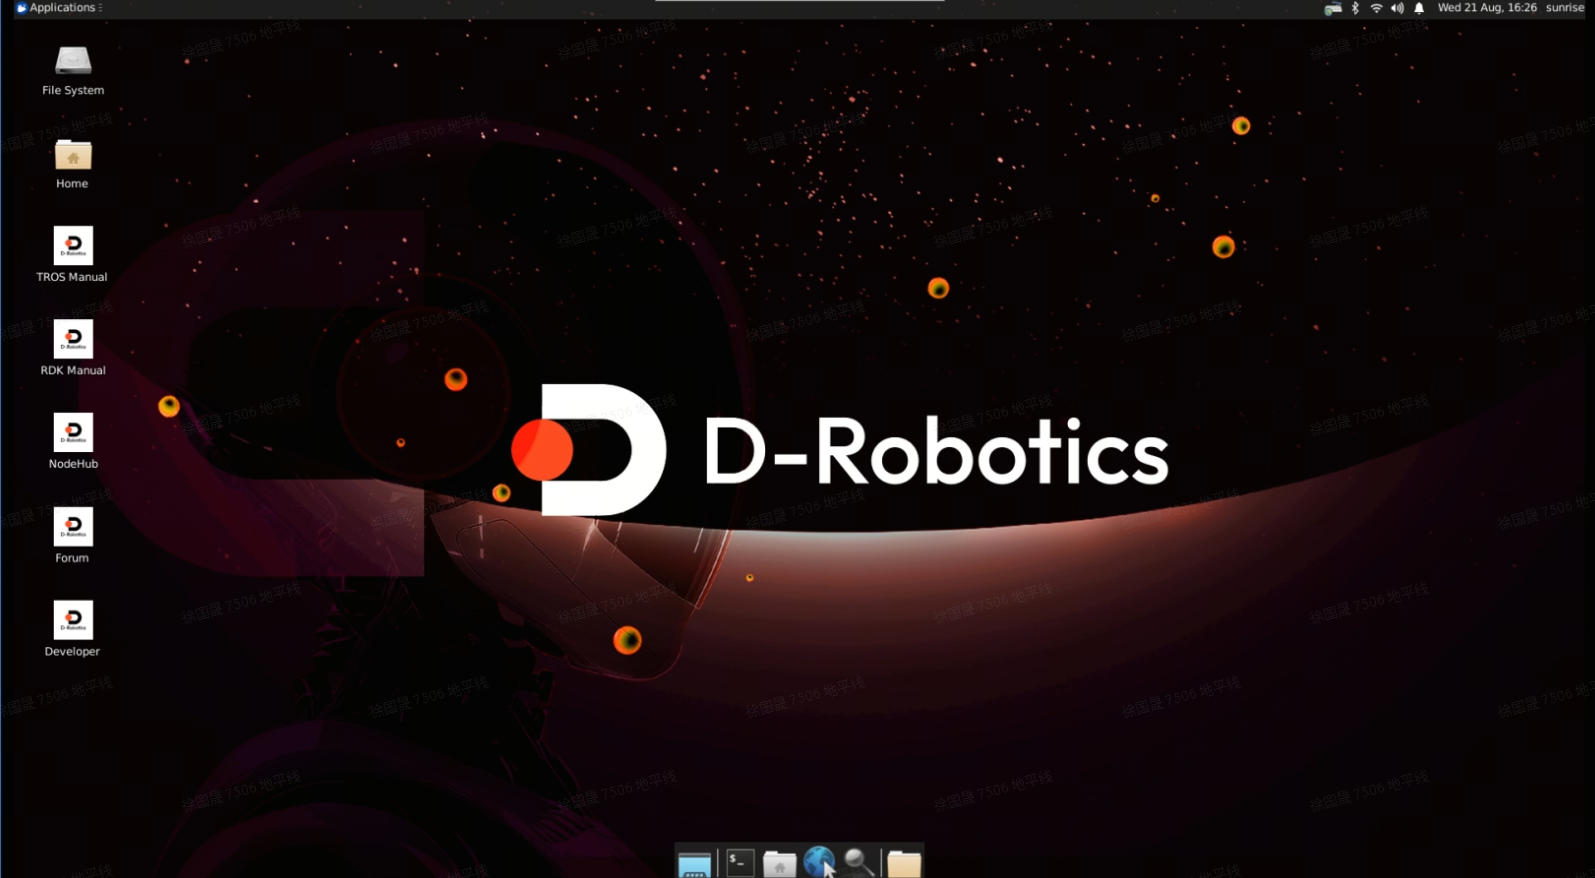
On first boot, the system will perform default environment configuration, which takes about 45 seconds. After configuration, the Ubuntu desktop will be displayed on the monitor.
After Ubuntu Desktop boots, the system desktop will be displayed via HDMI, as shown below:
FAQ
Notes
- Do not hot-plug any devices except USB, HDMI, or Ethernet cables.
For more troubleshooting, refer to the FAQ section, or visit the D-Robotics Developer Forum for help.