1.2.2 RDK X5
Before using the RDK X5 development board, the following preparations are required.
Preparation for Flashing
Power Supply
The RDK X5 development board is powered via a USB Type C interface. Use a power adapter that supports 5V/5A to power the board.
For more power supply options, refer to PoE Power Supply Usage.
Do not use a computer USB port to power the board. Insufficient power may cause abnormal shutdowns or repeated reboots.
For more troubleshooting tips, refer to the FAQ section.
Storage
The RDK X5 development board uses a Micro SD card as the system boot medium. It is recommended to use at least an 8GB card to meet the storage needs of the Ubuntu system and application software.
Display
The RDK X5 development board supports HDMI output. Connect the board to a monitor via an HDMI cable to enable graphical desktop display.
Network Connection
The RDK X5 development board supports both Ethernet and Wi-Fi for network connections. You can use either interface to connect to a network.
System Flashing
The RDK kit currently provides an Ubuntu 22.04 system image, supporting graphical interaction with the Desktop version.
The RDK X5 Module comes with a pre-installed test system image. To ensure the use of the latest version, it is recommended to follow the guide on the current page to flash the latest system image.
Image Download
Click Download Image to open the version selection page. Navigate to the version directory and go to the system download page for version 3.0.0.
After downloading, extract the Ubuntu system image file, such as ubuntu-preinstalled-desktop-arm64.img.
Version Description:
- Version 3.1.0: For the 3.1.0 image, there is an issue where the latest version of balenaEtcher may fail during the flashing process. The current solutions are:
- Use balenaEtcher version 1.18.11. Flashing will proceed normally, though the verification process may report an error, but the system will still boot up correctly.
- It is strongly recommended by the official team to use the Rufus flashing tool for image installation, as it is relatively more stable.
- 3.0 Version: Based on the RDK Linux open-source package, it supports the entire hardware series, including the RDK X5 Pi and X3 modules.
- Desktop: Ubuntu system with a desktop interface, enabling operation with an external screen and mouse.
- Server: Ubuntu system without a desktop, accessible via serial or remote network connection.
Flashing the System
Before flashing the Ubuntu system image, please prepare the following:
- A Micro SD card with at least 16GB capacity
- An SD card reader
- Download the flashing tool provided by D-Robotics, RDK Studio (you can click here to download), or the image flashing tool Rufus (you can click here to visit the official website).
- RDK Studio Tool
- Rufus Tool
- Flashing the Board
After using the RDK Studio tool to flash the system, you can add devices for management. It is recommended to use the RDK Studio tool. For detailed steps, please refer to Flashing the System with RDK Studio。
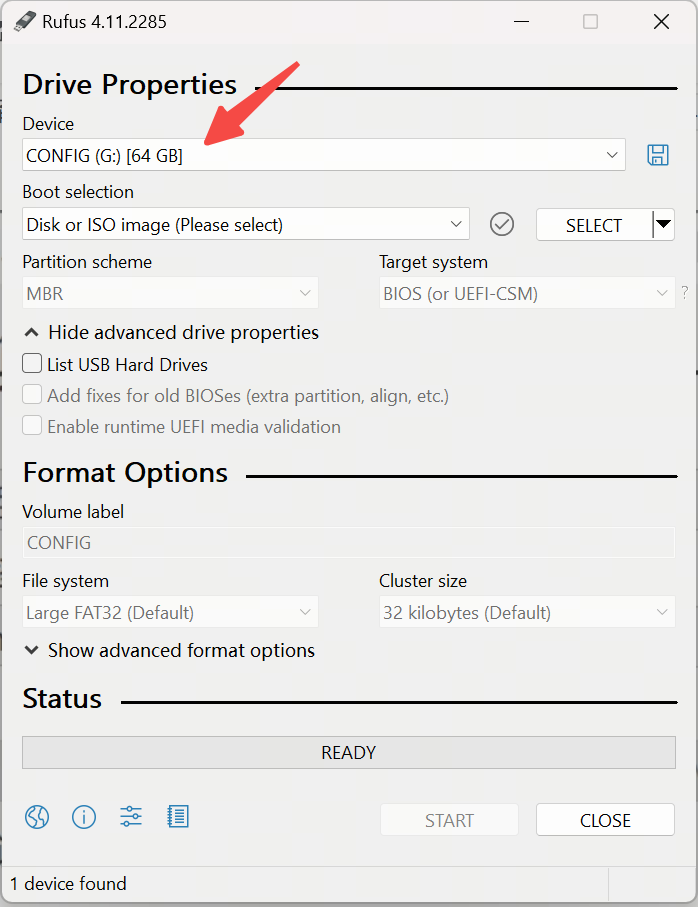
Rufus is a bootable media creation tool for Windows. To create an SD boot card using Rufus, follow these steps:
-
Open Rufus and select the target Micro SD card from the "Device" dropdown menu.
-
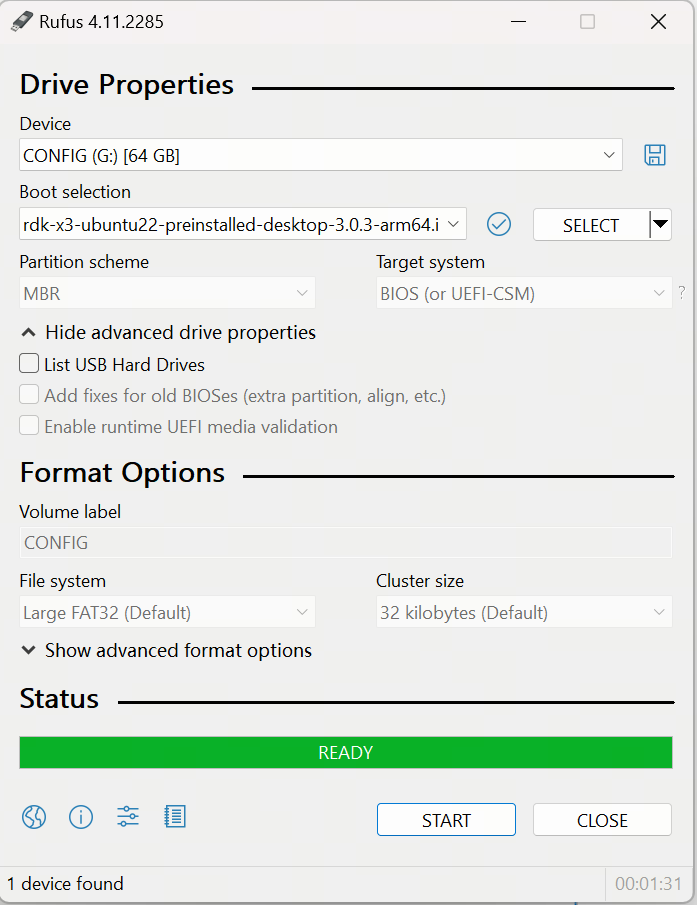
Click the "Select" button and choose the extracted
rdk-x5-ubuntu-preinstalled-desktop-arm64.imgfile as the image to flash.
-
Keep the other parameters as default, then click "Start" to begin flashing. Once the process is complete, you can close Rufus and remove the SD card.
Flashing the Board
- RDK X5
- RDK X5 Module
Insert the SD card into the development board, connect the USB 2.0 Type-C to the PC, press and hold the Sleep button (located next to the headphone jack), power on the development board, wait for 5 seconds, and the board will enter flashing mode.
The PC can detect the SD card mapped as a USB drive, then follow the system flashing section to complete the system flashing.
Insert the SD card into the development board, connect the USB 2.0 Type-C to the PC, press and hold the Sleep button (interface 23), power on the development board, wait for 5 seconds, and the board will enter flashing mode.
The PC can detect the SD card mapped as a USB drive.
If the SD card is not inserted into the development board, the eMMC built into the core board will be mapped as a USB drive.
Then follow the system flashing section to complete the system flashing.

System Boot
First, ensure the board is powered off. Insert the prepared SD card into the Micro SD card slot on the board, connect the board to a monitor using an HDMI cable, and then power on the board.
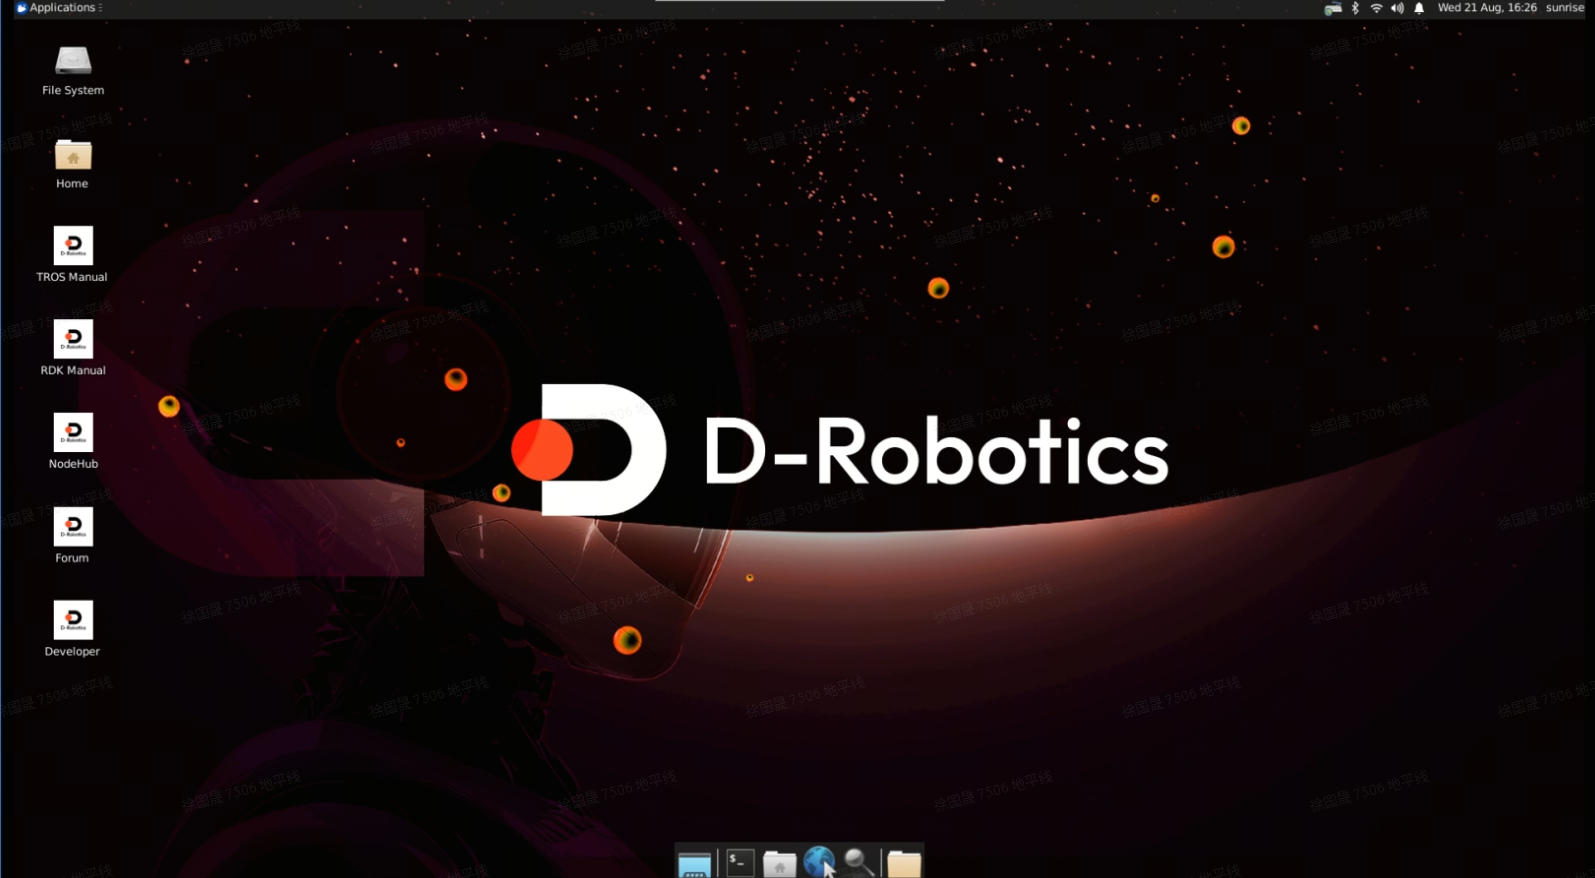
On the first boot, the system will perform default environment configuration, which takes approximately 45 seconds. After the configuration is complete, the Ubuntu system desktop will be displayed on the monitor.
- Green indicator: Lights up to indicate normal power status.
If the board does not display anything for an extended period after powering on (over 2 minutes), the board may not have booted properly. Debug via the serial port to check the board’s status.
Once the Ubuntu Desktop system boots, the system desktop will be displayed via the HDMI interface, as shown below:
FAQ
Here are common issues for first-time users of the development board:
- No power-on after connection: Ensure you are using the recommended power adapter mentioned in the Power Supply section. Ensure the Micro SD card has been flashed with the Ubuntu system image.
- Hot-swapping the storage card during use: The board does not support hot-swapping of the Micro SD card. If this happens, restart the board.
Precautions
- Do not plug or unplug any devices except USB, HDMI, and Ethernet cables while powered on.
- The USB Type C interface on the RDK X5 is for power supply only.
- Use certified USB Type C power cables. Poor-quality cables may cause power supply issues, leading to abnormal system shutdowns.
For more troubleshooting tips, refer to the FAQ section. You can also visit the D-Robotics Developer Official Forum for help.
NAND Firmware Flashing
The RDK minimum system is stored in NAND Flash and includes critical boot components such as Bootloader (Miniboot, U-Boot).
The device comes pre-installed with the latest NAND firmware that matches the hardware.
To ensure compatibility and device stability, downgrading to older versions of the firmware is strictly prohibited, as it may cause the device to fail to boot properly.
If your device fails to boot, please follow the steps below to re-burn the NAND firmware.
Download NAND Firmware
Download the latest product_release date.zip file. After extraction, you will get a product folder, which will serve as the directory containing the images for the subsequent burning process.

Download and Install the Burning Tool
XBurn is the official image burning tool provided for burning the RDK X5 NAND firmware. It offers an intuitive graphical interface, allowing users to complete the image burning process with just a few clicks, making it very convenient.
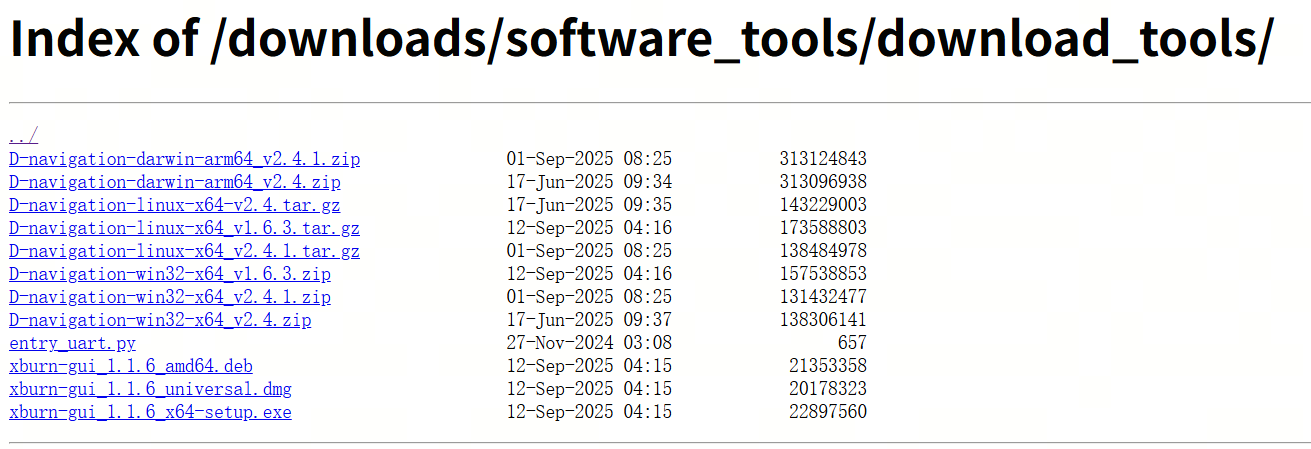
For Windows systems, download XBurn-gui_version number_x64-setup.exe.
For Ubuntu systems, download XBurn-gui_version number_x64-setup.deb.
For macOS, download XBurn-gui_version number_x64-setup.dmg.
Installing and Launching XBurn on Windows
- Double-click the installer
xburn-gui_1.1.5_x64-setup.exeto proceed with the installation. - After the installation is complete, the
XBurn-guiinterface will automatically open:

- Subsequently, you can directly double-click the
XBurn.exeicon on the desktop to launch the software.
Installing and Launching XBurn on Ubuntu
In the directory containing the installation package, execute the command sudo dpkg -i xburn-gui_1.1.5_amd64.deb and wait for the installation to complete. Installation example:
(base) hobot@hobot-ThinkPad-T14-Gen-1:~/tools$ sudo dpkg -i xburn-gui_1.1.5_amd64.deb
[sudo] password for hobot:
Selecting previously unselected package xburn-gui.
(Reading database ... 494898 files and directories currently installed.)
Preparing to unpack xburn-gui_1.1.5_amd64.deb  ...
Unpacking xburn-gui (1.1.5) ...
Setting up xburn-gui (1.1.5) ...
Udev rules installed and activated
User nobody added to plugdev group
User hobot added to plugdev group
User snapd-range-524288-root added to plugdev group
User snap_daemon added to plugdev group
User xpj added to plugdev group
Processing triggers for mailcap (3.70+nmu1ubuntu1)  ...
Processing triggers for gnome-menus (3.36.0-1ubuntu3)  ...
Processing triggers for desktop-file-utils (0.26-1ubuntu3)  ...
Processing triggers for hicolor-icon-theme (0.17-2)  ...
Then execute the command sudo xburn-gui or click the xburn-gui icon in the application menu (a prompt to enter the password will appear), enter the password to open the burning tool interface.
Installing and Launching XBurn on macOS
Double-click the installer xburn-gui_1.1.5_universal.dmg to proceed with the installation. The specific installation steps are as follows:
- A pop-up window will appear. Click and hold the
xburn-guiicon and drag it to theApplications icon:
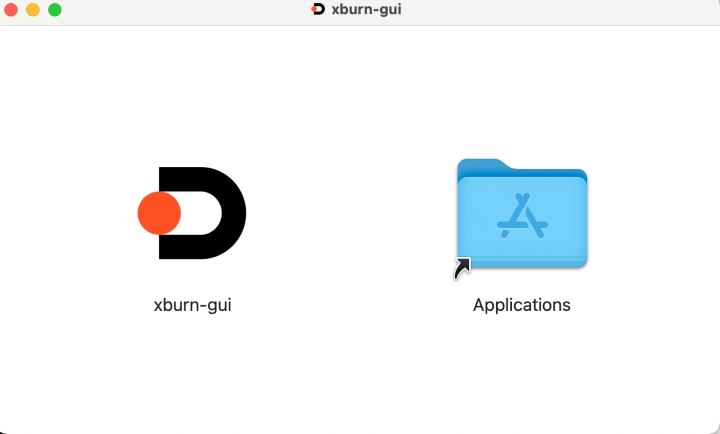
-
xburn-guiis now installed. You can now double-click thexburn-guiicon to open the program. -
If you encounter prompts indicating missing dependencies during installation, you need to install the corresponding dependencies first.
Check Drivers
When using the tool for the first time, you need to check if the drivers are installed correctly. Open the tool and switch to the driver interface. If it prompts that the driver is not installed, click the "Install Driver" button and follow the prompts to install the driver.

This interface is used to view and manage the status of drivers.
-
Driver Name: Lists the names of installed drivers (e.g., USB Driver (ADB, Fastboot, DFU) and USB to Serial Driver (CH341)).
-
Current Version: Displays the current version of the driver.
-
Operation: Provides buttons to install and uninstall drivers.
-
Scan Drivers: Provides a button to scan for drivers, used to detect and install new drivers.
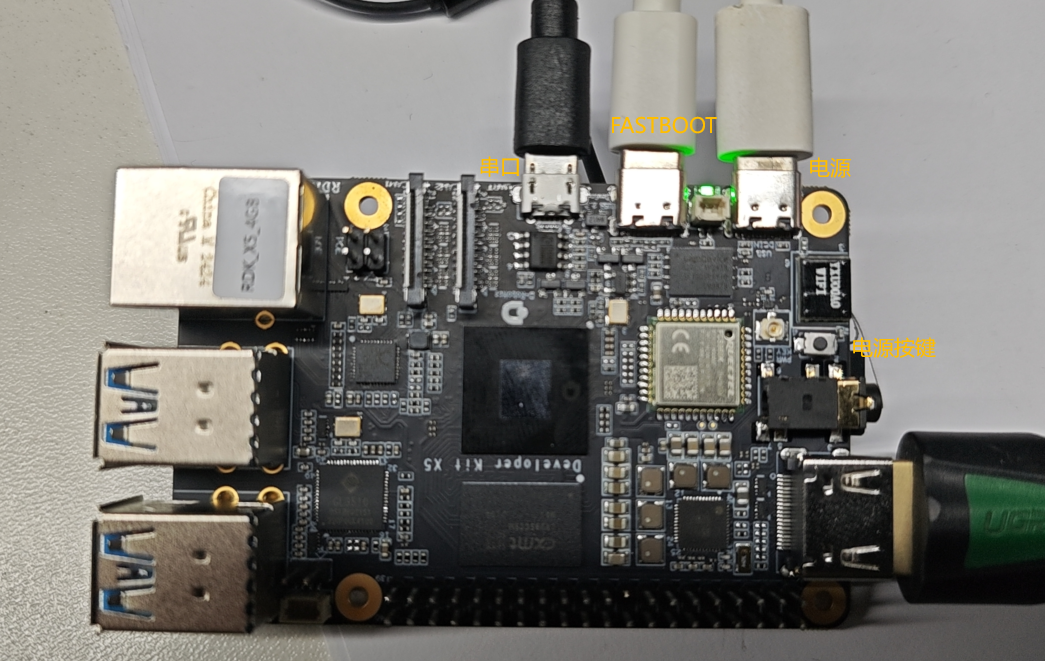
Connect the Device
Connect the serial port to the PC using a Micro-USB cable;
Connect the burning port to the PC using a USB Type C cable;
Connect the power cable using a USB Type C cable, and use a power adapter that supports 5V/5A;
- RDK X5
- RDK X5 Module

Flashing
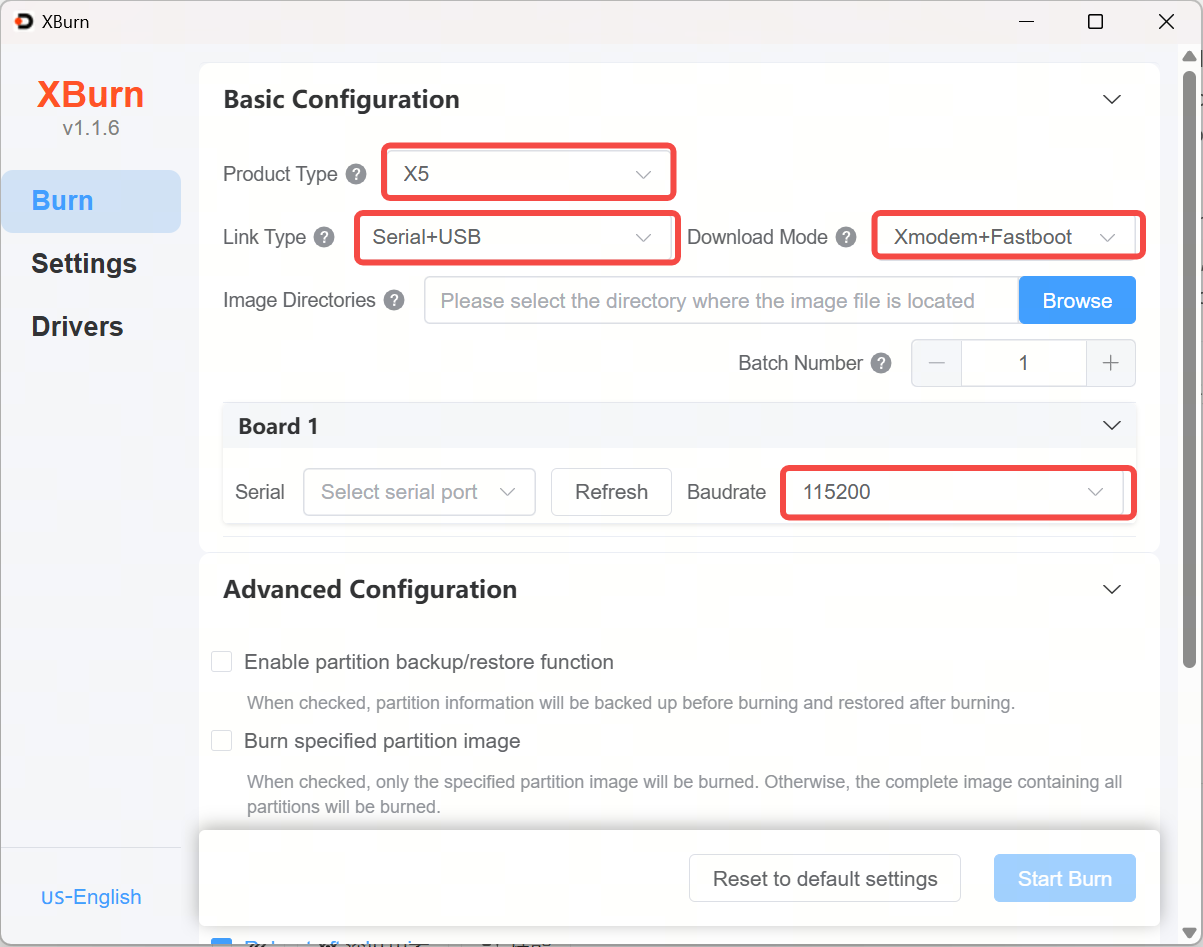
- Product Type: Select
X5 - Connection Type: Select
Serial+USB - Download Mode: Select
xmodem_fastboot - Image File Directory: Please select the directory where the image files to be burned are located.
- Batch Burning Quantity: Set the number of devices to burn simultaneously. Set a reasonable number based on factors such as computer performance, bandwidth of the hardware connection type, etc. It is recommended to burn a maximum of 8 devices simultaneously.
- Baud Rate: Select
115200for RDK X5, and select921600for RDK X5 Module.
Click "Start Upgrade". After seeing the prompt, unplug and replug the power;
If the serial port is lost after unplugging and replugging the power, you can first not supply power, and after seeing the prompt, then power on the board.

Start Upgrading

Upgrade Finished
