1.6 Image Classification Algorithm Example
Video: https://www.youtube.com/watch?v=lGFel8uabLY&list=PLSxjn4YS2IuFUWcLGj2_uuCfLYnNYw6Ld&index=3
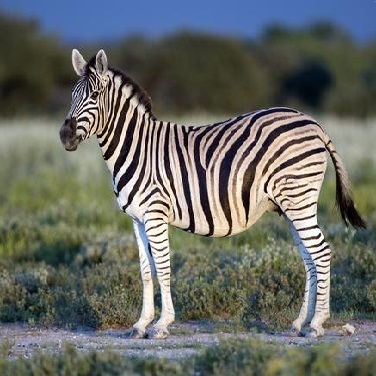
The development board is installed with the program test_mobilenetv1.py for testing the functionality of the mobilenet v1 image classification algorithm. This program reads the static image zebra_cls.jpg as the input of the model, and outputs the classification result cls id: 340 Confidence: 0.991851 in the command line terminal.
Execute the program test_mobilenetv1.py as follows:
sunrise@ubuntu:~$ cd /app/pydev_demo/01_basic_sample/
sunrise@ubuntu:/app/pydev_demo/01_basic_sample$ sudo ./test_mobilenetv1.py
Expected Effect
Output the predicted result of the image classification algorithm, id and confidence.
zebra_cls.jpg is an image of a zebra. According to the classification of the ImageNet dataset, the returned result id is 340, with a confidence of 0.991851.
========== Classification result ==========
cls id: 340 Confidence: 0.991851