1.2.1 RDK X3
Before using the RDK X3 development board, the following preparations need to be made.
Preparation
Power Supply
- RDK X3
- RDK X3 Module
The RDK X3 development board is powered by a USB Type C interface. It requires a power adapter that supports 5V/3A to power the board. It is recommended to use a power adapter from the Basic Accessories List section.
The RDK X3 Module is powered through the power interface on the carrier board. The official carrier board is powered through a DC interface. It is recommended to use the 12V/2A adapter recommended in the certified accessories list.
Please do not power the development board through the USB interface of a computer, as it may cause abnormal power failure and repeated restarts due to insufficient power supply.
For more troubleshooting, please refer to the Common Questions section.
Storage
- RDK X3
- RDK X3 Module
The RDK X3 development board uses a Micro SD card as the system boot medium, and it is recommended to use a storage card with a capacity of at least 8GB to meet the storage requirements of the Ubuntu system and application software.
The RDK X3 Module has onboard eMMC (optional) and supports booting the system from both eMMC and SD cards.
Display
- RDK X3
- RDK X3 Module
The RDK X3 development board supports HDMI display interface, and connects the development board and monitor via HDMI cable to support graphical desktop display.
The RDK X3 Module supports HDMI display interface, and connects the official carrier board and monitor via HDMI cable to support graphical desktop display.
Network Connection
- RDK X3
- RDK X3 Module
The RDK X3 development board supports Ethernet and Wi-Fi network interfaces, and users can use either interface for network connection.
The RDK X3 Module supports two types of network interfaces: Ethernet and Wi-Fi (optional). Users can achieve network connectivity through either interface.
System burning
The RDK suite currently provides the Ubuntu 20.04/22.04 system images, which support desktop graphical interaction.
Image download
- RDK X3
- RDK X3 Module
Video: https://www.youtube.com/watch?v=du1EypDtxMY&list=PLSxjn4YS2IuFUWcLGj2_uuCfLYnNYw6Ld&index=15
Click Download image to enter the version selection page, select the corresponding version directory, and enter the file download page. Take downloading the 2.0.0 version of the system image as an example:

After downloading, unzip the Ubuntu system image file, such as ubuntu-preinstalled-desktop-arm64.img.
Version description:
- Version 2.0: Made based on the RDK Linux open source code package, supporting the full range of hardware such as RDK X3 and X3 module.
Click Download image to enter the version selection page, select the corresponding version directory, and enter the file download page. Take downloading the 2.0.0 version of the system image as an example:
After downloading, unzip the Ubuntu system image file, such as ubuntu-preinstalled-desktop-arm64.img.
Version description:
- Version 2.0: Made based on the RDK Linux open source code package, supporting the full range of hardware such as RDK X3 and X3 module.
- desktop: Ubuntu system with a desktop, can be connected to an external screen and operated with a mouse
- server: Ubuntu system without a desktop, can be operated remotely through serial or network connection
System Burning
- RDK X3
- RDK X3 Module
Before burning the Ubuntu system image, please prepare the following:
- A Micro SD card with at least 8GB capacity
- An SD card reader
- Download the flashing tool provided by D-Robotics, RDK Studio (you can click here to download), or the image flashing tool Rufus (you can click here to visit the official website).
- RDK Studio Tool
- Rufus Tool
After using the RDK Studio tool to flash the system, you can add devices for management. It is recommended to use the RDK Studio tool. For detailed steps, please refer to Flashing the System with RDK Studio。
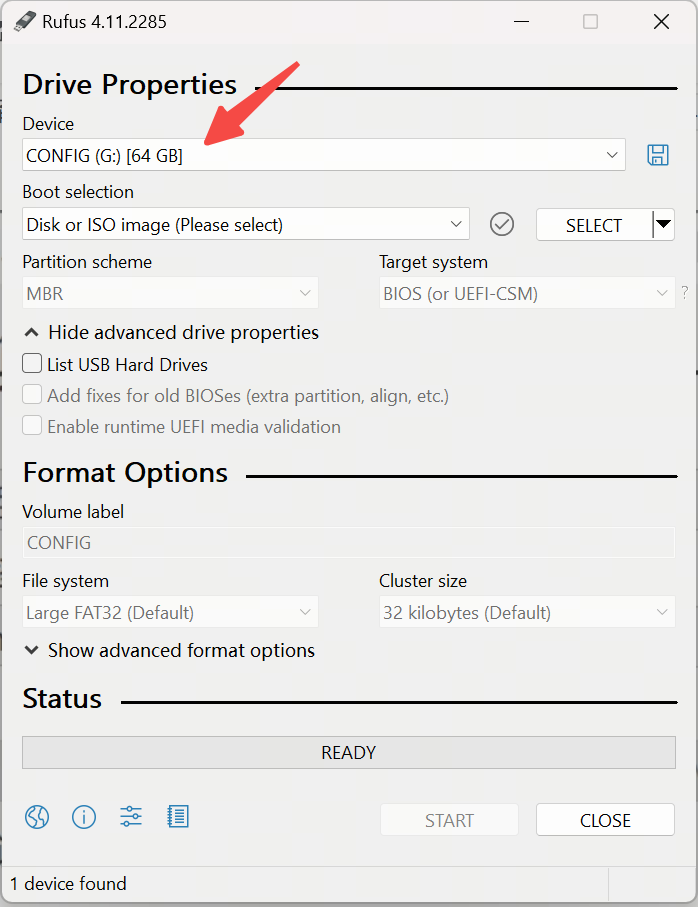
Rufus is a bootable media creation tool for Windows. To create an SD boot card using Rufus, follow these steps:
-
Open Rufus and select the target Micro SD card under the "Device" dropdown.
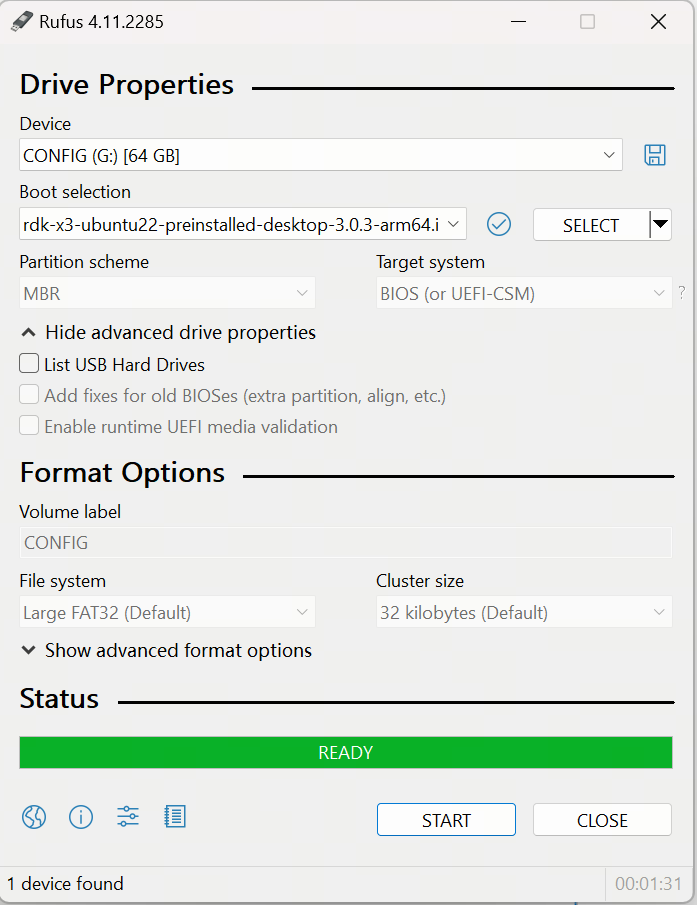
-
Click the "Select" button and choose the extracted
ubuntu-preinstalled-desktop-arm64.imgfile as the image to burn.
-
Keep other parameters as default, then click the "Start" button and wait for the burning process to complete. Once finished, you can close Rufus and remove the SD card.
The RDK X3 Module supports booting the system from two modes: eMMC and SD card:
- Using SD card: If you want to burn the system to an SD card (not booting from eMMC mode), follow the same steps as RDK X3 for burning the system.
- Using eMMC: You need to use the D-Robotics
hbupdatetool. (This method is mainly described below)
The hbupdate tool supports two versions: Windows and Linux, which start with hbupdate_win64 and hbupdate_linux respectively. The tool download link is: hbupdate.
- Extract the compressed tool package, and do not include spaces, Chinese characters, special characters, etc. in the extraction path.
- The tool communicates with the RDK X3 module through the USB port, so you need to install the USB driver in advance. See the following description for specific steps.
-
For PCs using the Windows system, before using the flashing tool, you need to confirm whether the fastboot driver program has been installed. Please follow the steps below to check:
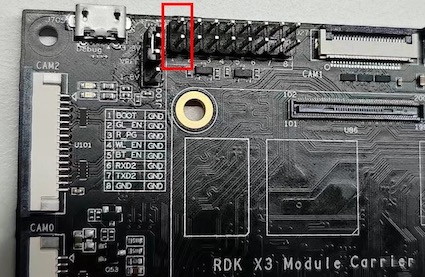
- Ground the
Bootpin of the RDK X3 carrier board using a jumper cap. Refer to the figure below for the pin position.
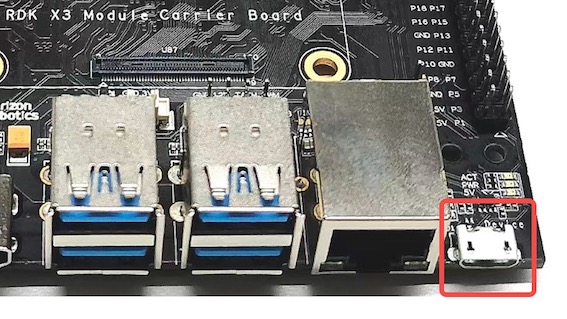
- Connect the Micro USB interface of the carrier board to the computer via a USB cable. Refer to the figure below for the interface position.
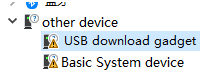
- Power on the device and observe the port status of the computer device manager. If the
USB download gadgetunknown device appears, you need to update the device driver; otherwise, you can skip the following steps.
-
Download and extract the driver package
android_hobot.zip. The download link is android_hobot. -
Go to the extracted directory and run
5-runasadmin_register-CA-cer.cmdas an administrator to complete the registration of the driver program. -
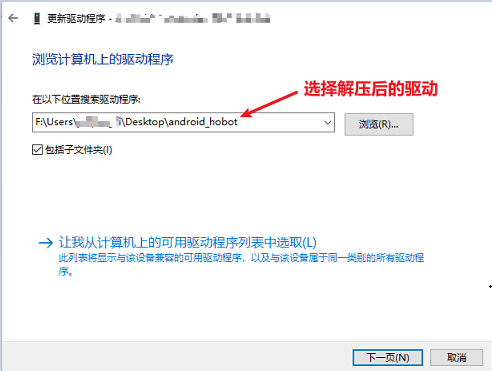
Double-click the
USB download gadgetunknown device, select the driver package extraction directory, and then click Next.
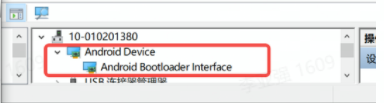
- After the driver installation is complete, the device manager will display the fastboot device
Android Device.
- Ground the
-
After confirming that the PC device manager displays the fastboot device
Android Device, runhbupdate.exeto open the burning tool, and follow the steps below to burn the system:
-
Select the development board model, which is a required field.
-
RDK_X3_2GB: RDK X3 (Sunrise X3), 2GB RAM version, only supports burning the minimal system image
-
RDK_X3_4GB: RDK X3 (Sunrise X3), 4GB RAM version, only supports burning the minimal system image
-
RDK_X3_MD_2GB: RDK X3 Module, 2GB RAM version
-
RDK_X3_MD_4GB: RDK X3 Module, 4GB RAM version
-

- Click the
Browsebutton to select the image file to be burned, this is a required option.

- Click the
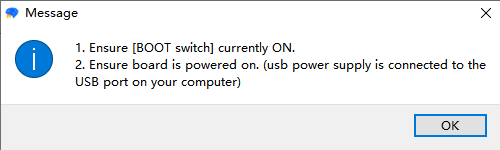
Startbutton to start the flashing process, and follow the popup prompts to continue:
-
When burning the image, it is necessary to connect the
BOOTpin to the ground using a jumper cap. The pin position can be referred to in the Functional Control Interface. -
Connect the Micro USB interface to the computer, and the computer device manager will recognize the
Android Deviceas described in the previous section for installing USB download drivers. -
After the burning is completed, disconnect the power supply, disconnect the connection cable from the computer, and remove the BOOT jumper cap, then re-power on.
-
If the startup is normal, the
ACT LEDon the hardware will enter the state of two fast flashes followed by one slow flash.
-
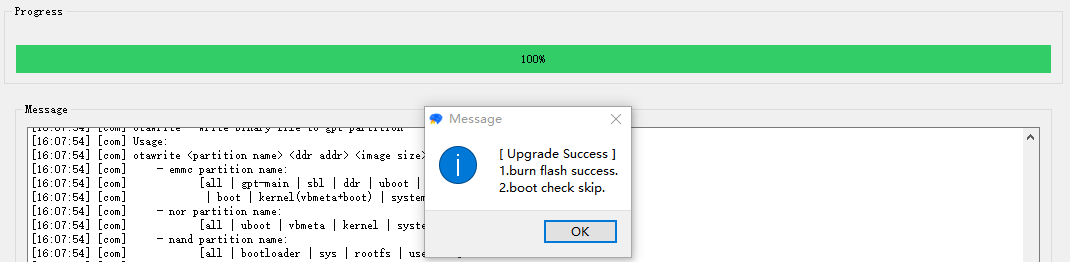
Check the upgrade results
- When the image burning is successful, the tool will prompt as follows:
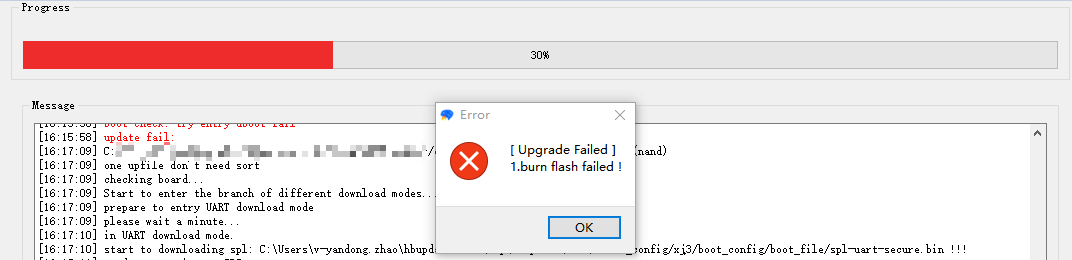
- When the image burning fails, the tool will prompt as follows, and at this time, you need to check if the
Android Devicedevice exists in the PC device manager.
-
If the burning process is interrupted, please follow the above steps to restart.
Start the system
- RDK X3
- RDK X3 Module
First, keep the development board powered off, then insert the prepared memory card into the Micro SD card slot of the development board, and connect the development board to a monitor using an HDMI cable. Finally, power on the development board. The default environment configuration will be performed when the system starts up for the first time. The entire process takes about 45 seconds, and after the configuration is completed, the Ubuntu system desktop will be displayed on the monitor.
- Red indicator light: When it is on, it indicates normal hardware power-on.
- Green indicator light: When it is on, it indicates that the system is booting up. When it is off or flashing, it indicates that the system booting process is complete.
If there is no display output on the development board for a long time (more than 2 minutes) after power-on, it means that the development board failed to start. In this case, users can check the system status through the indicator lights using the following methods:
- Green light stays on: It indicates that the system failed to start. Users can check if the power adapter meets the requirements and try to remake the system image.
- Green light is off or flashing: It indicates that the system has started successfully, but the display service failed to start. Users need to confirm if the connected display meets the specification requirements.
RDK X3 Module supports two modes of system startup: eMMC mode and SD card mode.
-
If the eMMC on the module does not have a system image burned, you can insert an SD card with the system image to the carrier board to start the system from the SD card.
-
If the eMMC on the module already has a system image burned, you can switch between eMMC and SD card startup by following these steps:
-
By default, the system starts up from the eMMC.
-
To disable eMMC booting and switch to SD card startup, log into the system and execute the following command to remove the boot flag from the second partition of eMMC, then restart the system for the change to take effect:
sudo parted /dev/mmcblk0 set 2 boot off
sudo reboot- In uboot, you will find that there is no boot partition on the eMMC and it looks for the boot partition on the SD card. The system is booted from the SD card. After logging into the system, you can execute the
mountcommand to see that the root file system is mounted on the second partition of the SD card, and the config partition also uses the first partition of the SD card.
/dev/mmcblk2p2 on / type ext4 (rw,relatime,data=ordered)
/dev/mmcblk2p1 on /boot/config type vfat -
-
To switch back to eMMC startup from SD card startup:
When the system is started from the SD card and the system has already been burned to the eMMC, execute the following command to restore the eMMC startup. Restart the system for the change to take effect.
sudo parted /dev/mmcblk0 set 2 boot on
sudo reboot
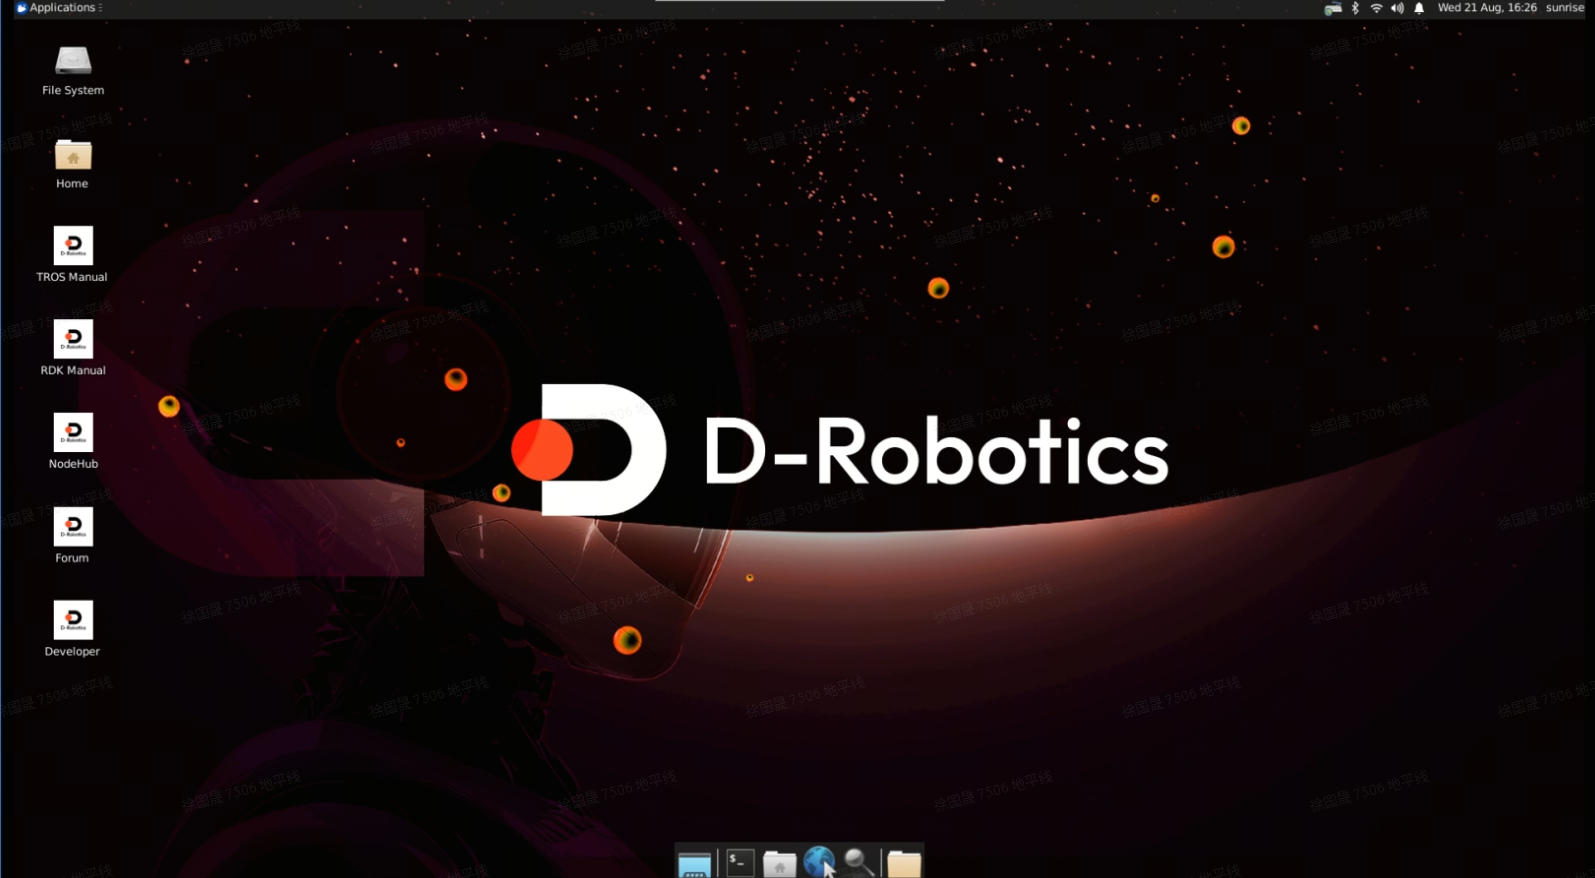
After the Ubuntu Desktop version system is fully booted, the system desktop will be displayed on the monitor via the HDMI interface, as shown in the following figure:
Frequently Asked Questions
Here are some common issues when using the development board for the first time:
- Power on failure: Please ensure that the recommended power adapter is used for the power supply; please also ensure that the Micro SD card or eMMC of the development board has been flashed with the Ubuntu system image.
- No response from USB Host interface: Please make sure that no data cable is connected to the Micro USB interface of the development board.
- Hot-plugging storage card during usage: The development board does not support hot-plugging of Micro SD storage cards. If an accidental operation occurs, please restart the development board.
Important Notices
- Do not plug and unplug any devices other than USB, HDMI, and Ethernet cables when they are powered on.
- The Type C USB interface of RDK X3 is only used for power supply.
- Use USB Type C power cables from reputable brands; otherwise, power supply abnormalities may occur, leading to system power failure.
For more problem-solving, please refer to the Frequently Asked Questions section, and you can also visit the D-Robotics Developer Forum for assistance.
The RDK X3 Module comes with a pre-installed test version of the system image. To ensure the use of the latest version of the system, it is recommended to refer to the current document to complete the burning of the latest version of the system image.