3.3.9 MIPI Camera Sample Introduction
Sample Overview
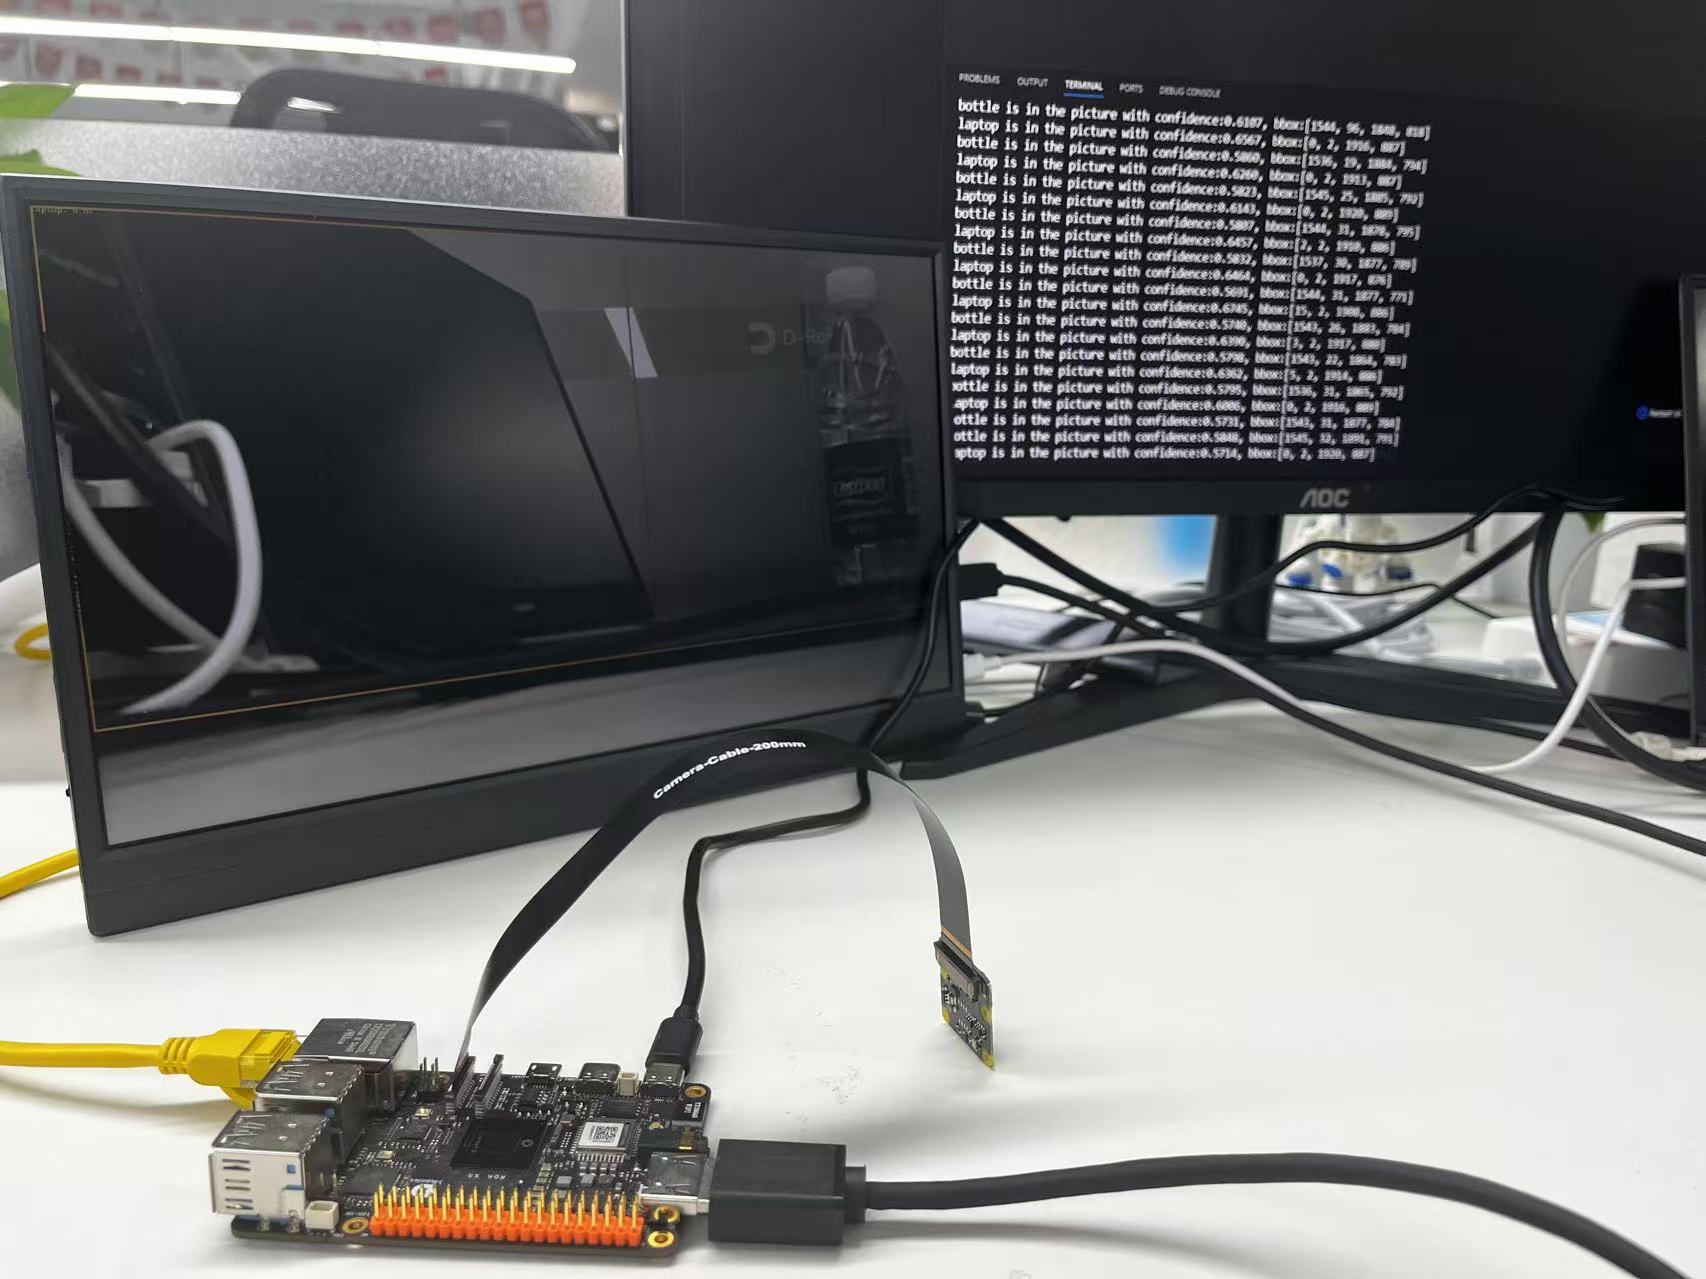
The MIPI camera sample is a Python interface development code example located in /app/pydev_demo/03_mipi_camera_sample, demonstrating how to use the onboard MIPI camera for real-time object detection. This sample uses the FCOS object detection model to perform real-time inference on the video stream captured by the MIPI camera, displays the detection results via HDMI, and outputs bounding box information and FPS performance data.
Demo Effect
Hardware Preparation
Hardware Connection
- Prepare an RDK development board
- Connect the officially compatible MIPI camera
- Connect the display to the development board via HDMI cable
- Connect power cable and network cable

Quick Start
Code and Board Location
The MIPI camera sample file is located at /app/pydev_demo/03_mipi_camera_sample/mipi_camera.py
Compilation and Execution
The Python sample does not require compilation and can be run directly:
Execution Effect
After running, the program will initialize the MIPI camera and HDMI display, and begin real-time object detection. Detection results will be displayed via HDMI, and the console will print detected object information and FPS.
Detailed Introduction
Sample Program Parameter Options
The MIPI camera sample does not require command line parameters and can be run directly. The program will automatically detect and use the onboard MIPI camera.
Software Architecture Description
The software architecture of the MIPI camera sample includes the following core components:
-
Model Loading: Load the FCOS object detection model
-
Camera Initialization: Initialize MIPI camera using srcampy.Camera()
-
Display Initialization: Initialize HDMI display
-
Camera and Display Binding: Directly bind camera output to display
-
Real-time Inference Loop:
-
Acquire images from camera
-
Model inference
-
Post-processing (parse detection results)
-
Draw bounding boxes and display
-
Calculate and print FPS

API Flow Description

FAQ
Q: What should I do if camera initialization fails when running the sample?
A: Please check if the MIPI camera is properly connected and ensure the camera driver is correctly loaded. Try restarting the device.
Q: What should I do if HDMI display is abnormal or has no output?
A: Please check the HDMI connection and ensure the display service is stopped (such as using systemctl stop lightdm).
Q: How to adjust the detection threshold?
A: Modify the value of fcos_postprocess_info.score_threshold in the code, for example, changing it to 0.5 can increase detection sensitivity.
Q: How to modify the display resolution?
A: Modify the sensor_width and sensor_height variables in the code, but note whether the display device supports that resolution.
Q: What should I do if the frame rate is very low when running the sample?
A: Try using a lighter model or adjust the camera capture resolution.
Q: How to save the detection result images?
A: You can add image saving logic in the code, for example using cv2.imwrite() to save processed images.
Q: How to add new detection categories?
A: You need to modify the get_classes() function, add new category names, and retrain the model or use a model that supports the new categories.