Web Display Camera Sample
Introduction
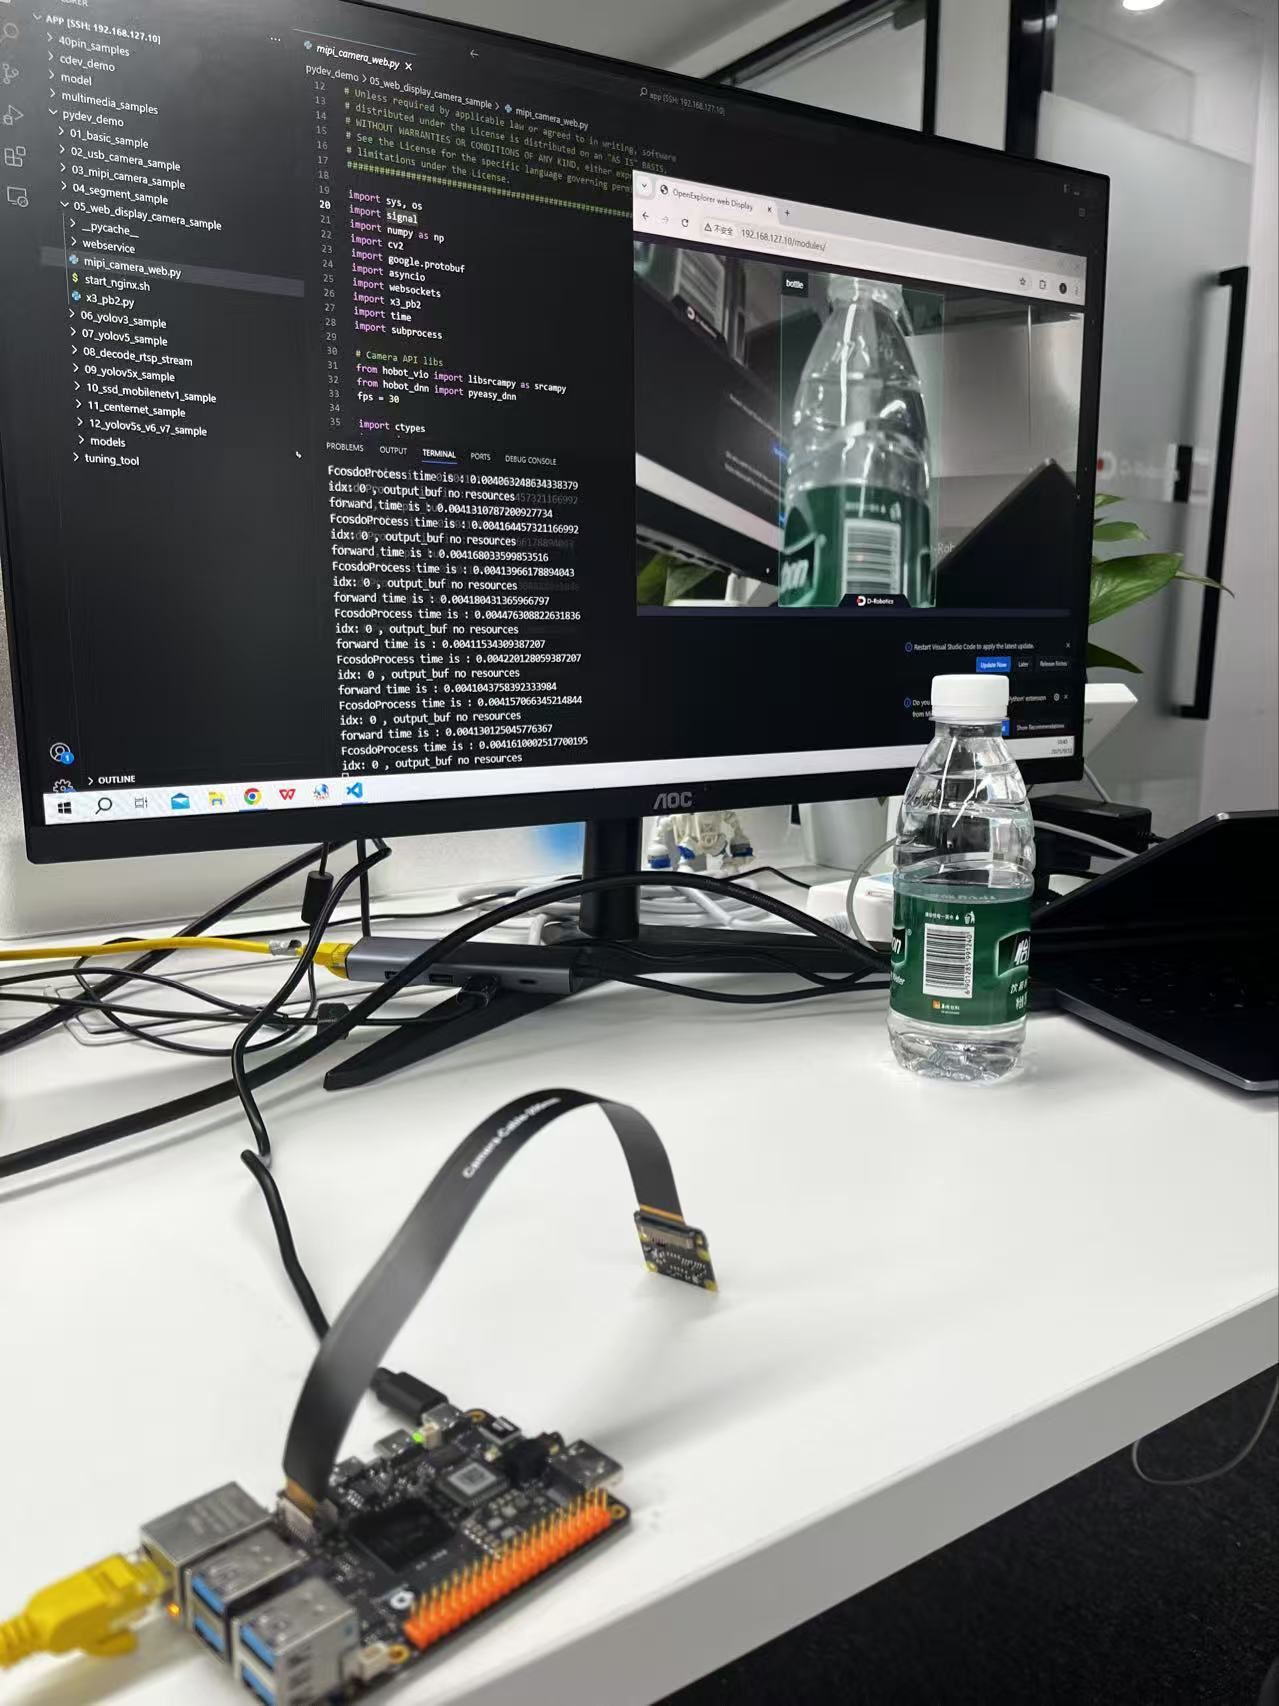
The Web display camera sample under /app/pydev_demo/05_web_display_camera_sample/ is a Python API example that streams MIPI camera video and detection results to a browser over a Web service. It combines MIPI capture, object detection, video encoding, and WebSocket delivery.
Demo
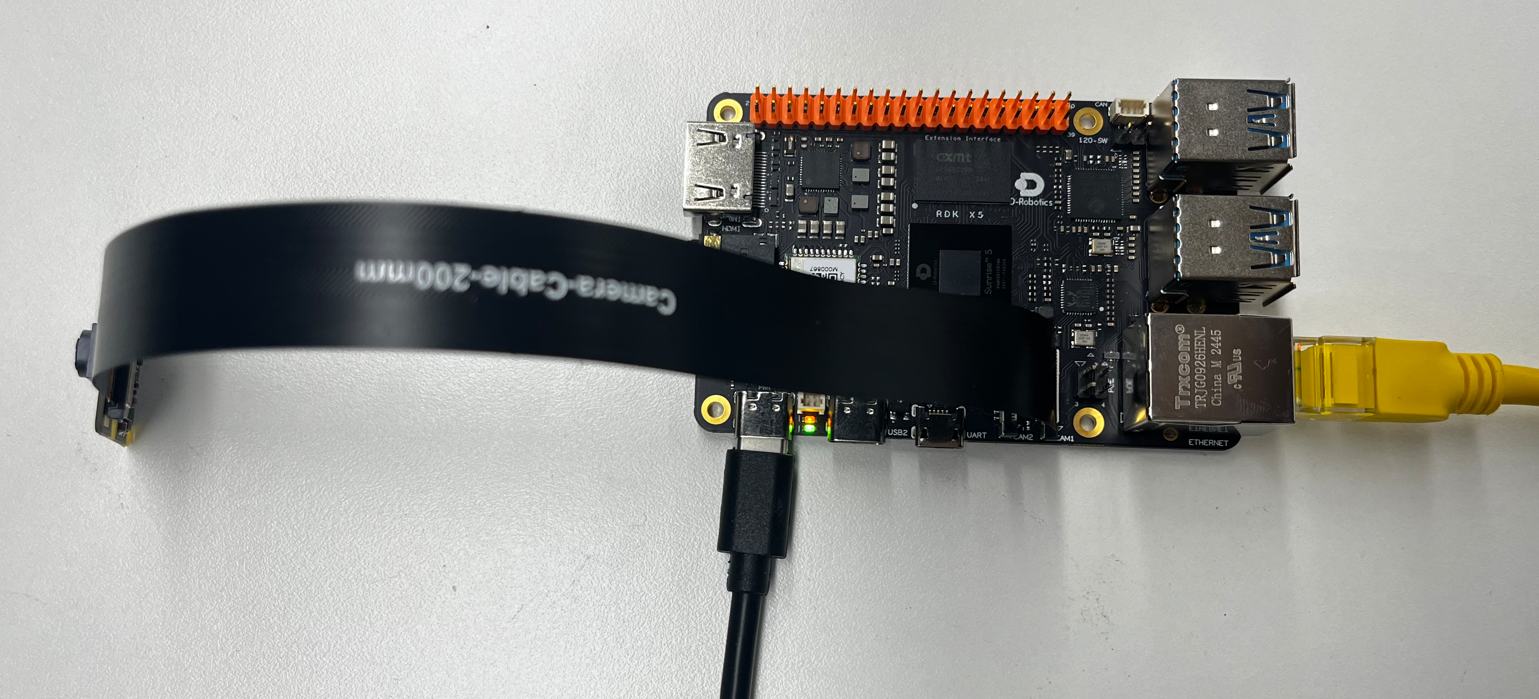
Hardware setup
Connections
- RDK board
- Official MIPI camera
- Ethernet
- Power
Quick start
Code location on device
root@ubuntu:/app/pydev_demo/05_web_display_camera_sample# tree
.
├── mipi_camera_web.py
├── start_nginx.sh
├── webservice
│ ��├── conf
│ │ ├── nginx.conf
│ │ └── ...
│ ├── html
│ │ ├── index.html
│ │ ├── assets
│ │ └── ...
│ ├── logs
│ └── sbin
│ └── nginx
└── x3_pb2.py
Build and run
Start Nginx, then run the Python script:
With an IMX477 sensor, set fps=50 in mipi_camera_web.py (around line 39).
# Start Nginx
./start_nginx.sh

# Run the Web camera sample
python3 mipi_camera_web.py
Sample output
A Web server starts; open the board IP in a browser (default example: http://192.168.127.10).

Click web Display in the page to see the live stream and detections (see Demo).
Details
Command-line options
No arguments required; MIPI camera and WebSocket are initialized automatically.
Software architecture
- MIPI capture with
srcampy.Camera() - FCOS detection on each frame
- JPEG encode with
srcampy.Encoder() - WebSocket server pushing frames and results
- Web UI (HTML/JS)
- Nginx for static files and proxy

API flow
cam.open_cam()enc.encode()models = pyeasy_dnn.load('../models/fcos_512x512_nv12.bin')websockets.serve(web_service, "0.0.0.0", 8080)- Loop: grab frame → detect → JPEG encode → WebSocket push

FAQ
Q: Port in use.
A: Check port 8080 with netstat -tlnp.
Q: Browser cannot open the stream.
A: Check network and firewall rules.
Q: High latency.
A: Lower resolution/FPS or use a lighter detector.
Q: Customize the Web UI.
A: Edit files under webservice/html/.
Q: Add classes.
A: Update get_classes() and use a compatible model.
Q: Save video.
A: Add recording with OpenCV VideoWriter, for example.