Flashing Steps on macOS Platform
Hardware Connection
Use a Type-C data cable to connect the USB port of your PC to the Type-C port of the development board.
Please ensure that the Type-C data cable is of high quality to guarantee the stability of the burning process.
- It should have a shielding layer.
- The shorter the length, the better.
- It should have high data transmission quality.
Installing Dependency Tools
Users on the macOS platform can install the tools using the following commands:
brew update
brew install android-platform-tools
brew install dfu-util
System Flashing
Full Image Flashing
DFU-Fastboot Flashing
- Currently, you need to set the SW3 switch to [Boot from onboard eMMC]; booting from an M.2 NVMe SSD is not supported at this time.
- The Xburn tool on Windows PC requires successful driver installation before use. Please ensure the driver is installed successfully.
Put the RDK S100 into DFU boot mode
- Set the SW1 switch to ↑ and turn off the power.
- Set the SW2 switch to ↑ to enter Download mode.
- Set the SW1 switch to ▽ and turn on the power.
- If the
DOWNLOADLED lights up, it has entered DFU mode; otherwise, pressK1to reset the system.
Flashing with Xburn
Configuration steps:
-
Select Product Model:
RDKS100 -
Connection Mode:
usb, Download Mode:DFU+Fastboot -
Storage Medium:
emmc, Firmware Type:secure -
Image Directory: Click browse and select the
productfolder containing the firmware.
-
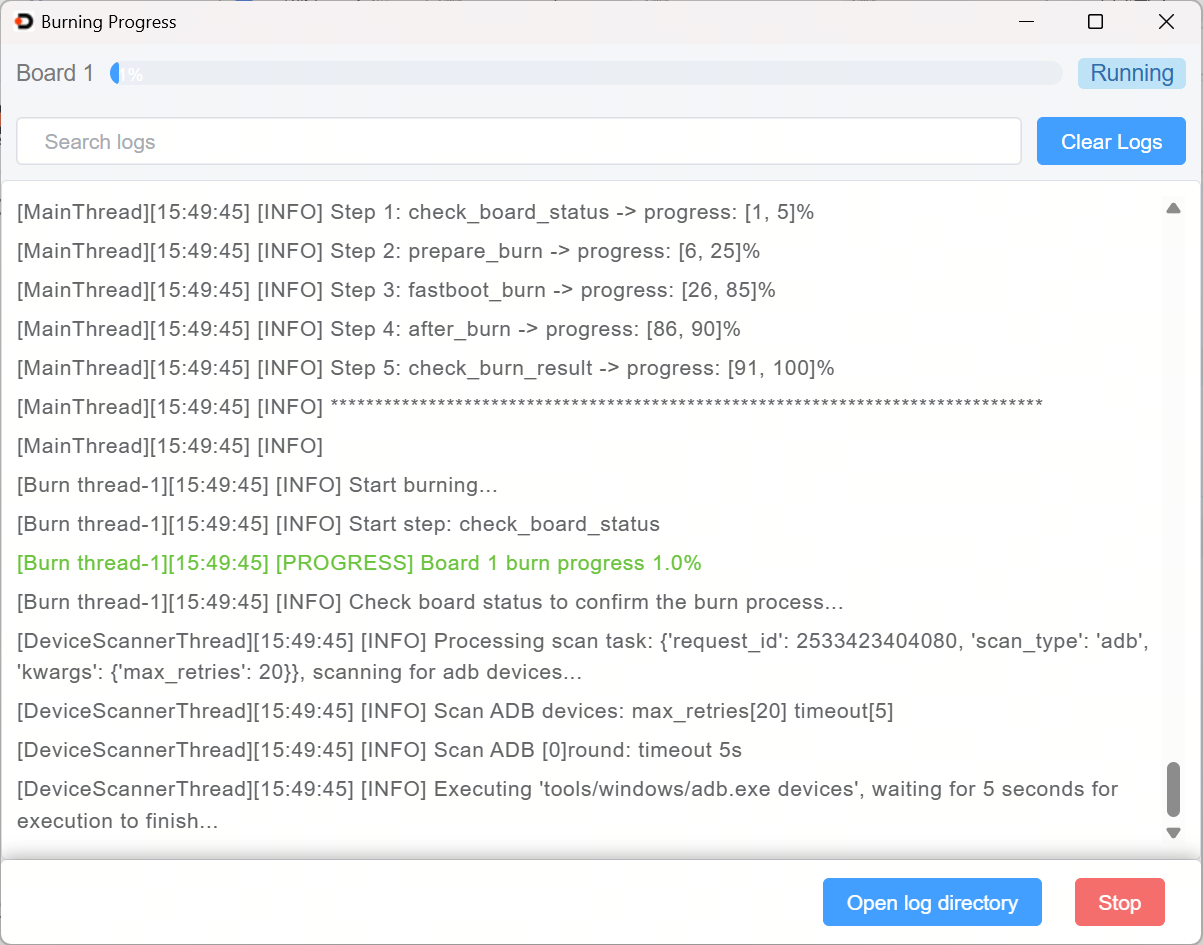
Click "Start Upgrade", power on the device, and wait for the upgrade to complete.
-
After the upgrade is complete, turn off the power, set the flash switch downward (to exit DFU mode), and then power on again.
Fastboot Flashing
- Fastboot uses the normal boot mode.
- Ensure the system U-boot starts normally and enters Fastboot.
Put the RDK S100 into Fastboot mode
There are two ways to enter Fastboot:
- Automatic entry into Fastboot: An ADB device is automatically generated after system startup. Xburn detects the ADB device and sends a command to the board to enter Fastboot.
- Manual entry into Fastboot: During board startup, enter uboot and type
fastboot 0to enter Fastboot.
Flashing with Xburn via Fastboot
Configuration steps:
-
Select Product Model:
RDKS100 -
Connection Mode:
usb, Download Mode:Fastboot -
Storage Medium:
emmc, Type:secure -
Image Directory: Click browse and select the
productfolder containing the firmware.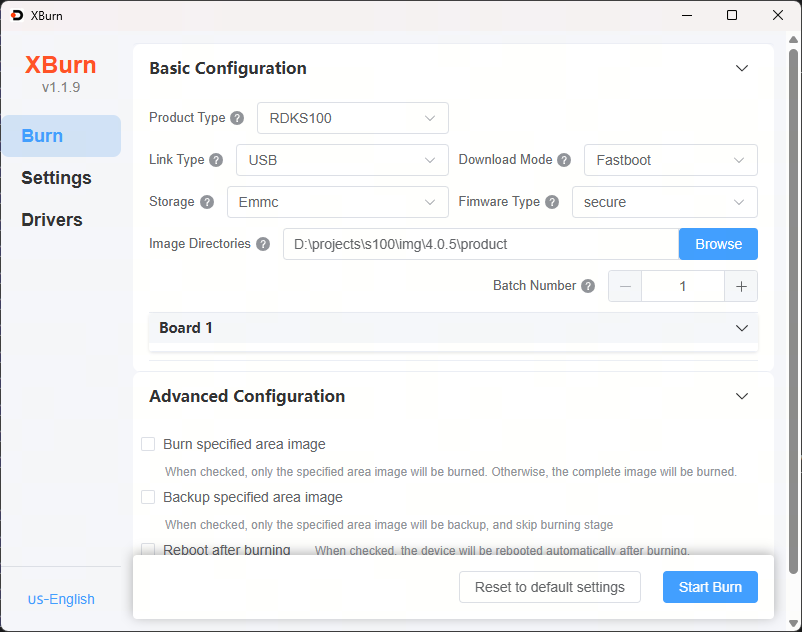
-
Click "Start Upgrade". The device will enter Fastboot mode; wait for the upgrade to complete.
-
After the upgrade is complete, power on again.
Flashing Specific Partitions
Partition Description
The RDK S100 supports flashing specific partitions via Xburn. The supported partitions are as follows:
| Partition | Storage Medium | Firmware Content | Image |
|---|---|---|---|
| miniboot_flash | Norflash | Basic boot image on Norflash, including images for HSM/MCU0, etc. | img_packages/disk/miniboot_flash.img |
| miniboot_emmc | eMMC | Basic boot image on eMMC, including images for BL31/Uboot, etc. | img_packages/disk/miniboot_emmc.img |
| emmc | eMMC | Complete eMMC image, already includes miniboot_emmc | img_packages/disk/emmc_disk.img |
Flashing Specific Partitions with Xburn
Example: Flashing only miniboot_flash and miniboot_emmc.
Configuration steps:
-
Select Product Model:
RDKS100 -
Connection Mode:
usb, Download Mode:DFU+Fastboot -
Storage Medium:
emmc, Type:secure -
Image Directory: Click browse and select the
productfolder containing the firmware. -
Advanced Configuration: Check
Flash specified area, then checkminiboot_flashandminiboot_emmc.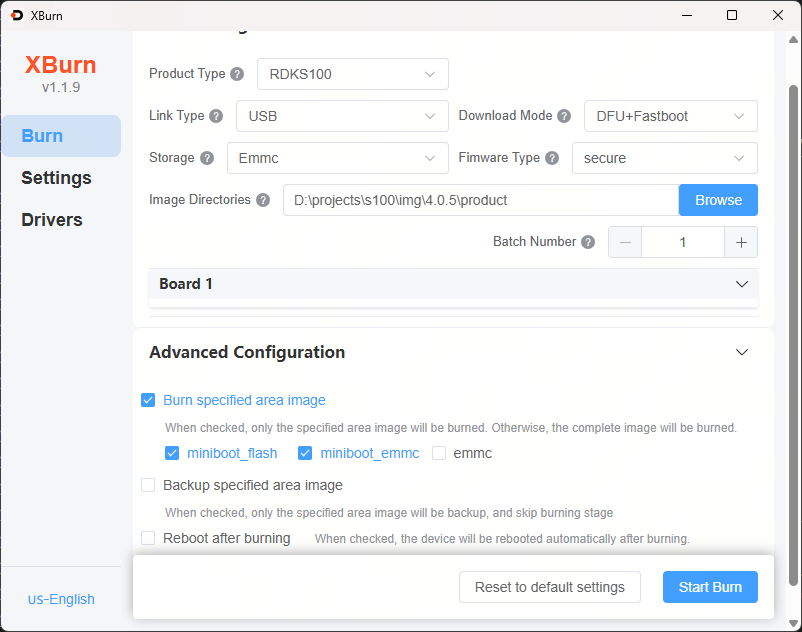
-
Click "Start Upgrade", power on the device, and wait for the operation to complete.
Backing Up Specific Partitions
Backup Partition Description
The RDK S100 supports backing up specific partitions via Xburn. The supported backup partitions are as follows:
| Partition | Storage Medium | Firmware Content | Backup Image Path |
|---|---|---|---|
| miniboot_flash | Norflash | Complete Norflash image | img_packages/disk/miniboot_flash_backup.img |
| emmc | eMMC | Complete eMMC image | img_packages/disk/emmc_disk_backup.img |
Backing Up Specific Partitions with Xburn
Take the specified backup miniboot_flash as an example.
Configuration steps:
-
Select Product Model:
RDKS100 -
Connection Mode:
usb, Download Mode:DFU+Fastboot -
Storage Medium:
emmc, Type:secure -
Image Directory: Click browse and select the
productfolder where the backup image should be saved. -
Advanced Configuration: Check
Backup specified area, then checkminiboot_flash.
-
Click "Start Upgrade", power on the device, and wait for the operation to complete.
-
After completion, navigate to the
img_packages/disk/folder to view the backup image fileminiboot_flash_backup.img.
- Backing up the entire storage medium data can take a long time. Please wait patiently for the backup to finish.
- The backup image format is
.img. When burning, you need to select a file in.simgformat; simply replace the.imgextension of the backup image file with.simg.
Booting the System
First, ensure the development board is powered off. Connect the development board to a monitor using an HDMI cable. Finally, power on the development board.
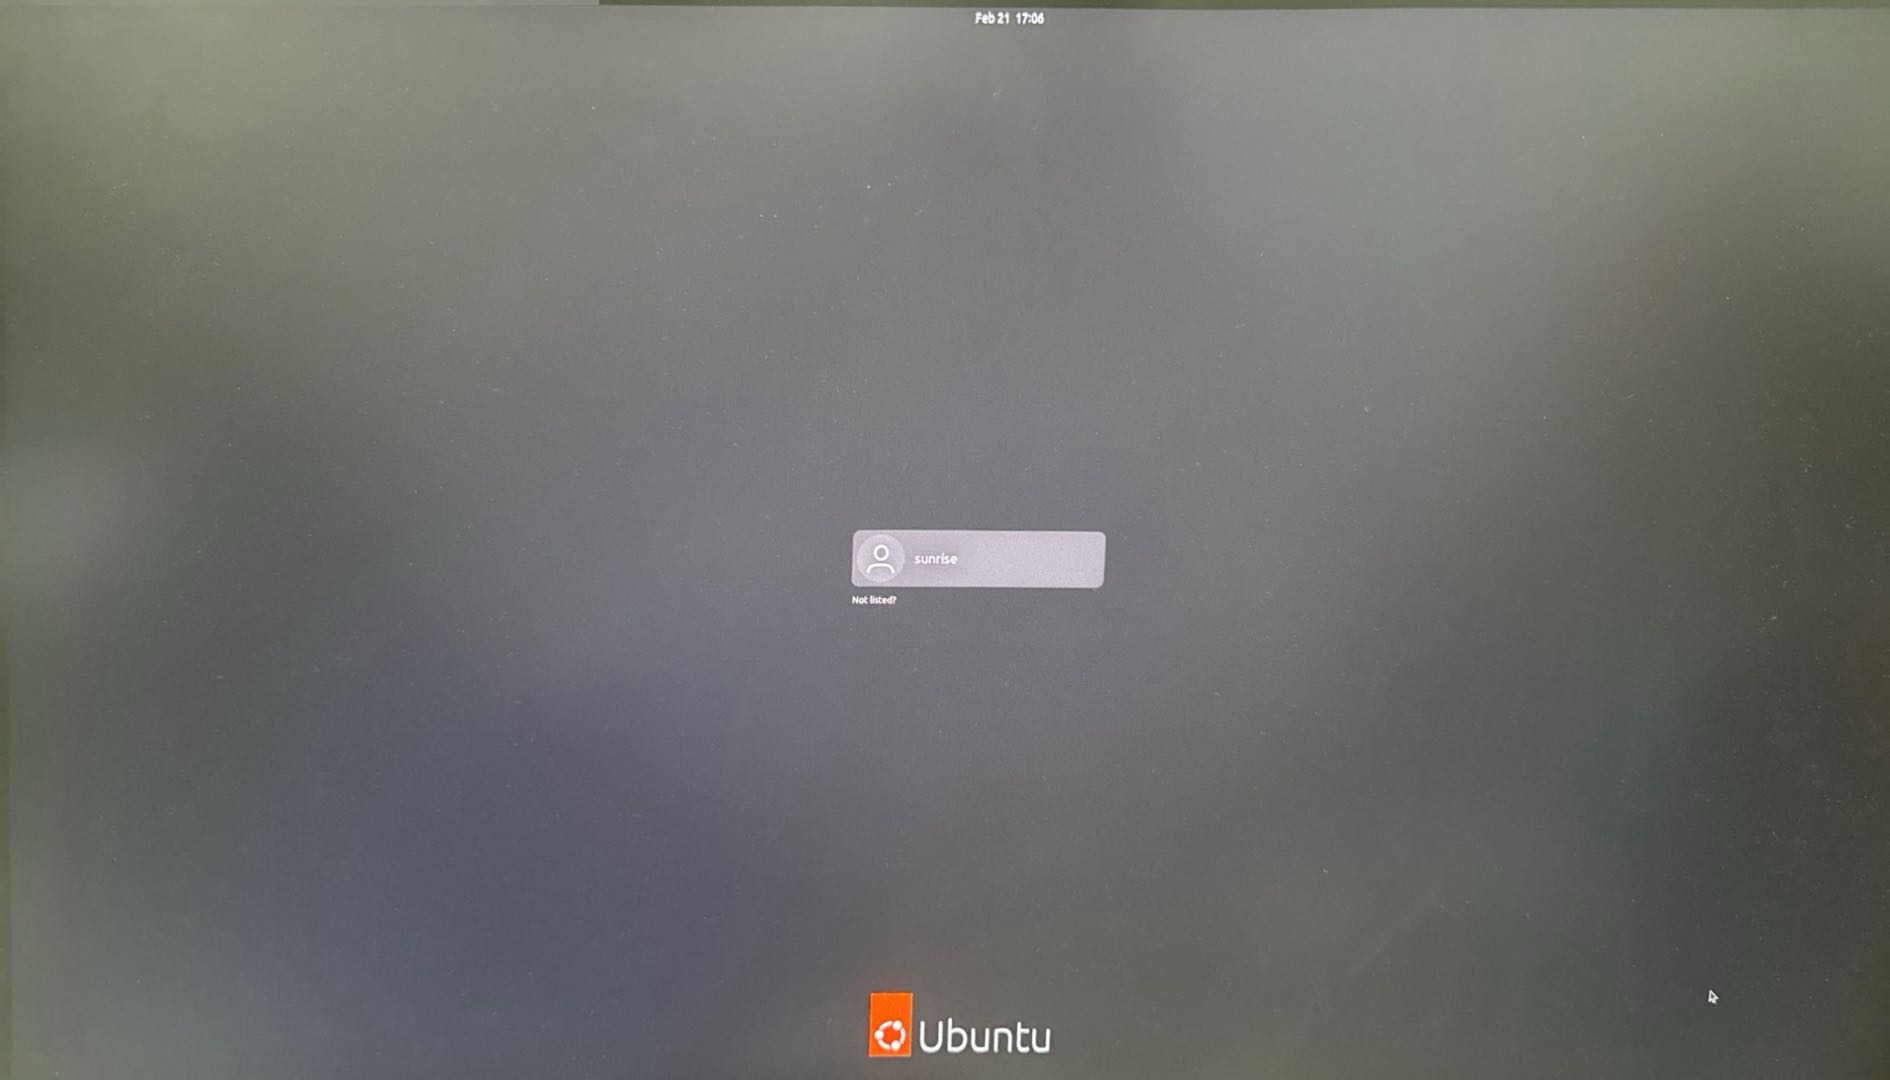
During the first system boot, default environment configuration will occur. This process takes about 45 seconds. After configuration, the Ubuntu system desktop will be displayed on the monitor.
- Green LED: Lights up when the hardware is powered on normally.
If the development board shows no display output for a long time (over 2 minutes) after powering on, it indicates a boot abnormality. You need to debug using a serial cable to check if the board is functioning correctly.
After the Ubuntu Desktop system finishes booting, the system desktop will be output to the monitor via the display interface, as shown below: