MobileNet_SSD
Feature Introduction
The MobileNet_SSD object detection algorithm example takes images as input, performs inference using the BPU, and publishes algorithm messages containing object categories and bounding boxes.
Mobilenet_SSD is a Caffe model obtained from (https://github.com/chuanqi305/MobileNet-SSD), trained on the VOC dataset. It supports detection of 20 object categories, including people, animals, fruits, vehicles, and more.
Code repository: (https://github.com/D-Robotics/hobot_dnn)
Application scenarios: MobileNet_SSD is an object detection algorithm based on MobileNet, offering advantages such as high speed and ease of deployment. It enables functionalities like object detection and waste recognition, and is primarily applied in fields such as autonomous driving and smart homes.
Face detection example: (https://github.com/bruceyang2012/Face-detection-with-mobilenet-ssd)
License plate detection example: (https://github.com/soonhahwang/Mobilenet-SSD-to-detect-Licence-Plate)
Supported Platforms
| Platform | Runtime Environment | Example Features |
|---|---|---|
| RDK X3, RDK X3 Module | Ubuntu 20.04 (Foxy), Ubuntu 22.04 (Humble) | · Launch MIPI/USB camera and display inference results via web browser · Use local image/video playback; rendered results saved locally |
| RDK X5, RDK X5 Module | Ubuntu 22.04 (Humble) | · Launch MIPI/USB camera and display inference results via web browser · Use local image/video playback; rendered results saved locally |
| X86 | Ubuntu 20.04 (Foxy) | · Use local image/video playback; rendered results saved locally |
Algorithm Information
| Model | Platform | Input Size | Inference FPS |
|---|---|---|---|
| ssd_mobilenet | X3 | 1x3x300x300 | 141.60 |
| ssd_mobilenet | X5 | 1x3x300x300 | 453.98 |
Prerequisites
RDK Platform
-
RDK has been flashed with Ubuntu 20.04 or Ubuntu 22.04 system image.
-
TogetheROS.Bot has been successfully installed on the RDK.
-
An MIPI or USB camera is installed on the RDK. If no camera is available, you can experience the algorithm by replaying local JPEG/PNG images or MP4, H.264, and H.265 video files.
-
Ensure your PC can access the RDK over the network.
X86 Platform
-
The X86 environment has been set up with Ubuntu 20.04 system image.
-
tros.b has been successfully installed on the X86 system.
Usage Guide
RDK Platform
Publishing Images Using MIPI Camera
The MobileNet_SSD object detection example subscribes to images published by the sensor package, performs inference, publishes algorithm messages, and renders both images and detection results in a web browser on the PC via the websocket package.
- Foxy
- Humble
# Configure tros.b environment
source /opt/tros/setup.bash
# Configure tros.b environment
source /opt/tros/humble/setup.bash
# Configure MIPI camera
export CAM_TYPE=mipi

# Launch the launch file
ros2 launch dnn_node_example dnn_node_example.launch.py dnn_example_config_file:=config/mobilenet_ssd_workconfig.json dnn_example_image_width:=480 dnn_example_image_height:=272
Publishing Images Using USB Camera
- Foxy
- Humble
# Configure tros.b environment
source /opt/tros/setup.bash
# Configure tros.b environment
source /opt/tros/humble/setup.bash
# Configure USB camera
export CAM_TYPE=usb

# Launch the launch file
ros2 launch dnn_node_example dnn_node_example.launch.py dnn_example_config_file:=config/mobilenet_ssd_workconfig.json dnn_example_image_width:=480 dnn_example_image_height:=272
Replaying Local Images
The MobileNet_SSD object detection example replays local JPEG/PNG images, performs inference, and saves the rendered result images to the current working directory.
- Foxy
- Humble
# Configure tros.b environment
source /opt/tros/setup.bash
# Configure tros.b environment
source /opt/tros/humble/setup.bash
# Launch the launch file
ros2 launch dnn_node_example dnn_node_example_feedback.launch.py dnn_example_config_file:=config/mobilenet_ssd_workconfig.json dnn_example_image:=config/target.jpg
X86 Platform
Replaying Local Images
The MobileNet_SSD object detection example replays local JPEG/PNG images, performs inference, and saves the rendered result images to the current working directory.
# Configure tros.b environment
source /opt/tros/setup.bash

# Launch the launch file
ros2 launch dnn_node_example dnn_node_example_feedback.launch.py dnn_example_config_file:=config/mobilenet_ssd_workconfig.json dnn_example_image:=config/target.jpg
Result Analysis
Using Camera to Publish Images
The terminal outputs the following logs during execution:
[example-3] [WARN] [1655095279.473675326] [example]: Create ai msg publisher with topic_name: hobot_dnn_detection
[example-3] [WARN] [1655095279.473789113] [example]: Create img hbmem_subscription with topic_name: /hbmem_img
[example-3] [WARN] [1655095280.697388819] [img_sub]: Sub img fps 31.16
[example-3] [WARN] [1655095280.710505278] [example]: Smart fps 31.50
[example-3] [WARN] [1655095281.697831409] [img_sub]: Sub img fps 30.00
[example-3] [WARN] [1655095281.743811574] [example]: Smart fps 30.01
[example-3] [WARN] [1655095282.730768103] [img_sub]: Sub img fps 30.04
[example-3] [WARN] [1655095282.744084511] [example]: Smart fps 30.00
The log indicates that the algorithm publishes inference results on the topic hobot_dnn_detection and subscribes to images on the topic /hbmem_img. Both the subscribed image stream and the inference output run at approximately 30 FPS.
Enter http://IP:8000 in your PC’s web browser to view the rendered images and detection results (replace "IP" with the RDK’s actual IP address):
Replaying Local Images
The terminal outputs the following logs during execution:
[example-1] [INFO] [1654930510.201326806] [example]: Output from image_name: config/target.jpg, frame_id: feedback, stamp: 0.0
[example-1] [INFO] [1654930510.201485092] [PostProcessBase]: outputs size: 12
[example-1] [INFO] [1654930510.201581047] [PostProcessBase]: out box size: 2
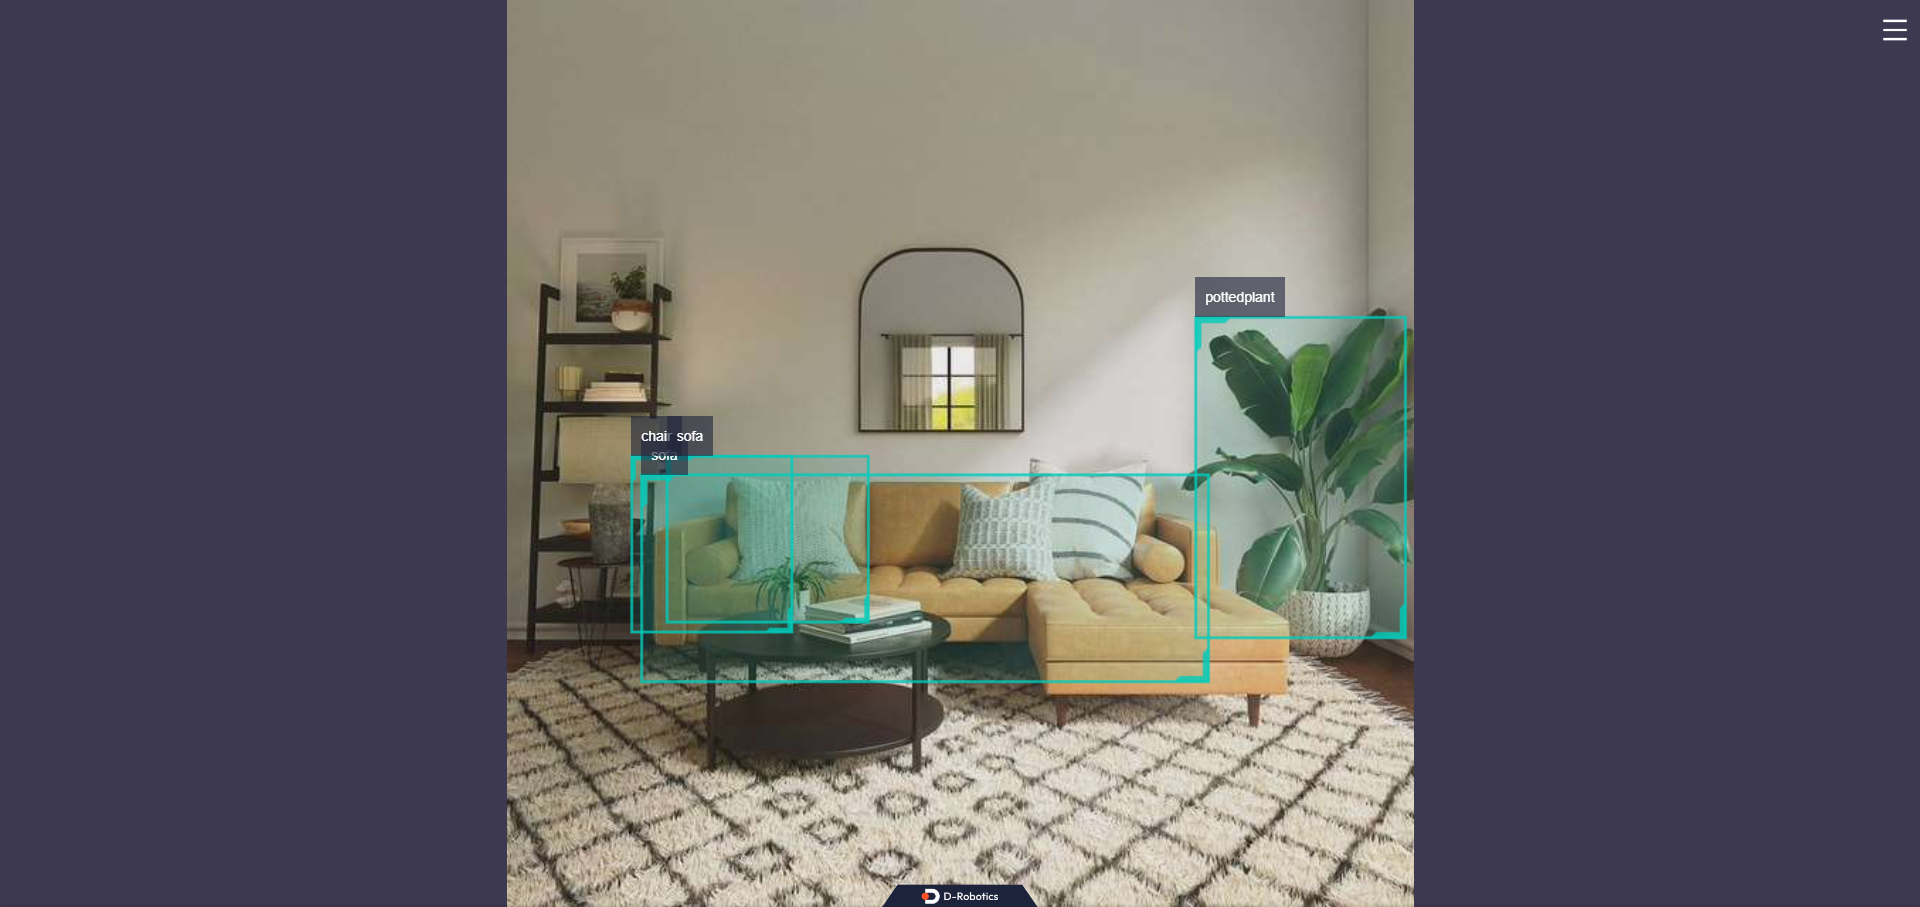
[example-1] [INFO] [1654930510.201672794] [PostProcessBase]: det rect: 227.27 101.873 299.219 223.667, det type: pottedplant, score:0.995207
[example-1] [INFO] [1654930510.201778415] [PostProcessBase]: det rect: 62.3792 155.731 221.676 223.179, det type: sofa, score:0.982129
The output log shows that the algorithm inferred two objects from the input image and output the bounding box coordinates (the coordinate order corresponds to the top-left x and y, and bottom-right x and y of each detection box) along with their categories. The rendered image is saved as "render_feedback_0_0.jpeg". Rendered image result:
