3.3.8 usb 摄像头示例介绍
示例简介
USB 摄像头示例包含两个位于 /app/pydev_demo/02_usb_camera_sample/ 中的 Python 接口开发代码示例,用于演示如何使用 USB 摄像头进行图像采集和处理。这两个示例分别展示了:
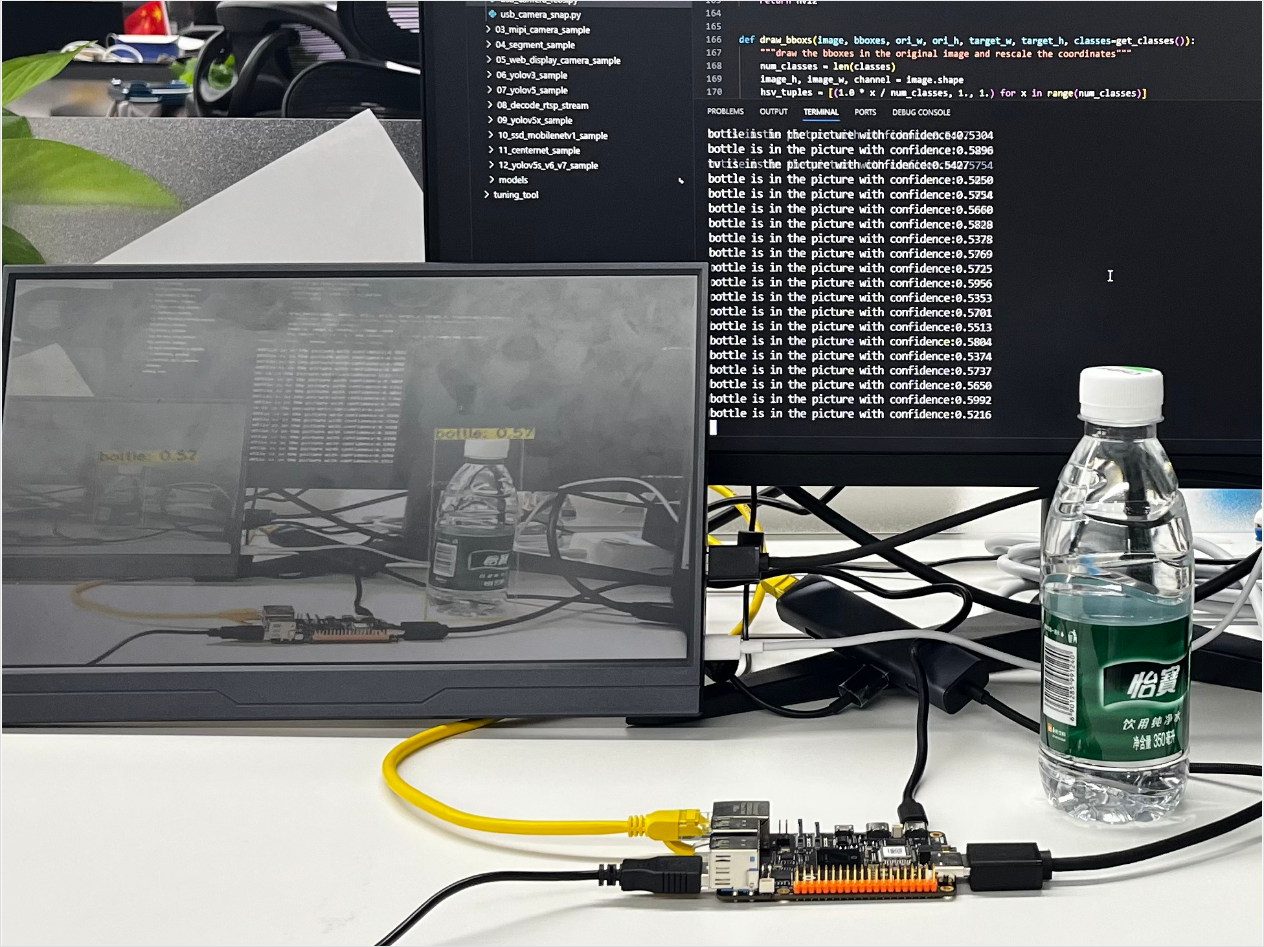
usb_camera_fcos.py:实时目标检测,使用 FCOS 模型对 USB 摄像头采集的视频流进行实时推理,并将检测结果通过 HDMI 显示。
usb_camera_snap.py:单张图像抓取,从 USB 摄像头捕获一张图片并保存为文件。
效果展示
usb_camera_fcos.py 效果
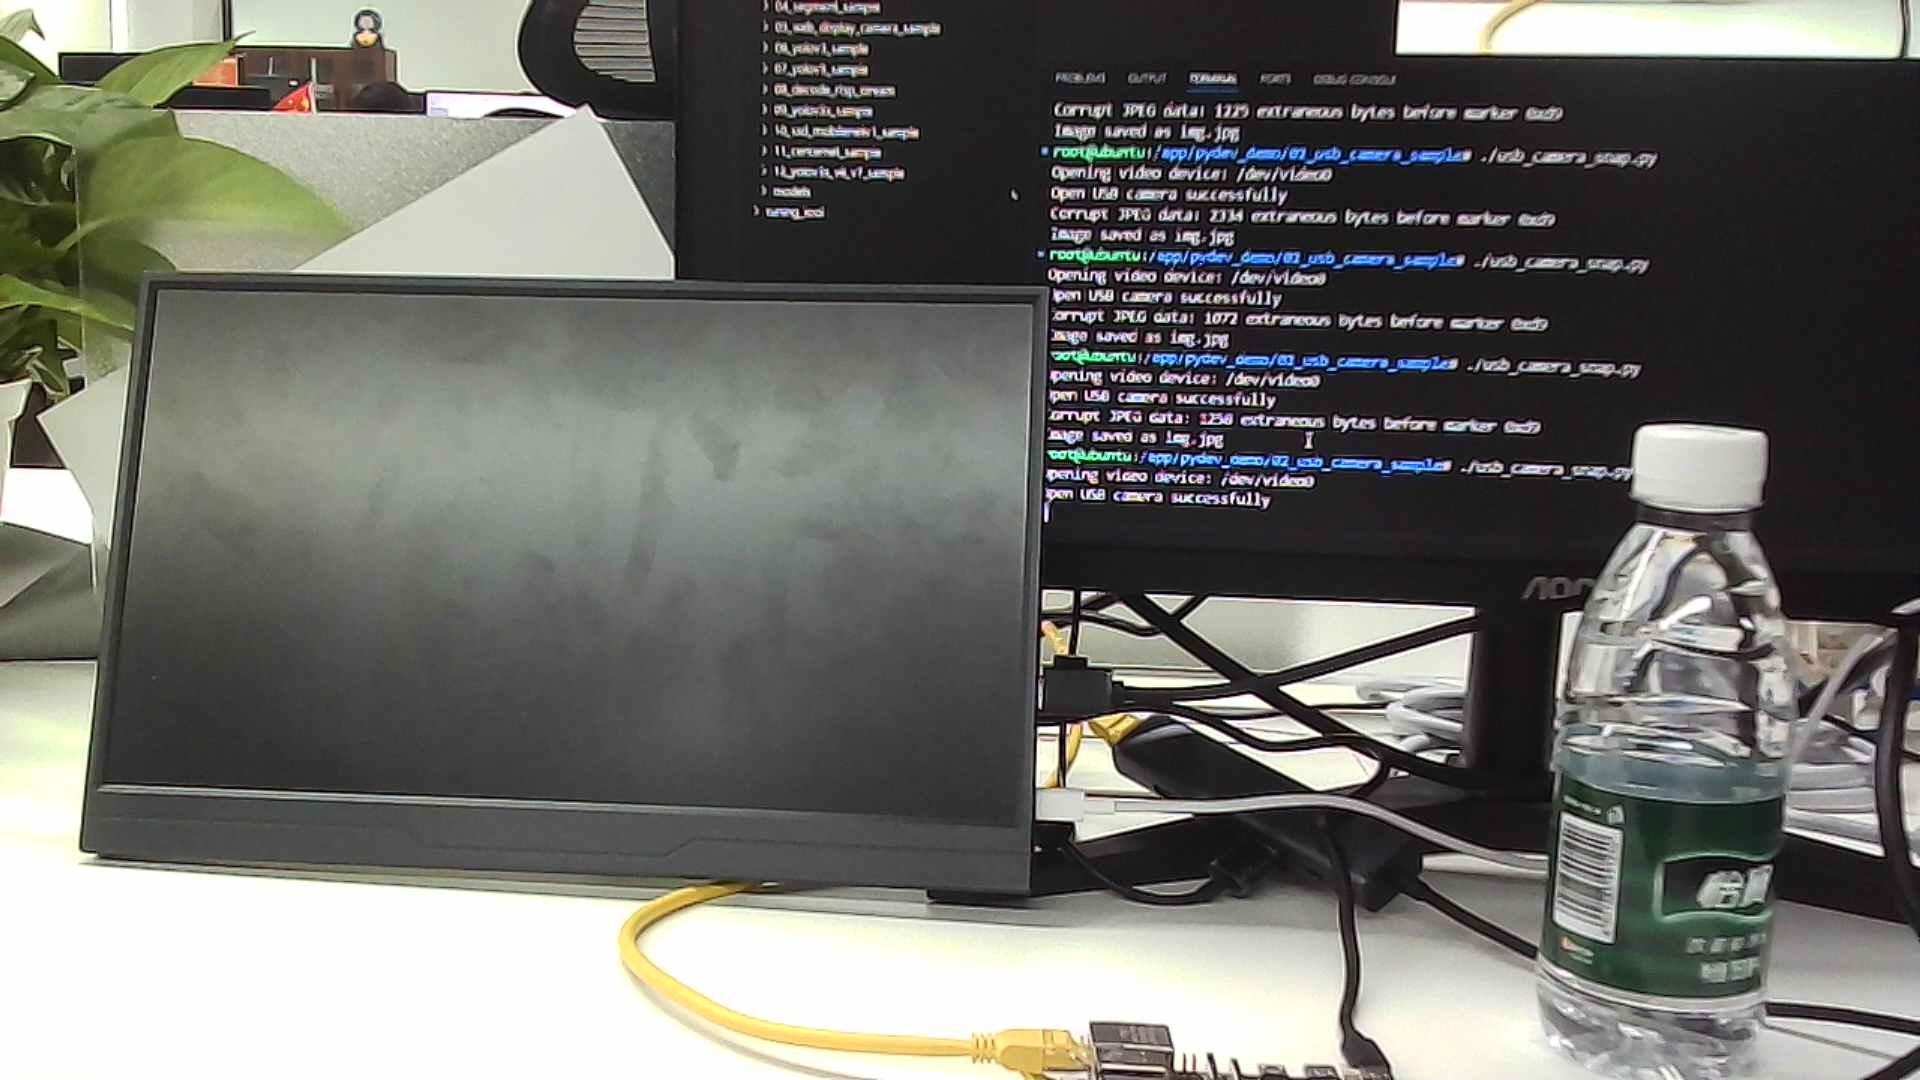
usb_camera_snap.py 效果
硬件准备
硬件连接
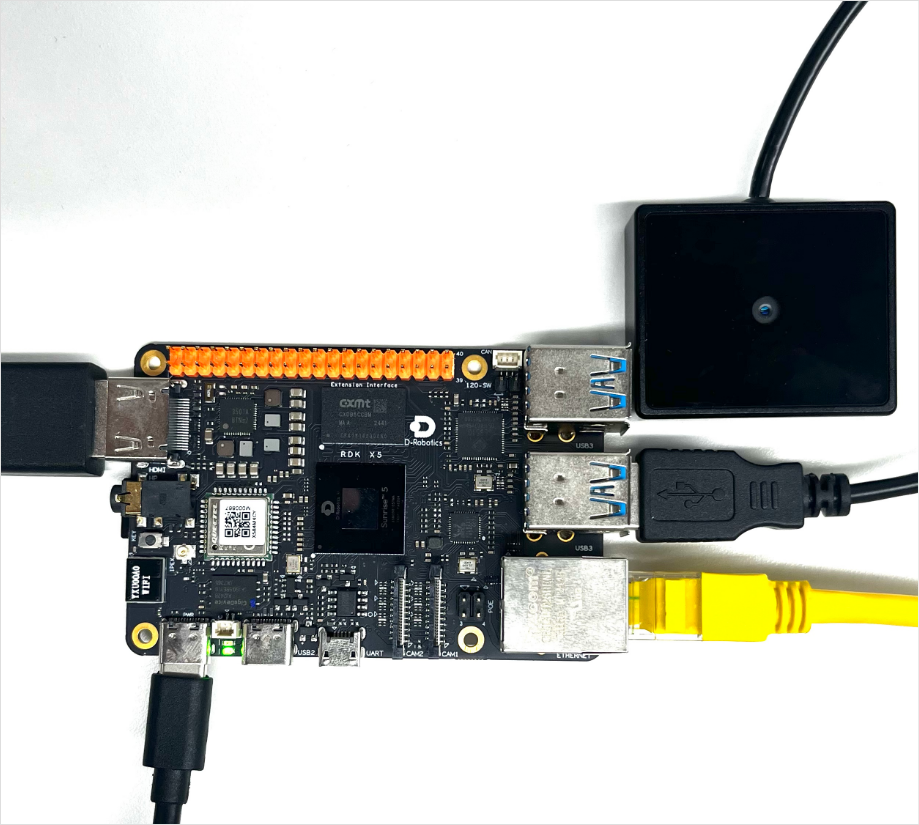
准备一个 RDK 开发板
连接 USB 摄像头到开发板的 USB 接口
通过 HDMI 线连接显示器和开发板(仅 usb_camera_fcos.py 需要显示)
连接电源线和网线
快速开始
代码以及板端位置
进入到 /app/pydev_demo/02_usb_camera_sample/ 位置,可以看到 USB 摄像头示例包含两个文件:
root@ubuntu:/app/pydev_demo/02_usb_camera_sample# tree
.
├── usb_camera_fcos.py
└── usb_camera_snap.py
编译以��及运行
Python 示例无需编译,直接运行即可。
运行 usb_camera_snap.py
python3 usb_camera_snap.py
运行 usb_camera_fcos.py
python3 usb_camera_fcos.py
执行效果
usb_camera_snap.py 执行效果:运行后,程序会自动查找可用的 USB 摄像头设备,捕获一帧图像并保存为当前目录下的 img.jpg 文件。
root@ubuntu:/app/pydev_demo/02_usb_camera_sample# ./usb_camera_snap.py
Opening video device: /dev/video0
Open USB camera successfully
Corrupt JPEG data: 766 extraneous bytes before marker 0xd9
Image saved as img.jpg
usb_camera_fcos.py 执行效果:运行后,程序会自动查找可用的 USB 摄像头设备,并开始实时目标检测。检测结果会通过 HDMI 显示,并控制台打印检测到的目标信息及 FPS。
root@ubuntu:/app/pydev_demo/02_usb_camera_sample# ./usb_camera_fcos.py
[BPU_PLAT]BPU Platform Version(1.3.6)!
[HBRT] set log level as 0. version = 3.15.55.0
[DNN] Runtime version = 1.24.5_(3.15.55 HBRT)
[A][DNN][packed_model.cpp:247][Model](2000-01-01,08:05:40.810.884) [HorizonRT] The model builder version = 1.23.5
[W][DNN]bpu_model_info.cpp:491][Version](2000-01-01,08:05:40.891.732) Model: fcos_efficientnetb0_512x512_nv12. Inconsistency between the hbrt library version 3.15.55.0 and the model build version 3.15.47.0 detected, in order to ensure correct model results, it is recommended to use compilation tools and the BPU SDK from the same OpenExplorer package.
tensor type: NV12
data type: uint8
layout: NCHW
shape: (1, 3, 512, 512)
15
tensor type: int32
data type: int32
layout: NHWC
shape: (1, 64, 64, 80)
tensor type: int32
data type: int32
layout: NHWC
shape: (1, 32, 32, 80)
tensor type: int32
data type: int32
layout: NHWC
shape: (1, 16, 16, 80)
tensor type: int32
data type: int32
layout: NHWC
shape: (1, 8, 8, 80)
tensor type: int32
data type: int32
layout: NHWC
shape: (1, 4, 4, 80)
tensor type: int32
data type: int32
layout: NHWC
shape: (1, 64, 64, 4)
tensor type: int32
data type: int32
layout: NHWC
shape: (1, 32, 32, 4)
tensor type: int32
data type: int32
layout: NHWC
shape: (1, 16, 16, 4)
tensor type: int32
data type: int32
layout: NHWC
shape: (1, 8, 8, 4)
tensor type: int32
data type: int32
layout: NHWC
shape: (1, 4, 4, 4)
tensor type: int32
data type: int32
layout: NCHW
shape: (1, 64, 64, 1)
tensor type: int32
data type: int32
layout: NCHW
shape: (1, 32, 32, 1)
tensor type: int32
data type: int32
layout: NCHW
shape: (1, 16, 16, 1)
tensor type: int32
data type: int32
layout: NCHW
shape: (1, 8, 8, 1)
tensor type: int32
data type: int32
layout: NCHW
shape: (1, 4, 4, 1)
Opening video device: /dev/video0
Open usb camera successfully
1920x1080
1280x800
1280x720
720x576
720x480
640x480
No suitable display method found.
Running without preview window
person is in the picture with confidence:0.5758
Frame#1 (1 fps) [2000-01-01 08:05:41]
person is in the picture with confidence:0.6214
person is in the picture with confidence:0.6050

...............
详细介绍
示例程序参数选项说明
两个示例均支持指定 USB 摄像头设备节点,如果不指定,则会自动查找第一个可用的 USB 摄像头。
- 指定设备节点运行:
python3 usb_camera_snap.py /dev/video8
python3 usb_camera_fcos.py /dev/video8
软件架构说明
这个示例包含了两个不同的功能 , 所以软件架构稍微有点差异,这里分开说明。
usb_camera_snap.py
-
摄像头发现:自动查找可用的 USB 摄像头设备。
-
摄像头配置:设置摄像头输出格式为 MJPEG,分辨率 1920x1080 。
-
图像捕获:读取一帧图像。
-
图像保存:将图像保存为 jpg 文件。

usb_camera_fcos.py
-
模型加载:加载 FCOS 目标检测模型。
-
摄像头发现与配置:同 usb_camera_snap.py,但分辨率设置为 640x480 。
-
显示初始化:初始化 HDMI 显示。
-
实时推理循环:
-
读取摄像头帧
-
预处理图像(缩放、颜色空间转换)
-
模型推理
-
后处理(解析检测结果)
-
绘制检测框并显示
-
计算并打印 FPS

API 流程说明
usb_camera_snap.py 这个示例没有使用到 SP API ,使用的基本是 opencv 的 API 。

usb_camera_fcos.py 这个示例除了使用 opencv 的接口以外,还使用了显示器资源的接口以及 sp_dev 中对模型操作的接口。

FAQ
Q: 运行示例时提示 "No USB camera found" 怎么办?
A: 请检查 USB 摄像头是否正确连接,并确保设备节点(如 /dev/video8 )存在。可以尝试使用 v4l2-ctl --list-devices 命令查看可用的摄像头设备。
Q: usb_camera_fcos.py 运行时 HDMI 显示不正常怎么办?
A: 请检查 HDMI 连接,并确保显示服务已停止(如使用 systemctl stop lightdm)。
Q: 如何调整 usb_camera_fcos.py 的检测阈值?
A: 在代码中修改 fcos_postprocess_info.score_threshold 的值,例如改为 0.5 。
Q: 如何修改 usb_camera_snap.py 的保存路径?
A: 修改代码中的 cv2.imwrite 参数,指定完整路径,如 /home/root/image.jpg。
Q: 运行 usb_camera_fcos.py 时帧率很低怎么办?
A: 可以尝试降低摄像头分辨率,或将模型换成更轻量的版本。