FCOS
功能介绍
FCOS 目标检测算法示例使用图片作为输入,利用 BPU 进行算法推理,发布包含目标类别和检测框的智能 msg。
FCOS 是 D-Robotics 开源的 Onnx 模型,使用COCO 数据集进行训练,支持的目标检测类型包括人、动物、水果、交通工具等共 80 种类型。
代码仓库: (https://github.com/D-Robotics/hobot_dnn)
应用场景:FCOS 发布于 2019 年,是一款单阶段的目标检测算法,可实现行人检测、车辆检测等功能,主要应用于自动驾驶、智能家居等领域。
多光谱的目标检测案例: (https://github.com/hdjsjyl/Multispectral-FCOS)
支持平台
| 平台 | 运行方式 | 示例功能 |
|---|---|---|
| RDK X3, RDK X3 Module | Ubuntu 20.04 (Foxy), Ubuntu 22.04 (Humble) | · 启动 MIPI/USB 摄像头,并通过 web 展示推理渲染结果 · 使用本地回灌,渲染结果保存在本地 |
| RDK X5, RDK X5 Module | Ubuntu 22.04 (Humble) | · 启动 MIPI/USB 摄像头,并通过 web 展示推理渲染结果 · 使用本地回灌,渲染结果保存在本地 |
算法信息
| 模型 | 平台 | 输入尺寸 | 推理帧率(fps) |
|---|---|---|---|
| fcos | X3 | 1x3x512x512 | 74.91 |
| 模型 | 平台 | 输入尺寸 | 推理帧率(fps) |
|---|---|---|---|
| fcos | X5 | 1x3x512x512 | 258.92 |
准备工作
RDK 平台
-
RDK 已烧录好 Ubuntu 系统镜像。
-
RDK 已成功安装 TogetheROS.Bot。
-
RDK 已安装 MIPI 或者 USB 摄像头,无摄像头的情况下通过回灌本地 JPEG/PNG 格式图片或者 MP4、H.264 和 H.265 的视频方式体验算法效果。
-
确认 PC 机能够通过网络访问 RDK。
使用介绍
RDK 平台
使用 MIPI 摄像头发布图片
FCOS 目标检测算法示例订阅 sensor package 发布的图片,经过推理后发布算法 msg,通过 websocket package 实现在 PC 端浏览器上渲染显示发布的图片和对应的算法结果。
- Foxy
- Humble
# 配置tros.b环境
source /opt/tros/setup.bash
# 配置tros.b环境
source /opt/tros/humble/setup.bash
# 配置MIPI摄像头
export CAM_TYPE=mipi

# 启动launch文件
ros2 launch dnn_node_example dnn_node_example.launch.py dnn_example_config_file:=config/fcosworkconfig.json dnn_example_image_width:=480 dnn_example_image_height:=272
使用 USB 摄像头发布图片
- Foxy
- Humble
# 配置tros.b环境
source /opt/tros/setup.bash
# 配置tros.b环境
source /opt/tros/humble/setup.bash
# 配置USB摄像头
export CAM_TYPE=usb

# 启动launch文件
ros2 launch dnn_node_example dnn_node_example.launch.py dnn_example_config_file:=config/fcosworkconfig.json dnn_example_image_width:=480 dnn_example_image_height:=272
使用本地图片回灌
FCOS 目标检测算法示例使用本地 JPEG/PNG 格式图片回灌,经过推理后将算法结果渲染后的图片存储在运行路径下。
- Foxy
- Humble
# 配置tros.b环境
source /opt/tros/setup.bash
# 配置tros.b环境
source /opt/tros/humble/setup.bash
# 启动launch文件
ros2 launch dnn_node_example dnn_node_example_feedback.launch.py dnn_example_config_file:=config/fcosworkconfig.json dnn_example_image:=config/target.jpg
结果分析
使用摄像头发布图片
在运行终端输出如下信息:
[example-3] [WARN] [1655092908.847609539] [example]: Create ai msg publisher with topic_name: hobot_dnn_detection
[example-3] [WARN] [1655092908.849393011] [example]: Create img hbmem_subscription with topic_name: /hbmem_img
[example-3] [WARN] [1655092543.834432739] [img_sub]: Sub img fps 31.16
[example-3] [WARN] [1655092543.864126080] [example]: Smart fps 31.56
[example-3] [WARN] [1655092544.867603759] [img_sub]: Sub img fps 30.01
[example-3] [WARN] [1655092544.899715339] [example]: Smart fps 29.95
[example-3] [WARN] [1655092545.900991853] [img_sub]: Sub img fps 30.01
[example-3] [WARN] [1655092545.931518037] [example]: Smart fps 30.07
[example-3] [WARN] [1655092546.901658559] [img_sub]: Sub img fps 30.00
[example-3] [WARN] [1655092546.938970895] [example]: Smart fps 29.79
[example-3] [WARN] [1655092547.934894494] [img_sub]: Sub img fps 30.01
[example-3] [WARN] [1655092547.973566486] [example]: Smart fps 29.98
[example-3] [WARN] [1655092548.967549745] [img_sub]: Sub img fps 30.10
[example-3] [WARN] [1655092548.997125216] [example]: Smart fps 30.30
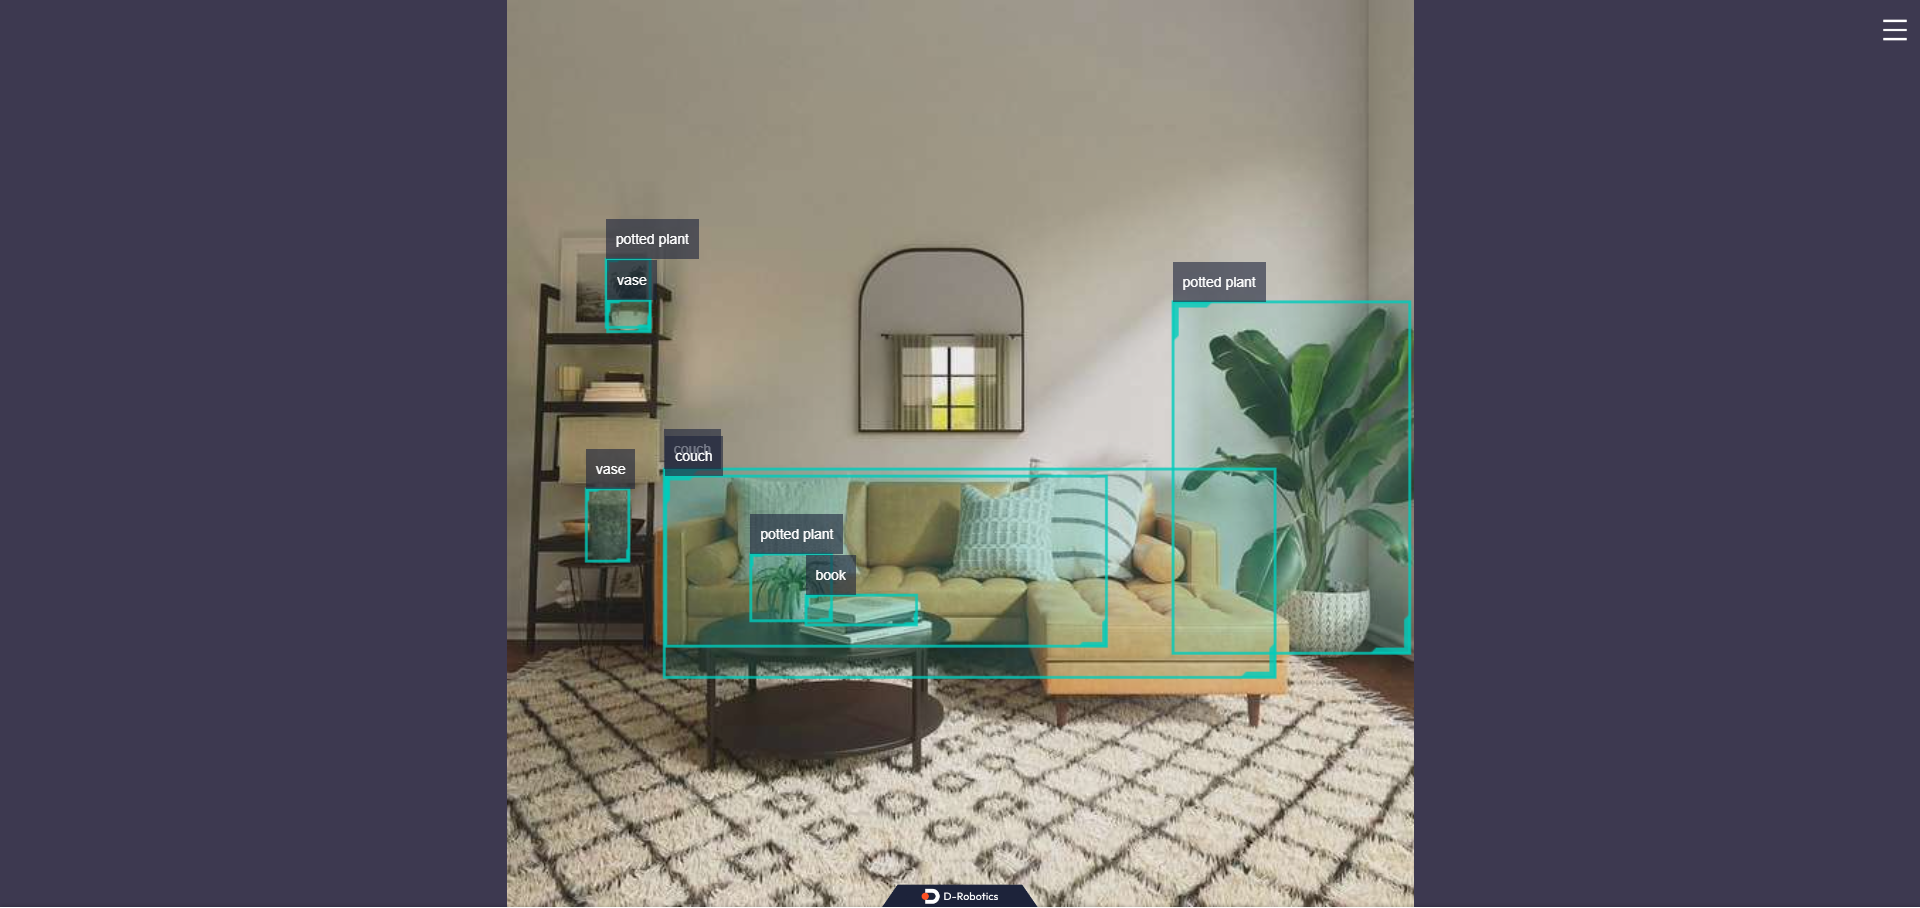
输出 log 显示,发布算法推理结果的 topic 为 hobot_dnn_detection ,订阅图片的 topic 为 /hbmem_img ,订阅到的图片和算法推理输出帧率约为 30fps。
在 PC 端的浏览器输入 http://IP:8000 即可查看图像和算法渲染效果(IP 为 RDK 的 IP 地址):
使用本地图片回灌
在运行终端输出如下信息:
[example-1] [INFO] [1654766336.839353395] [PostProcessBase]: out box size: 6
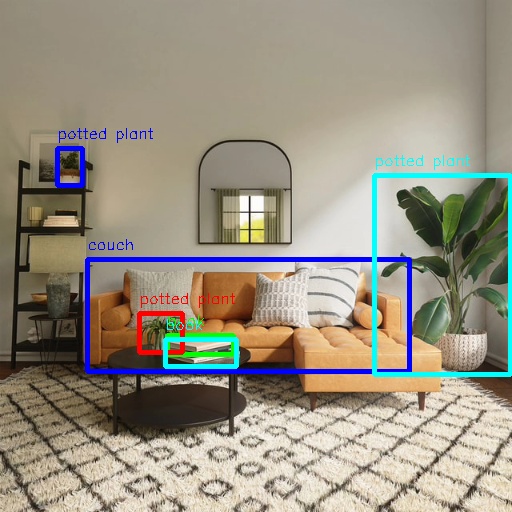
[example-1] [INFO] [1654766336.839427767] [PostProcessBase]: det rect: 87.2364 259.123 409.917 371.59, det type: couch, score:0.782941
[example-1] [INFO] [1654766336.839523764] [PostProcessBase]: det rect: 374.212 175.732 510.993 375.211, det type: potted plant, score:0.719925
[example-1] [INFO] [1654766336.839597637] [PostProcessBase]: det rect: 167.183 335.857 234.13 355.308, det type: book, score:0.548071
[example-1] [INFO] [1654766336.839671426] [PostProcessBase]: det rect: 139.87 313.279 183.4 352.292, det type: potted plant, score:0.542984
[example-1] [INFO] [1654766336.839738966] [PostProcessBase]: det rect: 57.9695 148.59 83.5923 186.552, det type: potted plant, score:0.502935
[example-1] [INFO] [1654766336.839823755] [PostProcessBase]: det rect: 165.691 339.25 237.475 366.896, det type: book, score:0.500648
输出 log 显示,算法使用输入的图片推理出 6 个目标,并输出了目标检测框坐标(输出的坐标顺序分别是人体框的左上的 x 和 y 坐标,和右下的 x 和 y 坐标)和类别。存储的渲染图片文件名为 render_feedback_0_0.jpeg,渲染图片效果: