2.1 Network & Bluetooth Configuration
This section mainly introduces the methods for modifying the wired and wireless network configurations of the development board.
Wired Network: RDK X5(>= 3.3.0)RDK X3(>= 3.0.2)
Video: https://www.youtube.com/watch?v=omaAU6sab2A&list=PLSxjn4YS2IuFUWcLGj2_uuCfLYnNYw6Ld&index=8
The default wired network configuration of the development board uses static IP configuration, and the initial IP address is 192.168.127.10. Users can switch between static and DHCP modes by the following methods.
Modifying Static IP Configuration
The development board's static network configuration is saved in the /etc/network/interfaces file. By modifying the address, netmask, gateway, and other fields, the static IP configuration can be modified. metric is the network priority configuration, setting it to 700 is to lower the priority of the wired network. When both wired and wireless networks are enabled, the wireless network will be prioritized. For example:
sudo vim /etc/network/interfaces
# interfaces(5) file used by ifup(8) and ifdown(8)
# Include files from /etc/network/interfaces.d:
source-directory /etc/network/interfaces.d
auto eth0
iface eth0 inet static
    address 192.168.127.10
    netmask 255.255.255.0
    gateway 192.168.1.1
    metric 700
After the modification is completed, enter the command sudo restart_network on the command line to make the configuration take effect.
Modifying DHCP Configuration
DHCP (Dynamic Host Configuration Protocol) is usually applied in local area network environments. Its main function is centralized management and allocation of IP addresses, allowing hosts in the network environment to dynamically obtain IP addresses, gateway addresses, DNS server addresses, and other information, thereby improving the utilization of addresses.
The development board's DHCP network configuration is saved in the /etc/network/interfaces file. By modifying the relevant configuration of eth0, the DHCP mode can be modified. For example:
sudo vim /etc/network/interfaces
source-directory /etc/network/interfaces.d
auto lo
iface lo inet loopback
auto eth0
iface eth0 inet dhcp
metric 700
After modifying, enter the sudo restart_network command in the command line to make the configuration take effect.
Modify MAC address configuration
If you need to modify the default MAC address of the development board, you can add pre-up configuration information in the /etc/network/interfaces file to specify the MAC address you need, for example:
sudo vim /etc/network/interfaces
# interfaces(5) file used by ifup(8) and ifdown(8)
# Include files from /etc/network/interfaces.d:
source-directory /etc/network/interfaces.d
auto eth0
iface eth0 inet static
    address 192.168.1.10
    netmask 255.255.255.0
    gateway 192.168.1.1
    pre-up ifconfig eth0 hw ether 00:11:22:9f:51:27
After modifying, reboot to make the configuration take effect.
Wireless Network
Video: https://www.youtube.com/watch?v=KrlTudL0_JE&list=PLSxjn4YS2IuFUWcLGj2_uuCfLYnNYw6Ld&index=7
The development board integrates a 2.4GHz wireless WiFi module, which supports Soft AP and Station modes, and runs in Station mode by default. The following introduces how to use the two modes.
Station Mode
In Station mode, the development board as a client and accesses the router's wireless hotspot for internet connection.
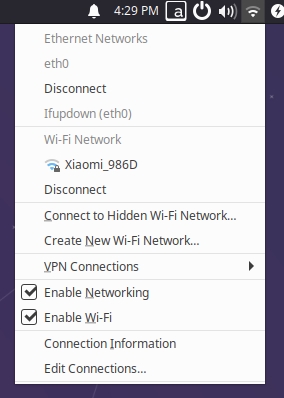
- For users of Ubuntu Desktop version, you can click on the Wi-Fi icon in the upper right corner of the desktop, select the corresponding hotspot, and enter the password to complete the network configuration, as shown in the figure below:
- For users of Ubuntu Server version, you can complete the wireless network configuration through the command line, following these steps:
-
Use the
sudo nmcli device wifi rescancommand to scan for hotspots. If you get the following message, it means scanning is too frequent and you need to try again later:root@ubuntu:~# sudo nmcli device wifi rescan
Error: Scanning not allowed immediately following previous scan. -
Use the
sudo nmcli device wifi listcommand to list the scanned hotspots. -
Use the
sudo wifi_connect "SSID" "PASSWD"command to connect to the hotspot. If you get the following message, it means the network connection is successful:root@ubuntu:~# sudo wifi_connect "WiFi-Test" "12345678"
Device 'wlan0' successfully activated with 'd7468833-4195-45aa-aa33-3d43da86e1a7'.
If you receive the following message after connecting to the hotspot, it means the hotspot is not found. You can execute the sudo nmcli device wifi rescan command to rescan and reconnect.
root@ubuntu:~# sudo wifi_connect "WiFi-Test" "12345678"
Error: No network with SSID 'WiFi-Test' found.
Soft AP Mode
By default, the development board's wireless network runs in Station mode. To use the Soft AP mode, please follow the steps below for configuration.
-
Install
hostapdandisc-dhcp-serversudo apt update
sudo apt install hostapd
sudo apt install isc-dhcp-server -
Run the command
sudo vim /etc/hostapd.confto configure thehostapd.conffile, focusing on the following fields:interface=wlan0 # The network card used as an AP hotspot
ssid=Sunrise # WiFi name
wpa=2 # 0 for WPA, 2 for WPA2, usually 2
wpa_key_mgmt=WPA-PSK # Encryption algorithm, usually WPA-PSK
wpa_passphrase=12345678 # Password
wpa_pairwise=CCMP # Encryption protocol, usually CCMP- For an open hotspot configuration, add the following content to the
hostapd.conffile:
interface=wlan0
driver=nl80211
ctrl_interface=/var/run/hostapd
ssid=Sunrise
channel=6
ieee80211n=1
hw_mode=g
ignore_broadcast_ssid=0- For a hotspot with a password, add the following content to the
hostapd.conffile:
interface=wlan0
driver=nl80211
ctrl_interface=/var/run/hostapd
ssid=Sunrise
channel=6
ieee80211n=1
hw_mode=g
ignore_broadcast_ssid=0
wpa=2
wpa_key_mgmt=WPA-PSK
rsn_pairwise=CCMP
wpa_passphrase=12345678 - For an open hotspot configuration, add the following content to the
-
The RDK X5 can be configured as a 5G hotspot. Please modify the
hw_modeandchannelfields in the hostapd.conf file:channel=36
hw_mode=a
-
Configure the
isc-dhcp-serverfile as follows:- Execute
sudo vim /etc/default/isc-dhcp-serverto modify theisc-dhcp-serverfile and add the following definition for the network interface:
INTERFACESv4="wlan0"- Execute
sudo vim /etc/dhcp/dhcpd.confto modify thedhcpd.conffile and uncomment the following fields:
authoritative;- Then, add the following configuration to the end of the
/etc/dhcp/dhcpd.conffile:
subnet 10.5.5.0 netmask 255.255.255.0 { #network and subnet mask
range 10.5.5.100 10.5.5.254;#IP range available
option subnet-mask 255.255.255.0; #subnet mask
option routers 10.5.5.1;#default gateway
option broadcast-address 10.5.5.31;#broadcast address
default-lease-time 600;#default lease time in seconds
max-lease-time 7200;#maximum lease time in seconds
} - Execute
-
Stop the
wpa_supplicantservice and restartwlan0systemctl mask wpa_supplicant
systemctl stop wpa_supplicant
ip addr flush dev wlan0
sleep 0.5
ifconfig wlan0 down
sleep 1
ifconfig wlan0 up -
Start the
hostapdservice as follows:- Execute the command
sudo hostapd -B /etc/hostapd.conf
root@ubuntu:~# sudo hostapd -B /etc/hostapd.conf
Configuration file: /etc/hostapd.conf
Using interface wlan0 with hwaddr 08:e9:f6:af:18:26 and ssid "sunrise"
wlan0: interface state UNINITIALIZED->ENABLED
wlan0: AP-ENABLED- Configure the IP and subnet of wireless interface
wlan0using theifconfigcommand, make sure it matches the configuration in the third step
sudo ifconfig wlan0 10.5.5.1 netmask 255.255.255.0- Finally, start the
dhcpserver. Clients connecting to the hotspot will be assigned an IP address from10.5.5.100to10.5.5.255
sudo ifconfig wlan0 10.5.5.1 netmask 255.255.255.0
sudo systemctl start isc-dhcp-server
sudo systemctl enable isc-dhcp-server - Execute the command
-
Connect to the hotspot on the development board, for example,
sunrise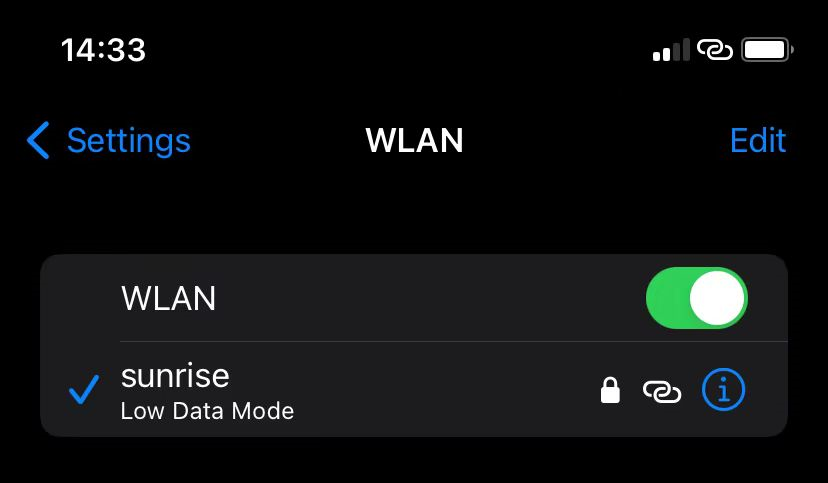
-
If you need to switch back to
Stationmode, you can do it as follows:[RDK X5]
# Stop hostapd
killall -9 hostapd

# Clear the address of wlan0
ip addr flush dev wlan0
sleep 0.5
ifconfig wlan0 down
sleep 1
ifconfig wlan0 up

# Restart wpa_supplicant
systemctl unmask wpa_supplicant
systemctl restart wpa_supplicant

# Reinstall the WiFi driver
rmmod aic8800_fdrv
modprobe aic8800_fdrv

# Connect to the hotspot. for specific operations, refer to the previous section "Wireless Network"
wifi_connect "WiFi-Test" "12345678"
[Other]
# Stop hostapd
killall -9 hostapd

# Clear the address of wlan0
ip addr flush dev wlan0
sleep 0.5
ifconfig wlan0 down
sleep 1
ifconfig wlan0 up

# Restart wpa_supplicant
systemctl unmask wpa_supplicant
systemctl restart wpa_supplicant

# Connect to the hotspot, for specific operation, please refer to the previous section "Wireless Network"
wifi_connect "WiFi-Test" "12345678"
Soft AP Mode(NetworkManager):RDK X5(>= 3.3.0)RDK X3(>= 3.0.2)
Newer system versions can also use NetworkManager to set up your Wi-Fi hotspot.
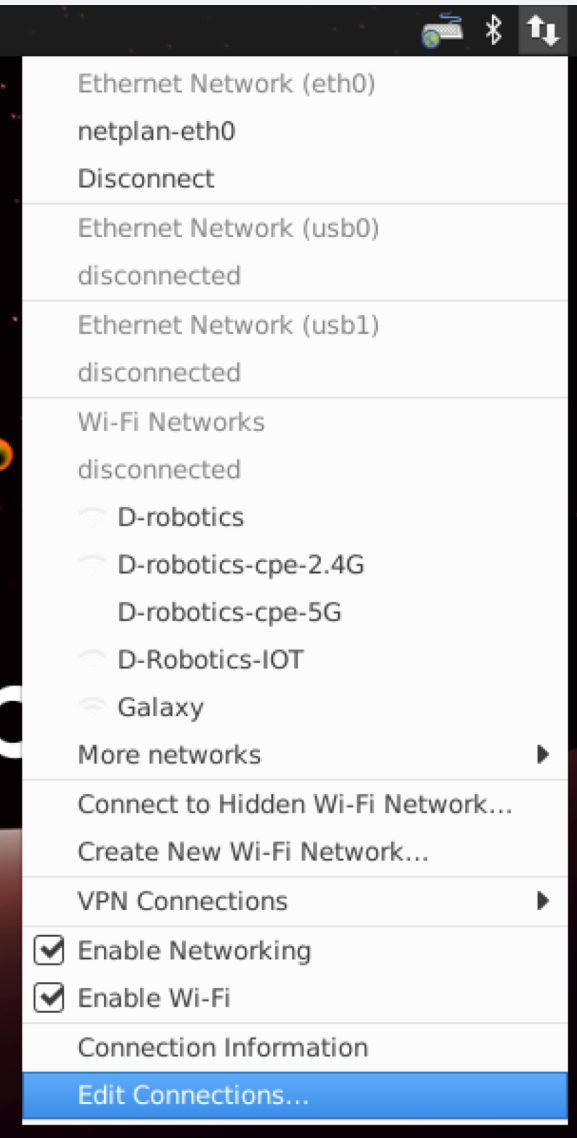
Click the wireless network icon in the upper-right corner of the desktop and selectEdit Connections...
Click the+button at the bottom left, and under Connection Type, select Wi-Fi
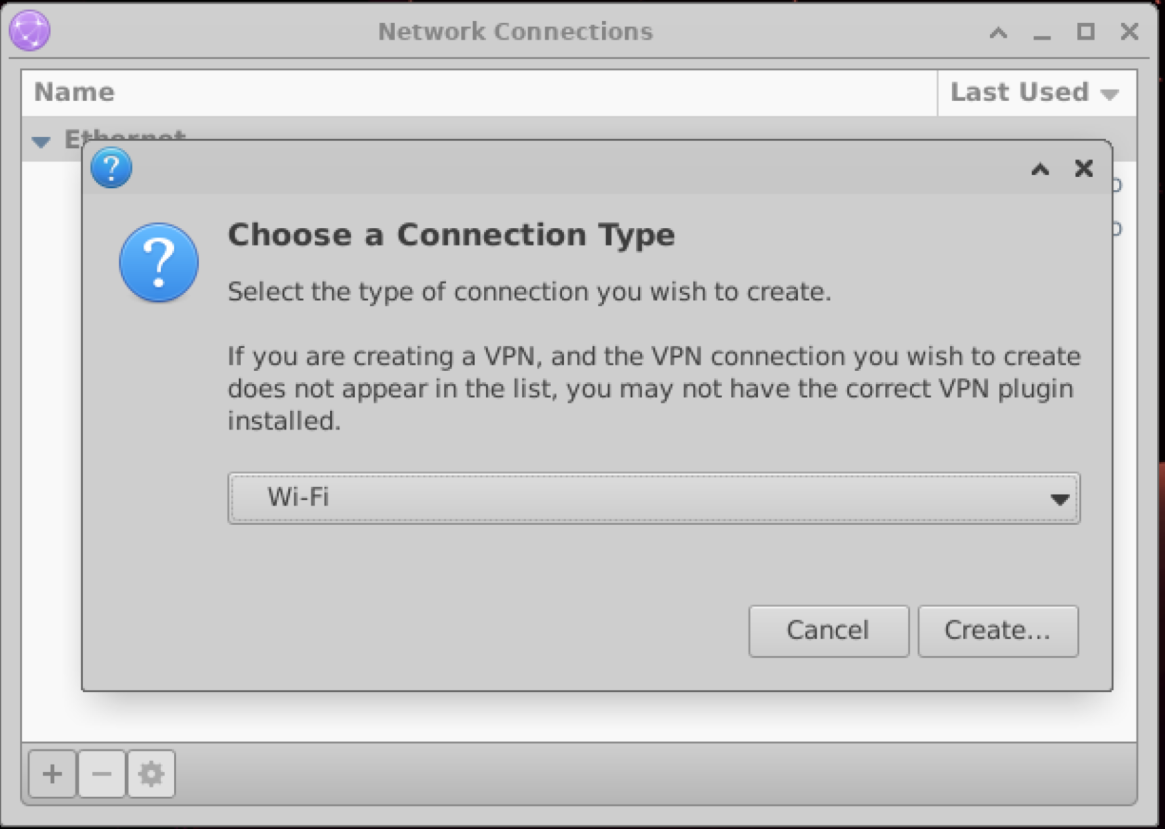
Under the Wi-Fitab, fill in the SSID, Mode, and Band.
-
SSID: Enter your desired hotspot name.
-
Mode: Select
Hotspot. -
Band: Choose Automatic,
A (5 GHz), orB/G (2.4 GHz).

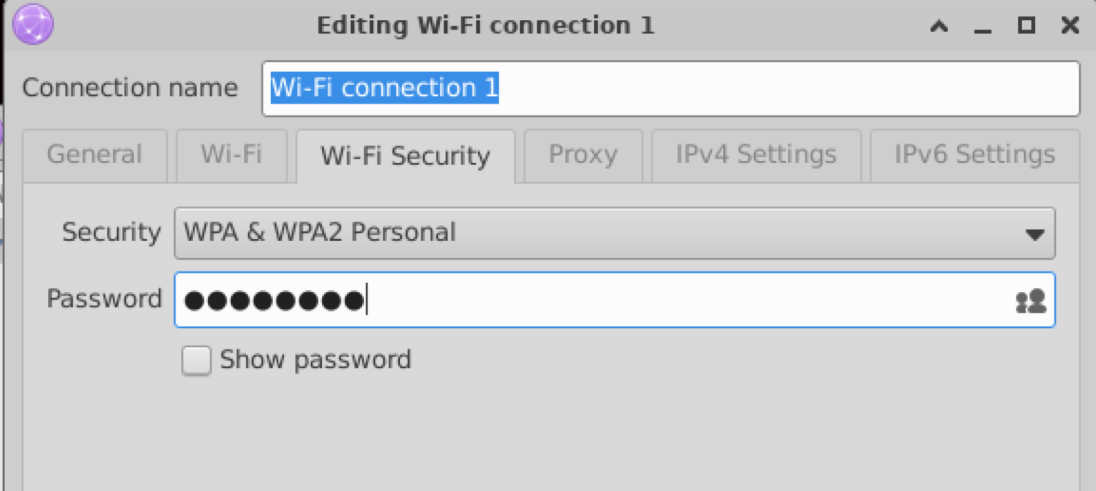
Under the Wi-Fi Security tab, select the encryption method and enter the password.
Restart the board or run restart_network to apply the configuration.
DNS Server
Video: https://www.youtube.com/watch?v=YCNFSC7LpCY&list=PLSxjn4YS2IuFUWcLGj2_uuCfLYnNYw6Ld&index=6
DNS (Domain Name Server) is a server that converts domain names to their corresponding IP addresses.
The DNS configuration on the development board is managed through the /etc/systemd/resolved.conf file. Users can modify this file to configure DNS settings. The steps are as follows:
-
Modify the
resolved.conffile and add the DNS server address, for example:DNS=8.8.8.8 114.114.114.114 -
Enable DNS configuration using the following commands:
sudo systemctl restart systemd-resolved
sudo systemctl enable systemd-resolved
sudo mv /etc/resolv.conf  /etc/resolv.conf.bak
sudo ln -s /run/systemd/resolve/resolv.conf /etc/
2.2 System Updates
For system security and stability considerations, it is recommended for users to update the system using the apt command after the installation.
The software source list for the apt command is stored in the /etc/apt/source.list file, and it is necessary to update the package list with the apt command before installing software.
First, open the terminal command line and enter the following command:
sudo apt update
Next, upgrade all installed software packages to the latest version with the following command:
sudo apt full-upgrade
It is recommended to use the full-upgrade option instead of the upgrade option, so that dependency packages will also be updated when related dependencies change.
When running the sudo apt full-upgrade command, the system will prompt for data download and disk space usage. However, apt does not check if there is enough disk space, so it is recommended for users to manually check with the df -h command. In addition, the deb files downloaded during the upgrade process will be saved in the /var/cache/apt/archives directory. Users can use the sudo apt clean command to delete cache files and free up disk space.
After executing the apt full-upgrade command, it may be necessary to reinstall drivers, kernel files, and some system software. It is recommended for users to manually restart the device to apply the updates, using the following command:
sudo reboot
Bluetooth
Video: https://www.youtube.com/watch?v=Ov8mL8P_yUY&list=PLSxjn4YS2IuFUWcLGj2_uuCfLYnNYw6Ld&index=10
Initialization
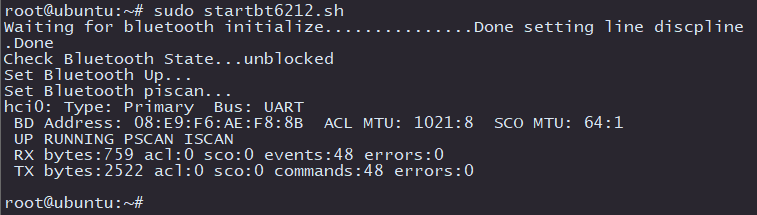
The Bluetooth function of the development board X3 is not enabled by default, while X5 has it enabled. You need to execute the /usr/bin/startbt6212.sh script to initialize it. The script completes the following tasks:
- Bluetooth initialization completed
- Execute
hciconfig hci0 upto bring up the Bluetooth Link - Execute
hciconfig hci0 piscanto perform Bluetooth scanning
The log after the successful execution of the script is as follows:
In addition, users can use the following command to check if the Bluetooth process is functioning properly:
ps ax | grep "/usr/bin/dbus-daemon\|/usr/lib/bluetooth/bluetoothd"
/usr/bin/dbus-daemon

/usr/lib/bluetooth/bluetoothd
Communication Interfaces
To fully leverage the expansion capabilities of the development board, the current hardware design integrates a variety of interfaces and peripheral resources.
Limited by the interface layout and hardware resource allocation, the development board does not fully replicate all the communication interfaces of the Bluetooth module.
Currently, only the BT_RX and BT_TX two-wire mode is provided, which can meet basic functions such as AT command interaction and data transmission that do not require real-time performance.
For UART-based Bluetooth modules, the different interface connection methods and their corresponding functions are as follows:
-
Basic Communication Mode (UART Only)
-
Interface Pins:
BT_RX,BT_TX -
Features: UART-based asynchronous serial data communication (e.g., AT command interaction, low-rate data transmission). Lacks flow control mechanism. Risks data packet loss and buffer overflow during baud rate overload or sustained high-volume data transfer.
-
-
Enhanced Transmission Mode (with Hardware Flow Control)
-
Interface Pins:
BT_RX,BT_TX,BT_CTS,BT_RTS -
Features: Effectively prevents data packet loss and buffer overflow risks. Supports A2DP high-fidelity unidirectional audio stream transmission.
-
-
Voice Communication Mode (PCM Synchronous Interface)
-
Interface Pins:
PCM_SYNC,PCM_DIN,PCM_CLK,PCM_DOUT -
Features: Supports real-time bidirectional audio transmission based on SCO links, such as HFP/HSP.
-
USB Bluetooth
For in-depth use of Bluetooth functions—such as achieving high-speed and stable communication in SPP (Bluetooth Virtual Serial Port) mode, ensuring bandwidth quality in PAN (Bluetooth Virtual Network Card) mode, or avoiding audio interruptions in A2DP (High-Fidelity Unidirectional Audio Stream) mode—it is recommended to prioritize using a USB interface Bluetooth module.
The development board comes pre-integrated with drivers for common Bluetooth dongles like USB2.0-BT and CSR8510 A10, and can directly support most firmware-free USB Bluetooth modules.


For Realtek series Bluetooth modules, additional firmware support is required. Please obtain the firmware adapted for the Linux platform from the module manufacturer and place it in the specified directory before normal use can be achieved.
Network Configuration and Connection
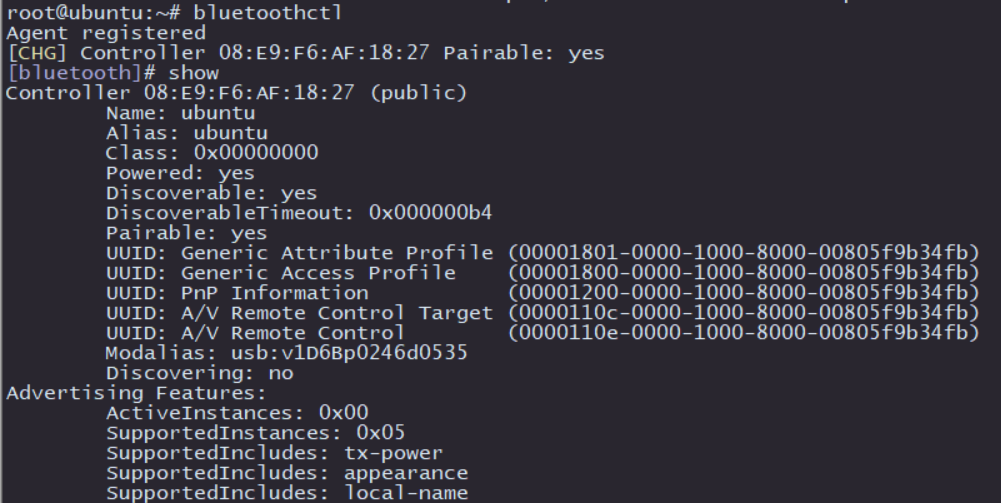
Execute sudo bluetoothctl to enter the interactive mode of Bluetooth configuration. If device information similar to the image below appears, it means that the Bluetooth has been recognized. Then, use show to view the Bluetooth information and pay attention to the powered and discoverable statuses of the Bluetooth.
Execute power on to enable the Bluetooth, as shown in the image below:

In order to make the Bluetooth discoverable to nearby devices, execute discoverable on to enable the Bluetooth and open the discoverable attribute of the Bluetooth, as shown in the image below:

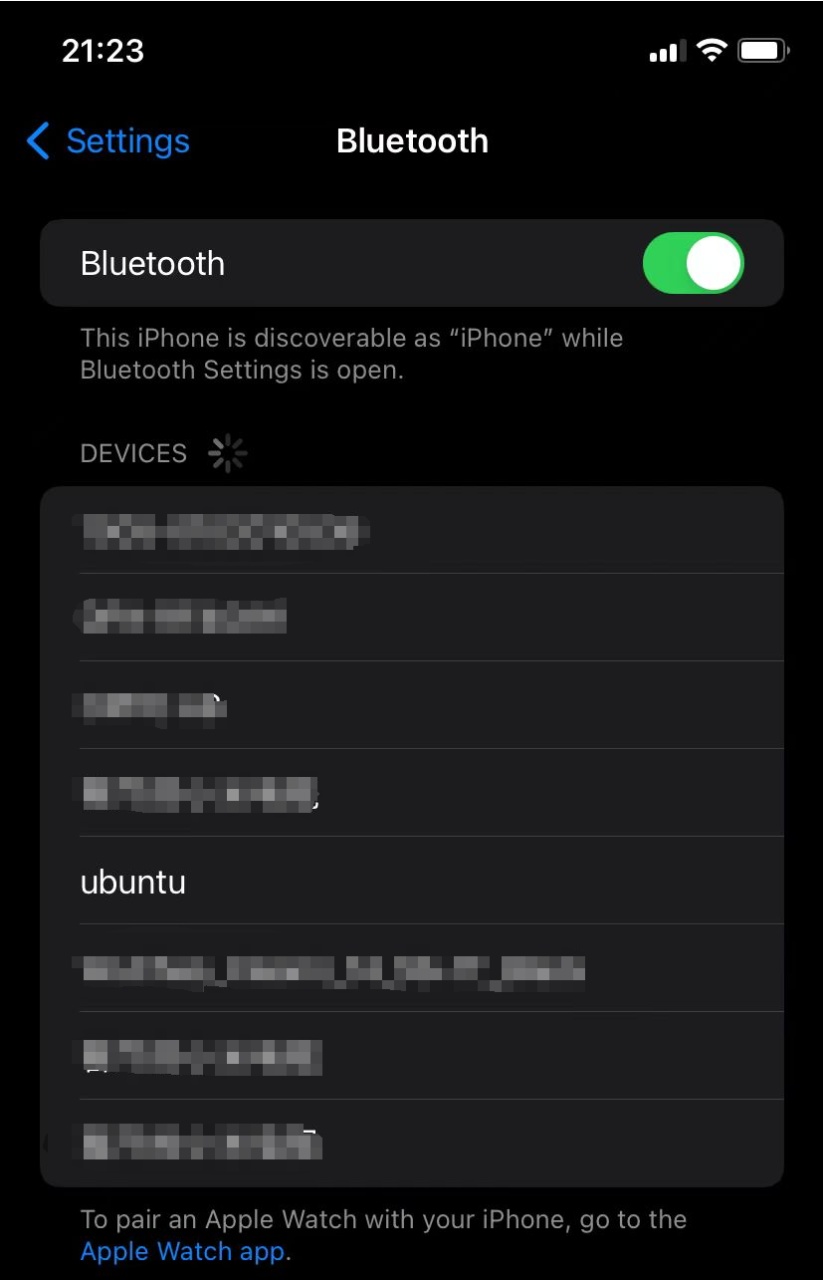
Now, you can use a mobile phone or computer to scan for the Bluetooth device with the name ubuntu, as shown in the image below:
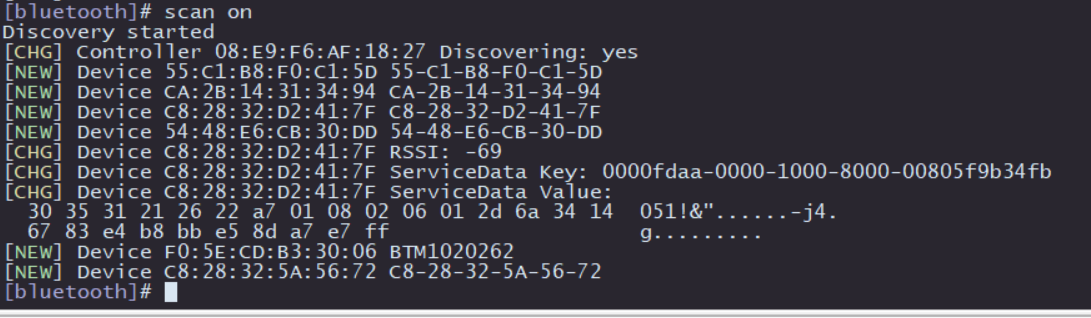
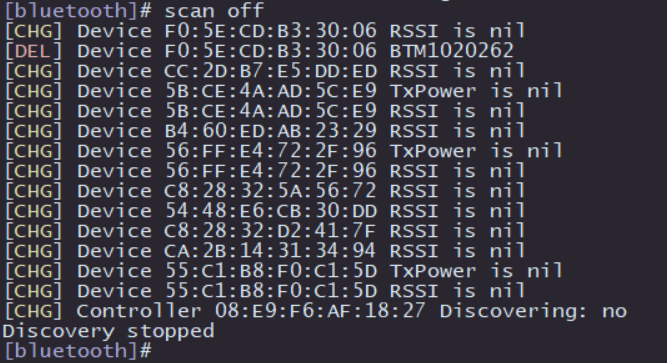
Next, test the active scanning function of Bluetooth. In the interactive interface of bluetoothctl, enter scan on to enable active scanning. It will periodically print nearby devices. You can see that my mobile phone device has been discovered. Enter scan off to disable the scanning function and summarize the scanned Bluetooth devices.
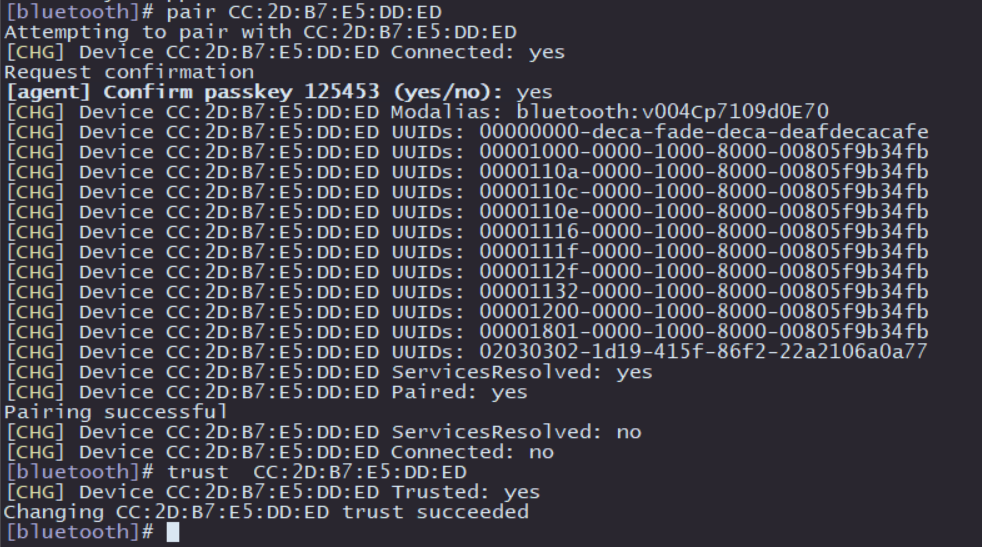
Then comes the pairing with other Bluetooth devices:
-
Pairing command:
pair [targetMAC], after entering this command, follow the prompts to enteryes, and the remote Bluetooth device will select thePairoption to complete the pairing. -
After successful pairing, you can use
trust [targetMAC]to automatically connect next time.
After the above operations, the basic functions of Bluetooth scanning and pairing are completed. For more functions, please refer to the official help documentation of BlueZ.