3.2.3 RDK X5 Series Audio Guide
The RDK X5 integrates the ES8326 audio codec, and users can also connect audio boards to extend the audio capabilities to meet the needs of various voice scenarios. This section will provide a detailed guide on using the onboard audio codec and audio boards.
If after installing the driver, you get a message that the Miniboot version is not the latest, please go to 1 System Options -> S7 Update Miniboot to update Miniboot.
Onboard ES8326
The onboard audio codec ES8326 provides basic audio functionality. You need to connect a 3.5mm audio interface to record and play sound.
Usage
You can use user-space interfaces like amix or tinyalsa to control the audio. Note!!! When adjusting the gain or testing, it's best not to wear headphones during operation to avoid sudden noise or high volume that could damage your hearing. The safest approach is: execute the command first, observe the loudness or noise, and then adjust accordingly within the safe limits.
Click here for usage tips on amixer
We have found that some users, when plugging in USB audio devices, may encounter issues where the commands below don't work as expected.
In embedded audio devices, you can generally see how many sound cards are available by running cat /proc/asound/cards. After plugging in a USB device and rebooting, the UAC (USB Audio Class) device sound card registers first. Running the command mentioned above may show output similar to this:
  0 [RC08           ]: USB-Audio - ROCWARE RC08
                      ROCWARE RC08 at usb-xhci-hcd.2.auto-1.2, high speed
  1 [duplexaudio    ]: simple-card - duplex-audio
                      duplex-audio
At this point, we notice that the onboard audio sound card's index has changed to 1. Since `amixer` or `tinymix` default to using the device with index 0 when no specific device or card index is specified, we can use the following commands to view the controls and properties of the onboard sound card:
amixer -D 0 -c 1 controls
If you want to adjust the microphone gain using amixer, you can use the following command:
amixer -D 0 -c 1 sget 'ADC PGA Gain',0
Recording and Playback Test
You can use the following commands to test if recording and playback work properly:
- Recording Command:
# arecord -Dhw:0,0 -c 2 -r 48000 -f S24_LE -t wav -d 10 /userdata/record1.wav
Recording WAVE '/userdata/record1.wav' : Signed 24 bit Little Endian, Rate 48000 Hz, Stereo
#
You should see normal recording logs on the screen. Wait for about 10 seconds (the -d 10 in the command means 10 seconds). After the recording is complete, you can play the recorded audio using the following command:
- Playback Command:
# aplay -D hw:0,0 /userdata/record1.wav
Playing WAVE '/userdata/record1.wav' : Signed 24 bit Little Endian, Rate 48000 Hz, Stereo
#
If you find that the recorded sound is too quiet, you can check and adjust the microphone gain using the following commands.
- Query Command:
# amixer sget 'ADC PGA Gain',0
Simple mixer control 'ADC PGA Gain',0
  Capabilities: volume volume-joined
  Playback channels: Mono
  Capture channels: Mono
  Limits: 0 - 10
  Mono: 0 [0%] [0.00dB]
After executing the above command, you should see the return value "Mono: 0 [0%] [0.00dB]", which indicates that the current value is 0.
- Adjust Gain Command:
# amixer sset 'ADC PGA Gain',0 10
Simple mixer control 'ADC PGA Gain',0
  Capabilities: volume volume-joined
  Playback channels: Mono
  Capture channels: Mono
  Limits: 0 - 10
  Mono: 10 [100%] [30.00dB]
The above command sets the ADC PGA Gain to its maximum, which is 10.
Audio Driver HAT REV2
After installing the audio daughter card driver, card 0 is the device registered by the daughter card, and the original onboard audio is now card 1.
Product Introduction
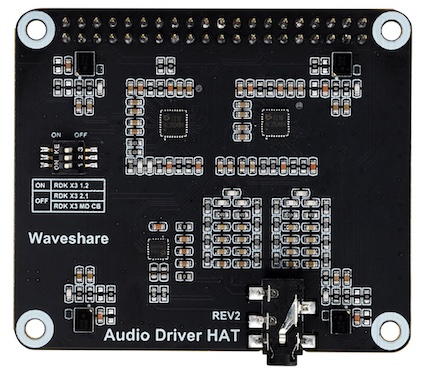
The Audio Driver HAT REV2 is an audio expansion board produced by Waveshare. It uses a dual Codec solution with ES7210 + ES8156, enabling features such as circular 4-microphone recording, dual-channel audio playback, and audio signal loopback. The appearance of the expansion board is shown in the following image:

For more detailed information about the audio expansion board, please refer to Audio Driver HAT.
Installation Method
-
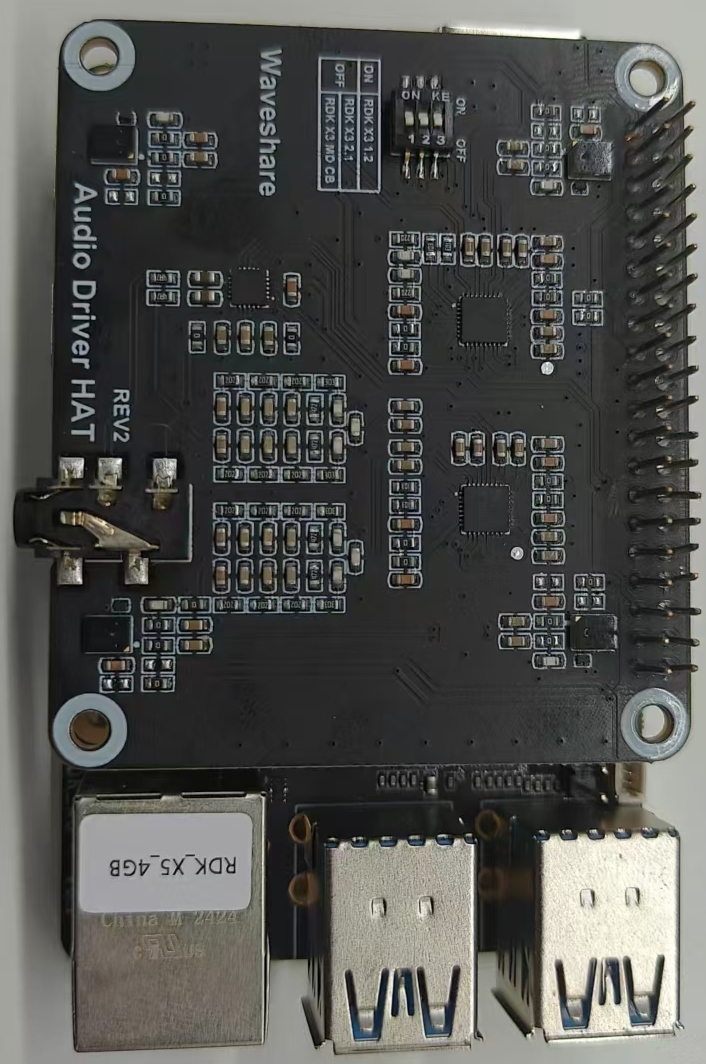
Connect the expansion board to the 40-pin header of the RDK X5 as shown in the image below:

Make sure to switch all dip switches to off. -
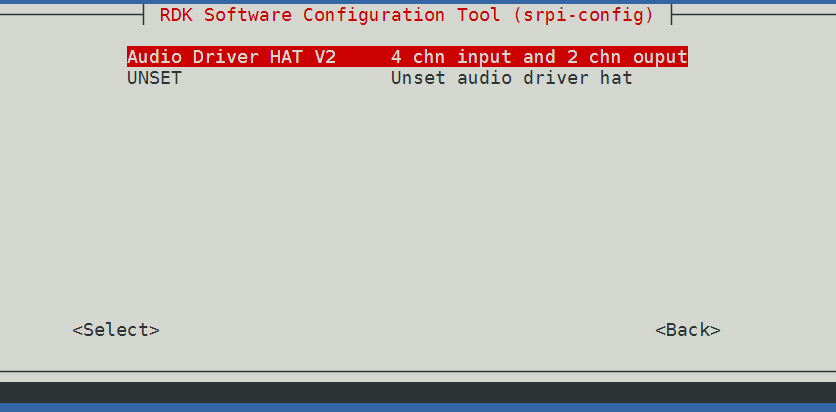
Use
raspi-configto configure the audio board:
Go to3 Interface Options->I5 Audio
SelectAudio Driver HAT V2:

-
Run the command
sync && rebootto reboot the development board. If the following device nodes appear under/dev/snd, it indicates that the expansion board has been successfully installed.root@ubuntu:/userdata# ls /dev/snd
by-path controlC0 controlC1 pcmC0D0c pcmC0D1p pcmC1D0c pcmC1D0p timerAmong them,
pcmC0D0candpcmC0D1pare the audio devices registered by the ES7210 + ES8156, whilepcmC1D0candpcmC1D0pare the audio devices registered by the onboard audio.
Uninstallation Method
- Use
raspi-configto configure the audio board:
Go to3 Interface Options->I5 Audio
SelectUNSETto uninstall the audio driver and related configurations.
Audio Nodes
The playback node for this audio board on the RDK X5 is pcmC1D1p, and the recording node is pcmC1D0c.
Recording and Playback Test
This test uses the tinyalsa library tools: tinycap for recording and tinyplay for playback.
Usage instructions for tinycap:
tinycap
Usage: tinycap {file.wav | --} [-D card] [-d device] [-c channels] [-r rate] [-b bits] [-p period_size] [-n n_periods] [-t time_in_seconds]

Use -- for filename to send raw PCM to stdout
tinyplay Usage Instructions:
tinyplay
usage: tinyplay file.wav [options]
options:
-D | --card   <card number>    The device to receive the audio
-d | --device <device number>  The card to receive the audio
-p | --period-size <size>      The size of the PCM's period
-n | --period-count <count>    The number of PCM periods
-i | --file-type <file-type >  The type of file to read (raw or wav)
-c | --channels <count>        The amount of channels per frame
-r | --rate <rate>             The amount of frames per second
-b | --bits <bit-count>        The number of bits in one sample
-M | --mmap                    Use memory mapped IO to play audio
If you want to learn more about the tinyalsa library, please refer to its repository.
- 2-channel microphone recording:
tinycap ./2chn_test.wav -D 0 -d 1 -c 2 -b 16 -r 48000 -p 512 -n 4 -t 5
- 4-channel microphone recording:
tinycap ./4chn_test.wav -D 0 -d 1 -c 4 -b 16 -r 48000 -p 512 -n 4 -t 5
- Stereo audio playback (does not support direct playback of 4-channel recordings):
tinyplay ./2chn_test.wav -D 0 -d 0