2.1 Network and Bluetooth Configuration
This section mainly introduces how to modify wired and wireless network configurations on the development board.
Wired Network
Wired Network Configuration – Netplan Method
Network configuration via Netplan has only been verified and used on the RDK S100; other platforms are currently not supported.
The root filesystem of RDK S100 is built upon Ubuntu 22.04, which by default does not support enabling or disabling network interfaces using the traditional ifup/ifdown commands.
In Ubuntu systems, static network configuration for the development board is stored in the file /etc/netplan/01-hobot-net.yaml. Below are specific configuration instructions:
- Static IP and Subnet Mask: To assign a static IP address and subnet mask to a network interface, use the
addressesfield with CIDR notation for the subnet mask. - DHCP Configuration: To enable a specified network interface to automatically obtain an IP address via DHCP (Dynamic Host Configuration Protocol), set the
dhcp4ordhcp6field toyes. - Custom MAC Address: Use the
macaddressfield to assign a custom MAC address to a network interface. - Custom DNS Servers: Use the
nameserversfield to specify custom DNS server addresses for a network interface.
An example of network configuration using Netplan is as follows:
sudo vim /etc/netplan/01-hobot-net.yaml
network:
  version: 2
  renderer: NetworkManager
  ethernets:
    eth0:
      dhcp4: yes
      dhcp6: yes
      nameservers:
        addresses: [10.9.1.2, 8.8.8.8, 8.8.4.4]
    eth1:
      addresses:
        - 192.168.127.10/24
      nameservers:
        addresses: [10.9.1.2, 8.8.8.8, 8.8.4.4]
After making changes, run sudo netplan apply to apply the new configuration.
For detailed documentation on Netplan configuration files, please refer to: Ubuntu Manpage: netplan.
The desktop version of RDK S100 uses NetworkManager + Netplan as its default network management framework. When users configure network connections via NetworkManager (either through GUI or the nmcli command), corresponding configuration files are generated under /etc/NetworkManager/system-connections.
During Ubuntu system boot, Netplan configuration files located in /etc/netplan/ are used to generate corresponding connection profiles under /run/NetworkManager/system-connections. By default in Ubuntu, connection profiles under /run/NetworkManager/system-connections take precedence over those under /etc/NetworkManager/system-connections.
Therefore, if you wish configurations made via NetworkManager (GUI or nmcli) to take effect, you must first remove the corresponding settings from the Netplan configuration files under /etc/netplan/.
Wireless Network
The development board integrates a 2.4GHz Wi-Fi module, supporting both Soft AP and Station modes, and runs in Station mode by default. The following sections describe how to use both modes.
Station Mode
In Station mode, the development board acts as a client connecting to a router's Wi-Fi hotspot for internet access.
-
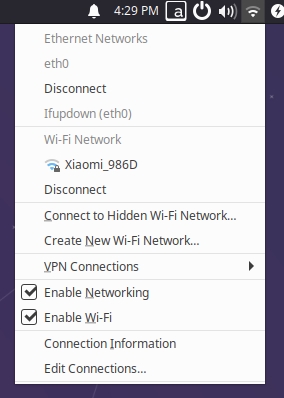
For users running the Ubuntu Desktop edition, click the Wi-Fi icon in the top-right corner of the desktop, select the desired hotspot, and enter the password to complete network setup, as shown below:
-
For users running the Ubuntu Server edition, wireless network configuration can be performed via command line as follows:
-
Use the command
sudo nmcli device wifi rescanto scan for available hotspots. If you receive the following message, scanning was too frequent—please wait and try again later:root@ubuntu:~# sudo nmcli device wifi rescan
Error: Scanning not allowed immediately following previous scan. -
Use the command
sudo nmcli device wifi listto display the list of discovered hotspots. -
Connect to a hotspot using the command
sudo wifi_connect "SSID" "PASSWD". A successful connection will return output similar to the following:root@ubuntu:~# sudo wifi_connect "WiFi-Test" "12345678"
Device 'wlan0' successfully activated with 'd7468833-4195-45aa-aa33-3d43da86e1a7'.tipIf after attempting to connect you receive the following message, the hotspot was not found. In this case, run
sudo nmcli device wifi rescanto rescan and then retry the connection:root@ubuntu:~# sudo wifi_connect "WiFi-Test" "12345678"
Error: No network with SSID 'WiFi-Test' found.
Soft AP Mode
Wi-Fi AP mode on RDK S100 is currently unavailable.
Continuously being updated....
DNS Service
DNS (Domain Name Server) is a server that translates domain names into their corresponding IP addresses.
The DNS configuration on the development board is managed via the /etc/systemd/resolved.conf file. Users can modify this file to configure DNS settings as follows:
-
Edit the
resolved.conffile and add DNS server addresses, for example:DNS=8.8.8.8 114.114.114.114 -
Apply the DNS configuration with the following commands:
sudo systemctl restart systemd-resolved
sudo systemctl enable systemd-resolved
sudo mv /etc/resolv.conf  /etc/resolv.conf.bak
sudo ln -s /run/systemd/resolve/resolv.conf /etc/
Proxy Configuration
Proxy configuration refers to setting up a network proxy. In network communication, a proxy server acts as an intermediary between the client and the destination server. The client sends requests to the proxy server, which then forwards them to the target server. Similarly, responses from the target server are returned to the client via the proxy server.
Edit either the ~/.bashrc or /etc/environment file. Edit ~/.bashrc to configure the proxy for the current user, or edit /etc/environment to configure it system-wide for all users.
Add the following lines to the file (using an HTTP proxy as an example):
http_proxy=http://proxy_server_address:port
https_proxy=http://proxy_server_address:port
ftp_proxy=http://proxy_server_address:port
no_proxy=localhost,127.0.0.1
After saving the file, run the following command to apply the configuration:
source ~/.bashrc
System Update
Do not execute before the product is officially released.
For system security and stability, it is recommended that users update the system using the apt command after installation.
The /etc/apt/sources.list file contains the list of software repositories used by the apt command. Before installing software, you should first update the package list using apt.
Open a terminal and run the following command:
sudo apt update
Next, upgrade all installed packages to their latest versions with:
sudo apt full-upgrade
It is recommended to use full-upgrade instead of upgrade, as full-upgrade will also update dependency packages when dependencies change.
When running sudo apt full-upgrade, the system will display the amount of data to be downloaded and the disk space required. However, apt does not check whether sufficient disk space is available. It is advisable to manually verify available disk space using the df -h command. Additionally, downloaded .deb files during the upgrade process are stored in /var/cache/apt/archives. You can free up disk space by clearing this cache with sudo apt clean.
After running apt full-upgrade, drivers, kernel files, and some system software may be reinstalled. It is recommended to manually reboot the device to apply all updates:
sudo reboot
Bluetooth Configuration
Video: https://www.bilibili.com/video/BV1rm4y1E73q/?p=9
Initialization
Bluetooth functionality is disabled by default on the development board. You need to run the /usr/bin/startbt6212.sh script to initialize it. This script performs the following tasks:
- Resets the Bluetooth module.
- Creates the
messagebususer and group, which are required by thedbus-daemonprocess. - Runs
brcm_patchram_plusto load the Bluetooth driver and firmware. - Continuously checks for the existence of the
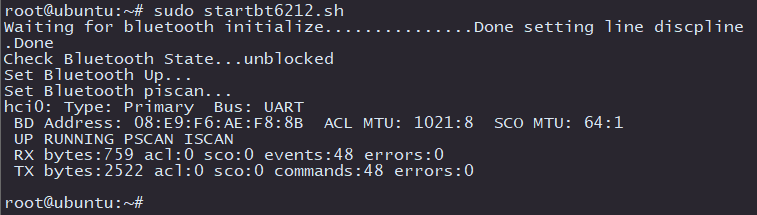
/sys/class/bluetooth/hci0directory to confirm that the Bluetooth driver is running properly. - Displays Done setting line discipline when Bluetooth initialization succeeds.
- Executes
hciconfig hci0 upto bring the Bluetooth interface up. - Executes
hciconfig hci0 piscanto enable Bluetooth scanning (this step can be omitted depending on your needs).
The log output after successful script execution is shown below:
Additionally, you can verify whether Bluetooth processes are running normally with the following command:
ps ax | grep "/usr/bin/dbus-daemon\|/usr/lib/bluetooth/bluetoothd"
/usr/bin/dbus-daemon

/usr/lib/bluetooth/bluetoothd
Network Pairing and Connection
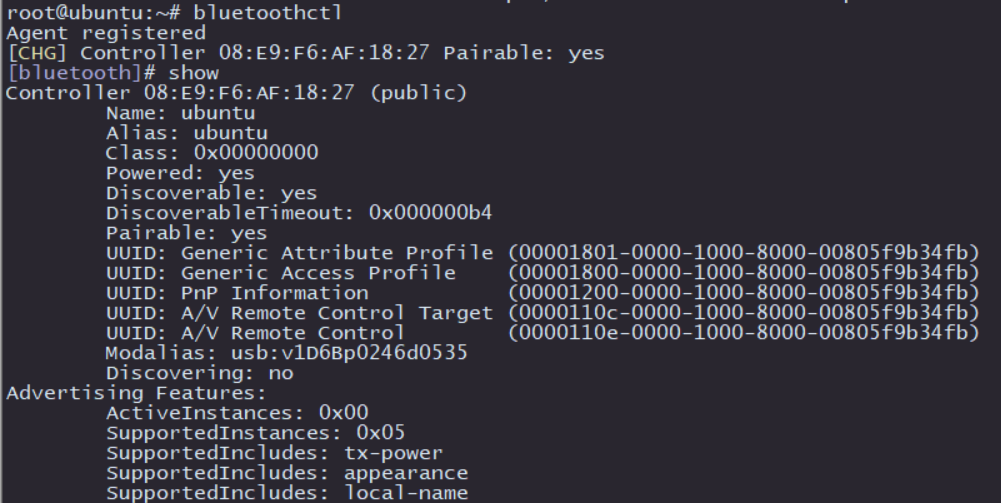
Run sudo bluetoothctl to enter the interactive Bluetooth configuration interface. If the device information appears as shown in the image below, the Bluetooth adapter has been recognized. Use the show command to view Bluetooth details, paying attention to the powered and discoverable states.
Execute power on to enable Bluetooth, as shown below:

To make the Bluetooth device discoverable by nearby devices, run discoverable on to enable Bluetooth and set it to discoverable mode, as illustrated below:

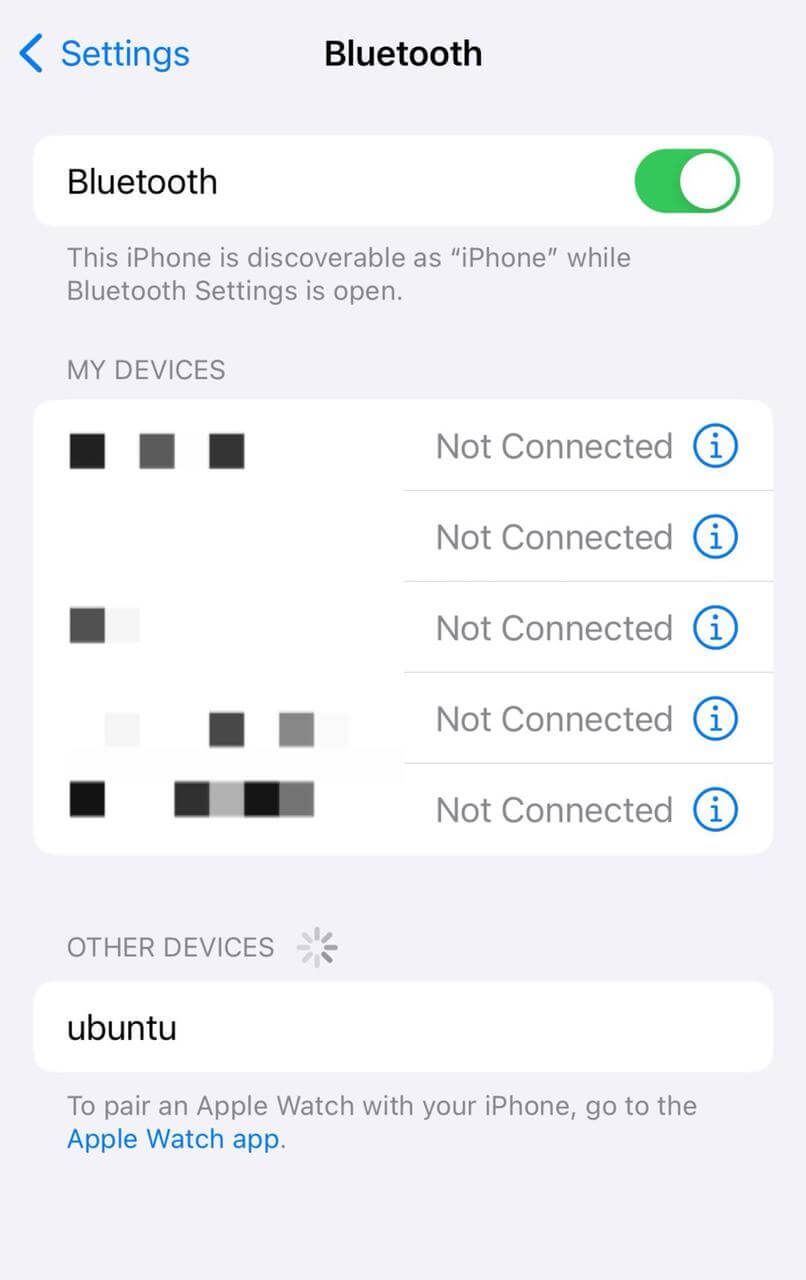
At this point, scanning with a smartphone or computer will reveal a Bluetooth device named ubuntu:
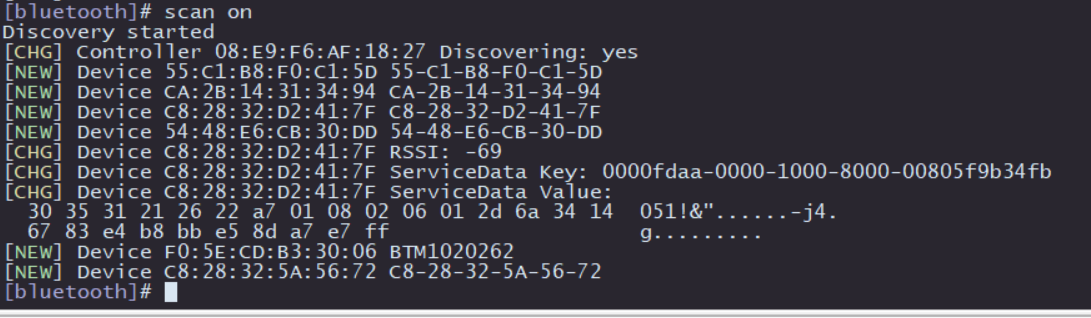
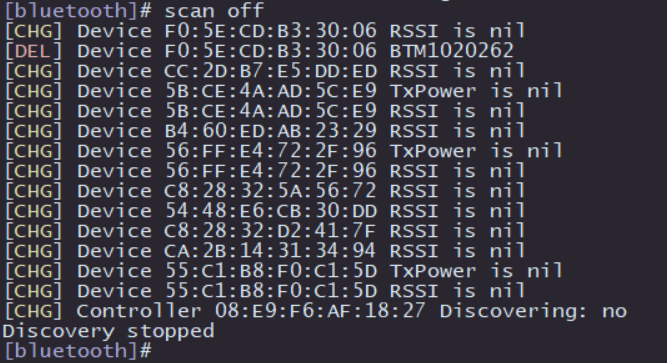
Next, test active Bluetooth scanning. In the bluetoothctl interactive interface, type scan on to start active scanning. The system will periodically print nearby devices—in this case, my smartphone has been detected. Use scan off to stop scanning and display a summary of discovered Bluetooth devices:
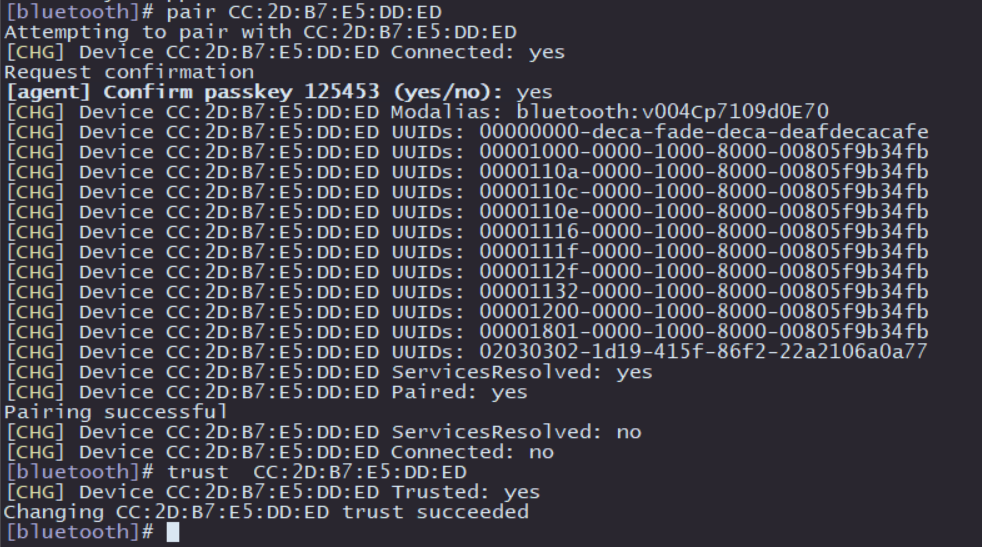
Then comes pairing with other Bluetooth devices:
-
Pairing command:
pair [targetMAC]. After entering this command, typeyeswhen prompted, and select thePairoption on the remote Bluetooth device to complete pairing. -
After successful pairing, you can use
trust [targetMAC]to enable automatic connection the next time.
After the above steps, basic Bluetooth scanning and pairing functionality is complete. For more advanced features, please refer to the official BlueZ documentation.