2.6 GUI Network Configuration Process
This section describes how to configure static IP, DNS, and Proxy settings for the ETH network via the GUI interface in the Ubuntu system.
Modifying Static IP and DNS Configuration
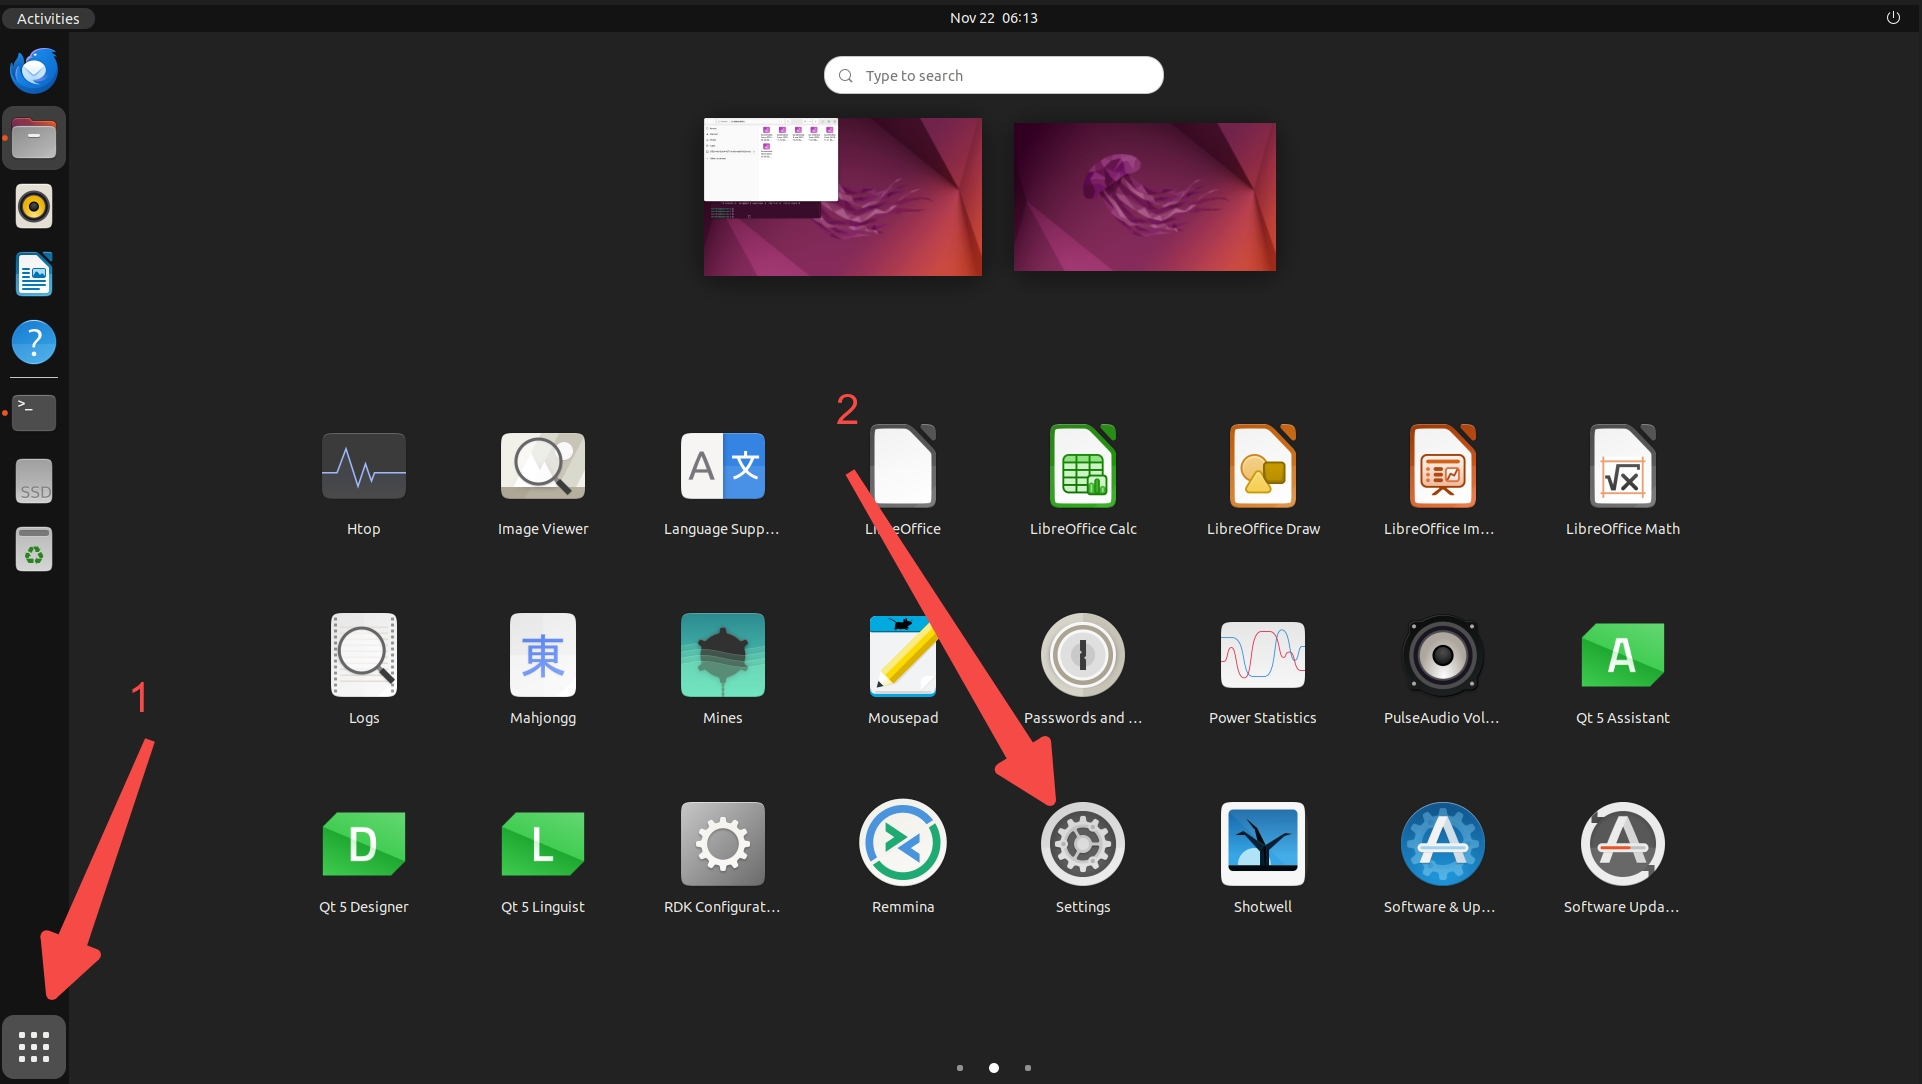
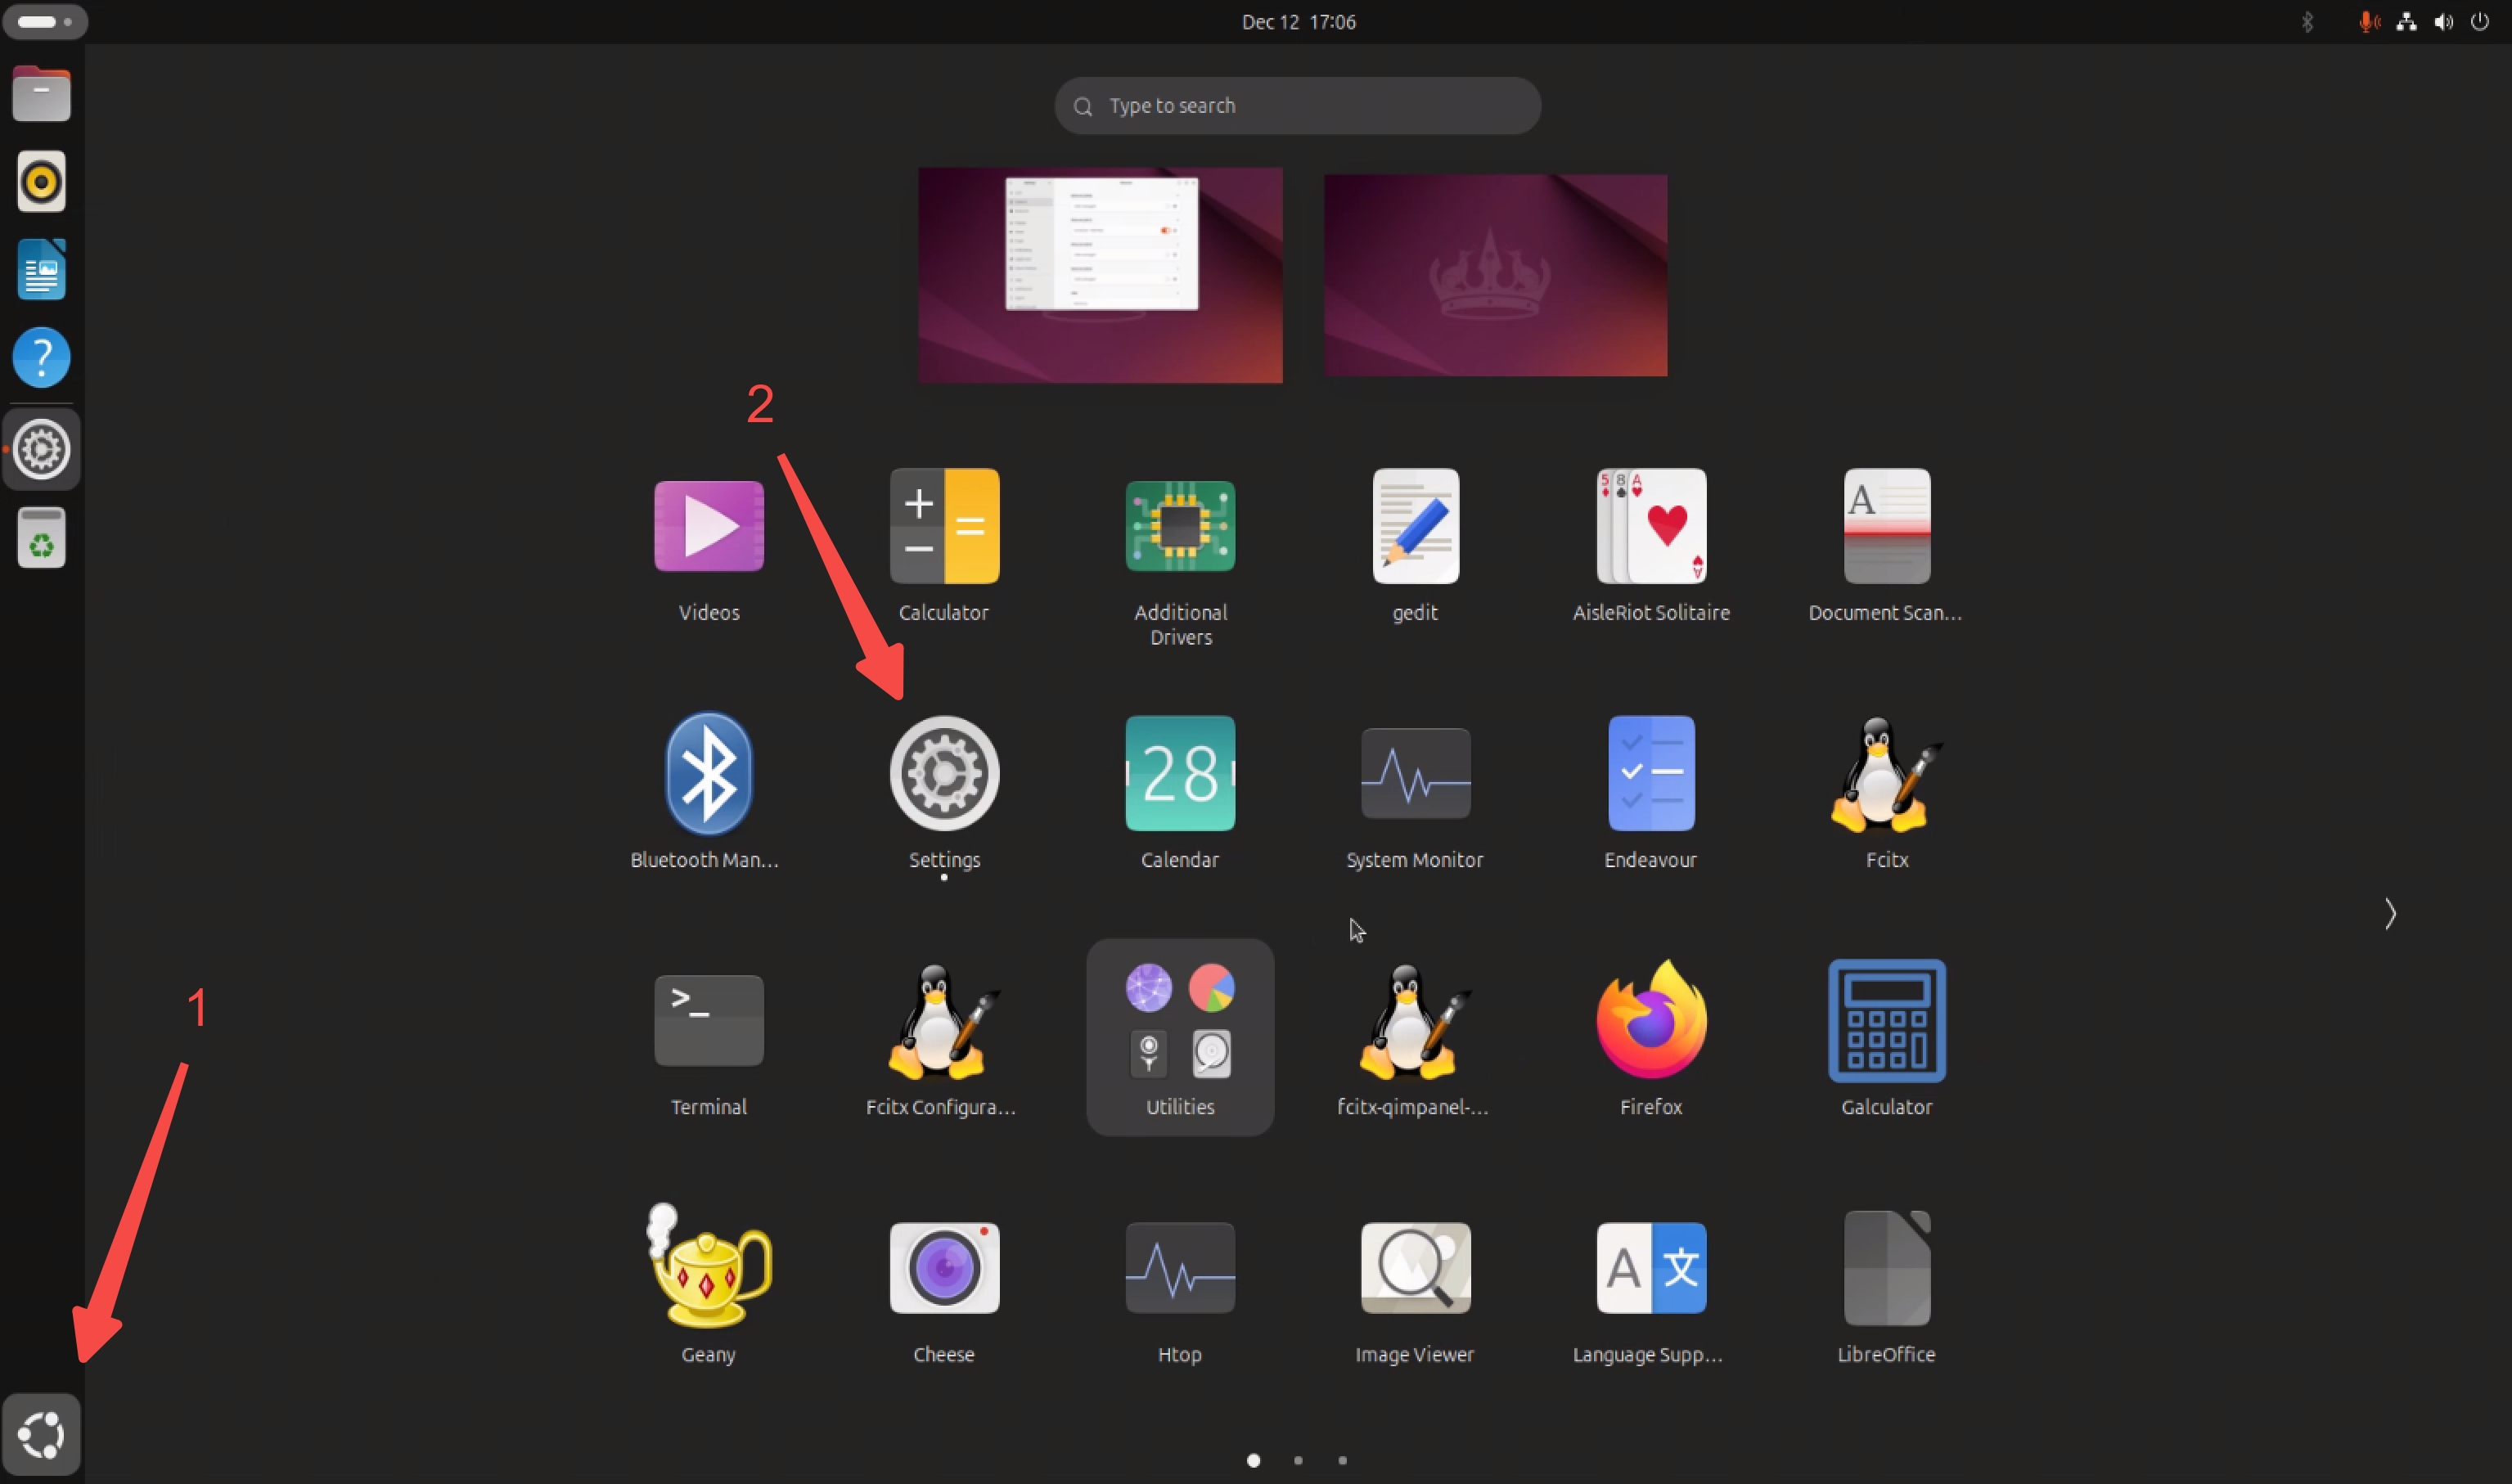
- After entering the desktop, click the bottom-left corner to open the application list and select the
Settingsapp. In the pop-up window, chooseNetwork.
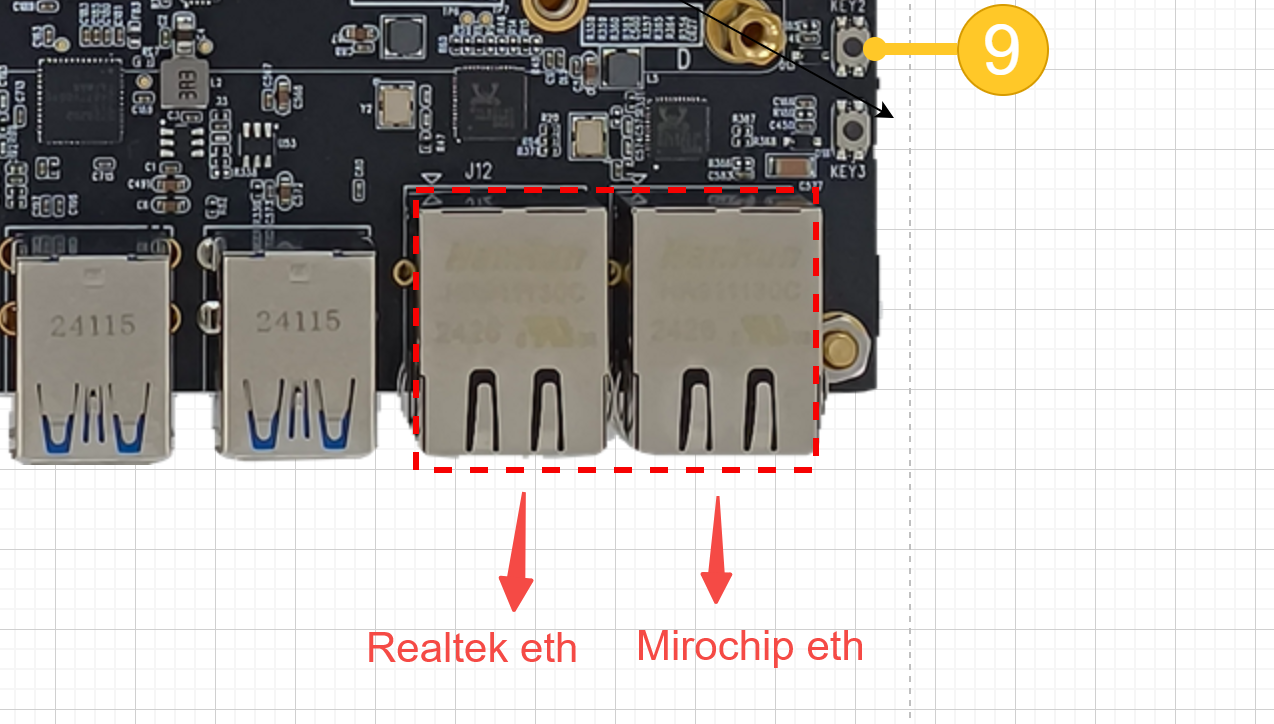
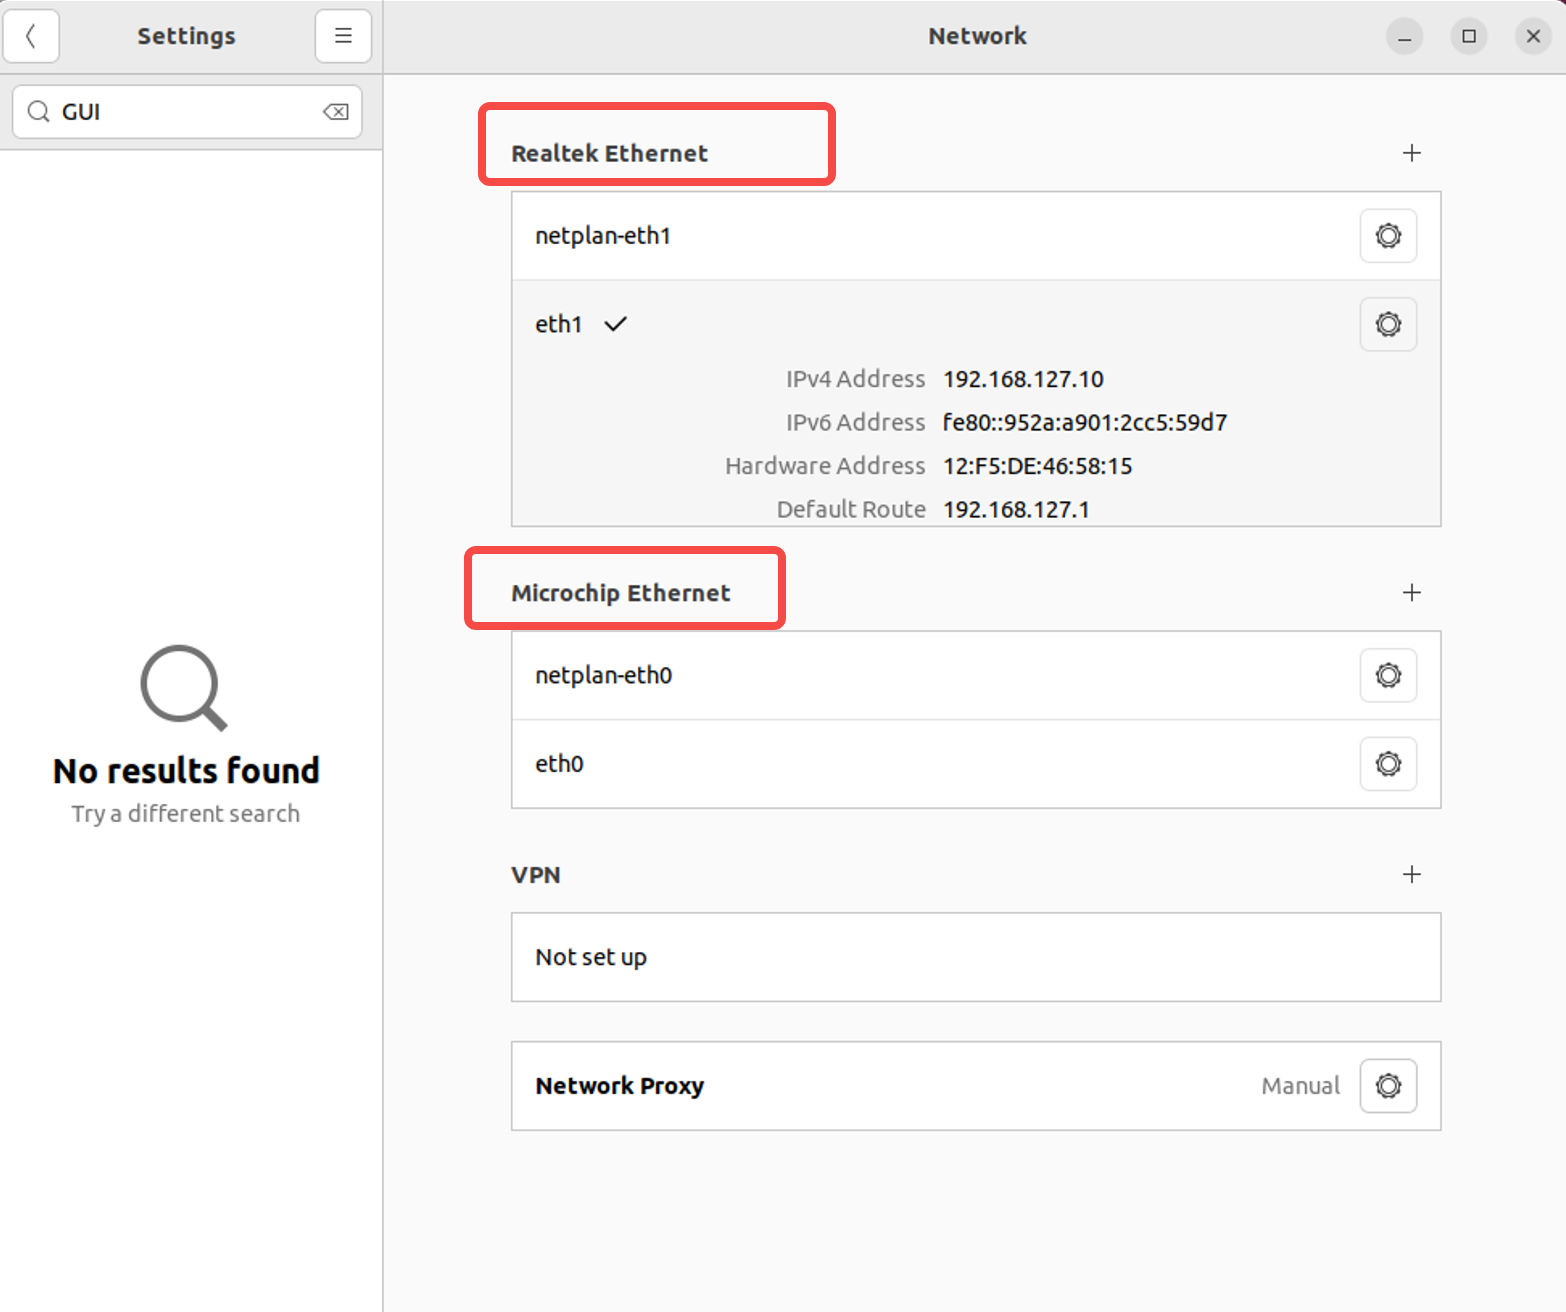
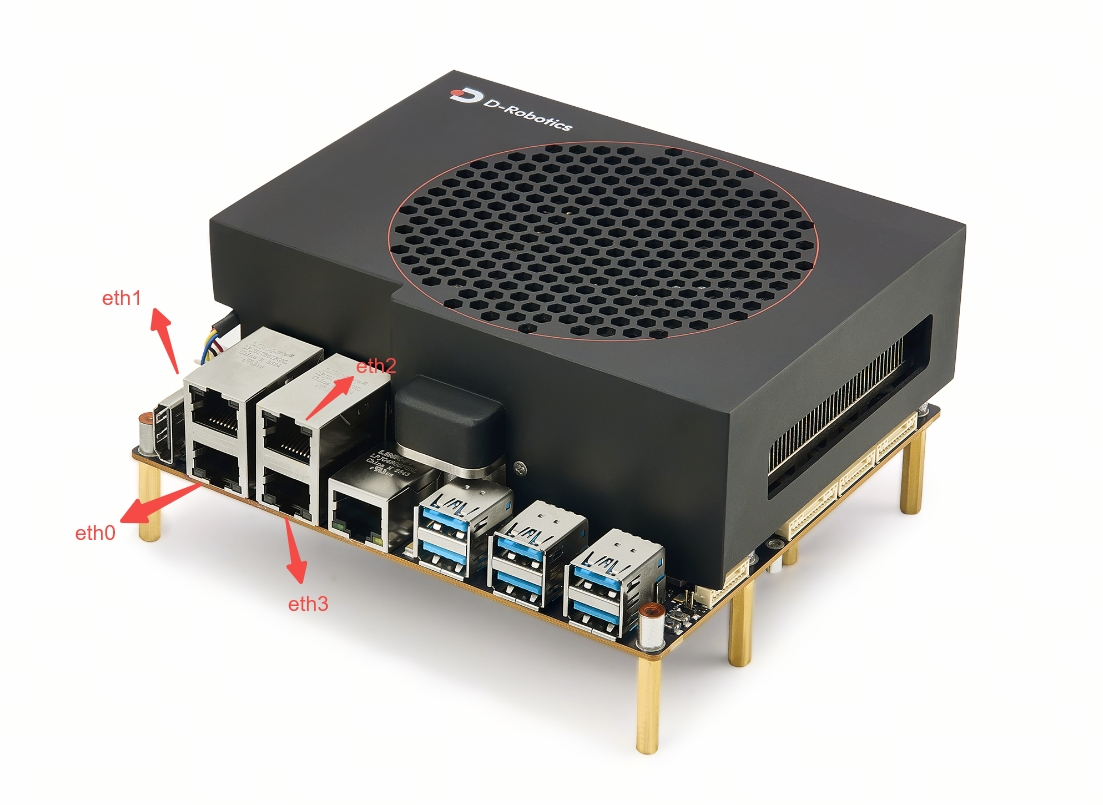
Ethernet (eth0)andEthernet (eth1)correspond to configurations for different physical network ports, as shown below:
- Taking
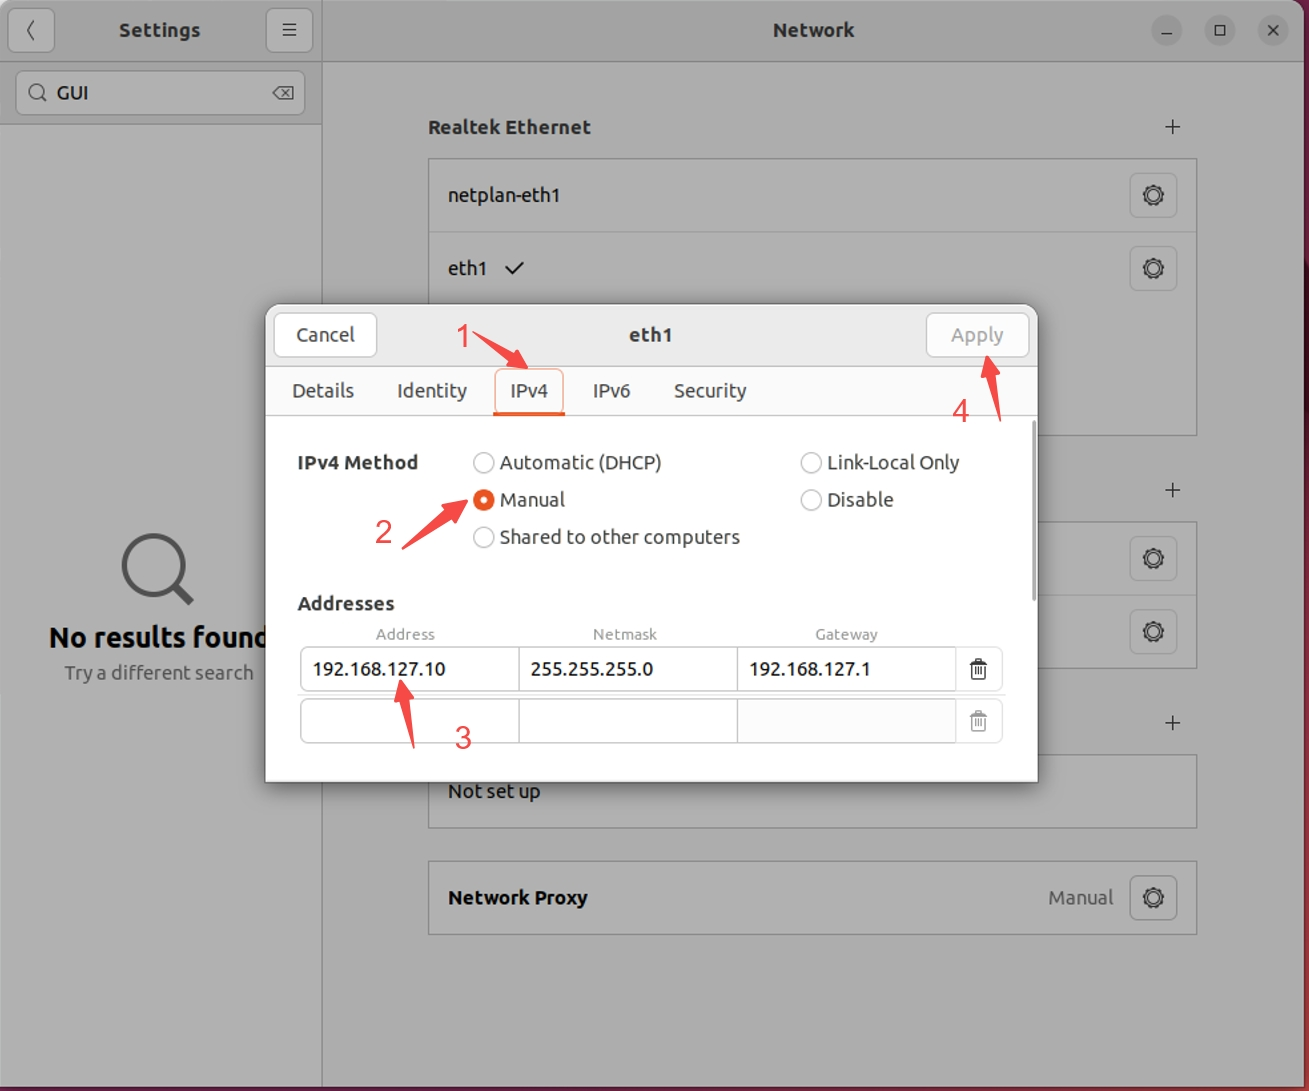
Ethernet (eth1)as an example, click the gear icon next to the edit button. In the pop-up window, selectIPv4, chooseManualfor manual configuration, and enter theIPaddress, subnet mask, and gateway in theAddressesfield below.
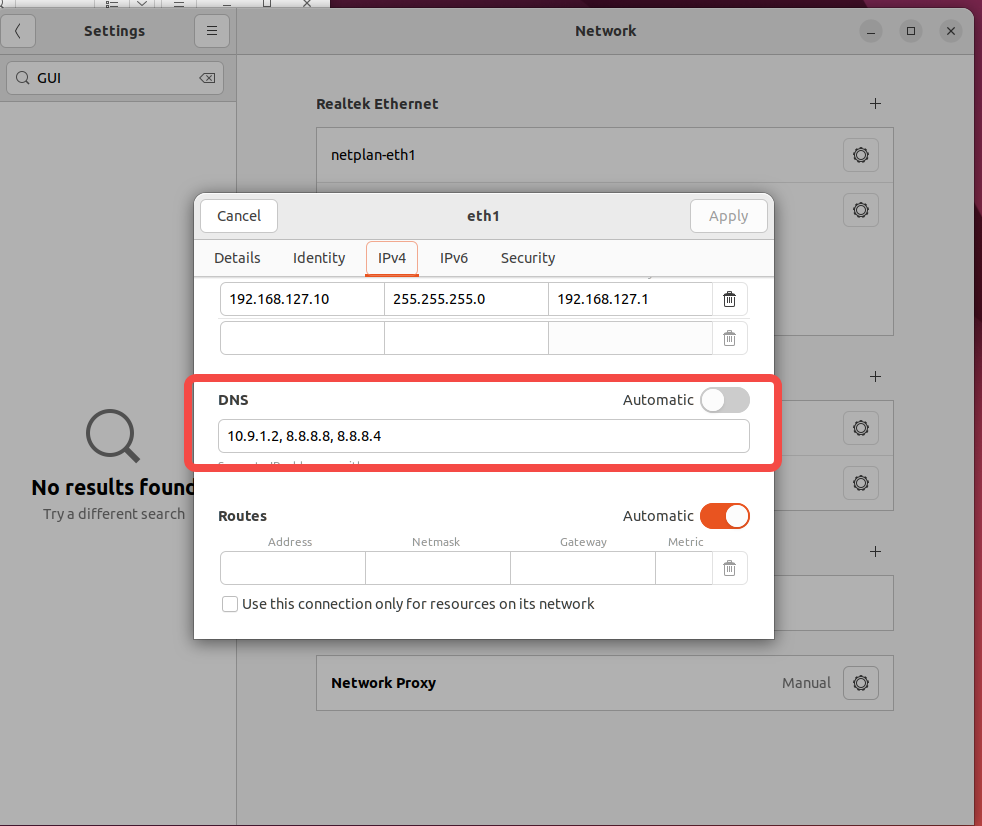
- Scroll down and enter the DNS configuration in the DNS field below.
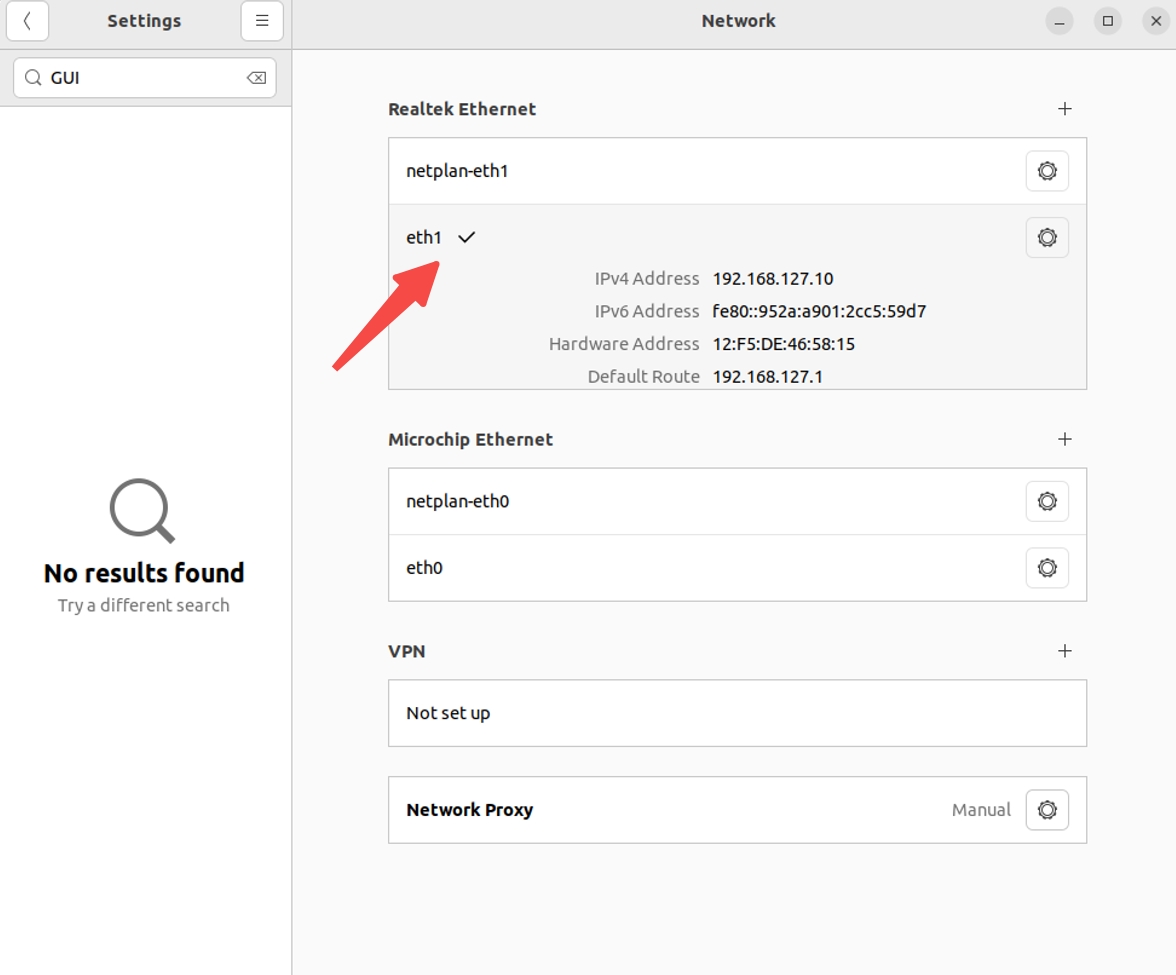
- To assign multiple IP addresses to a single network interface (using
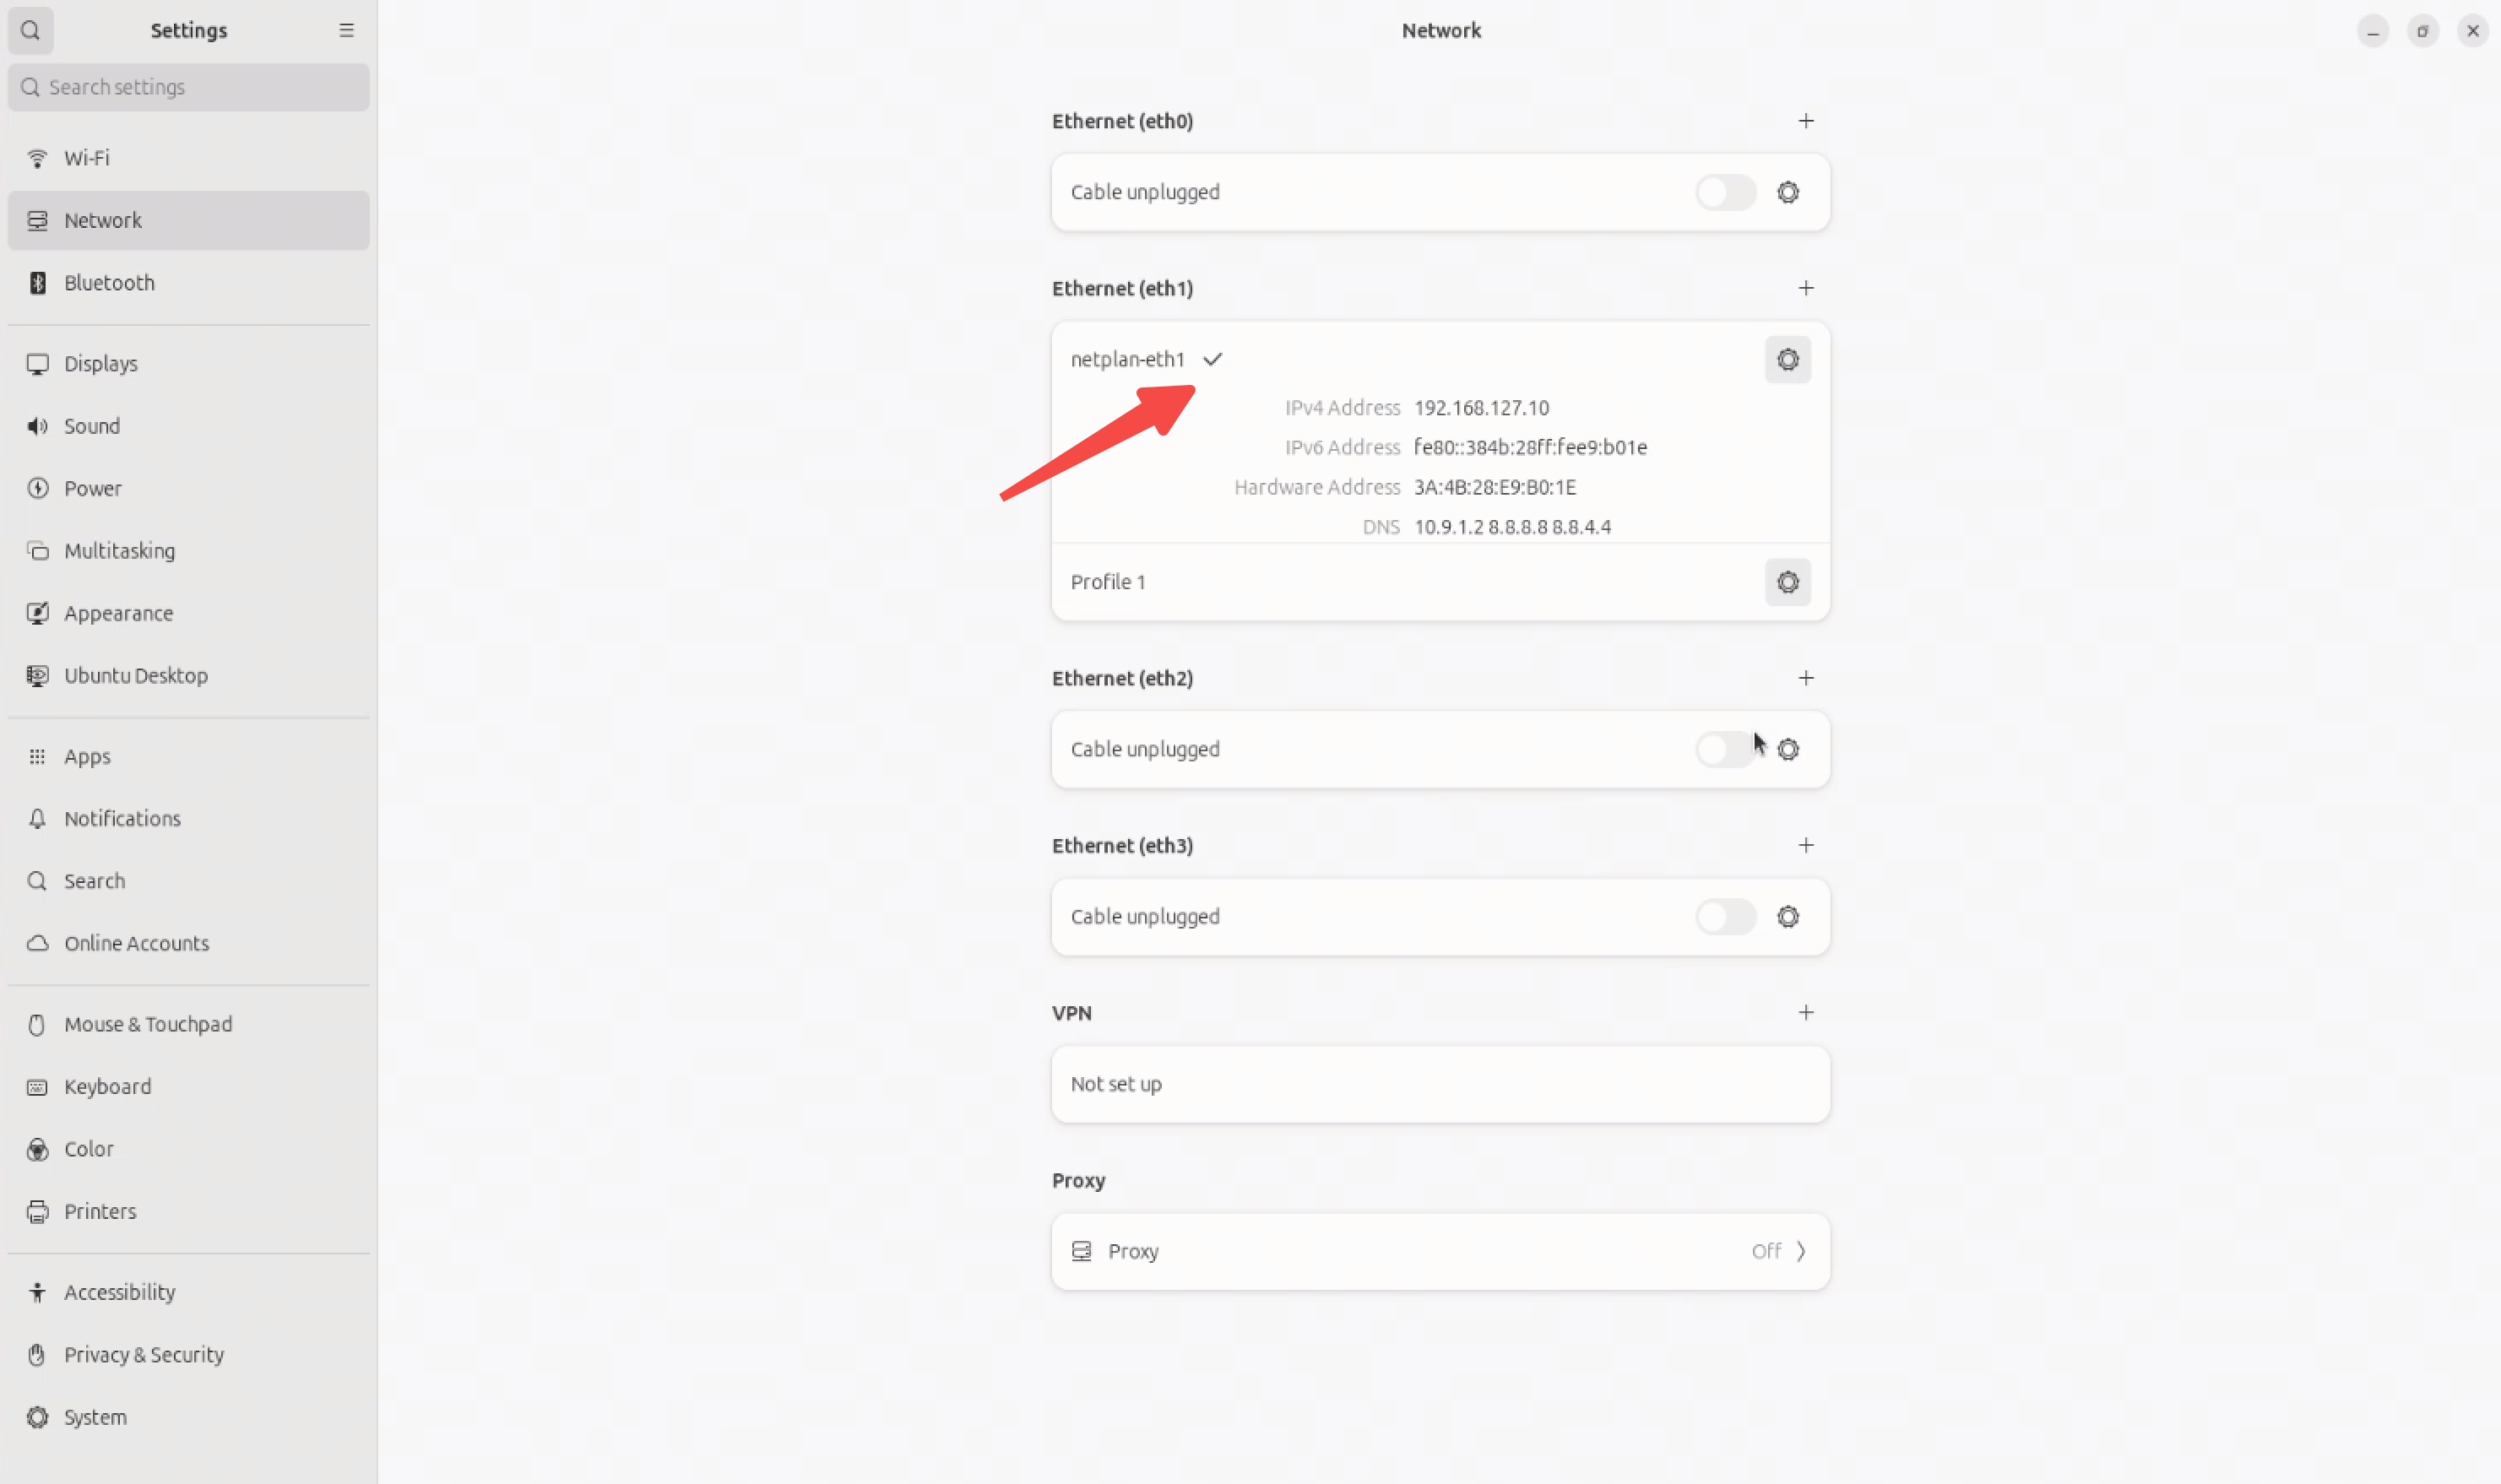
Ethernet (eth1)as an example), click the plus sign (+) on the right. Configure the additional IP address following the same steps as in steps 3 and 4. After completing the configuration, ensure that thenetplan-eth1option is selected (indicated by a√).
Modifying Proxy Configuration
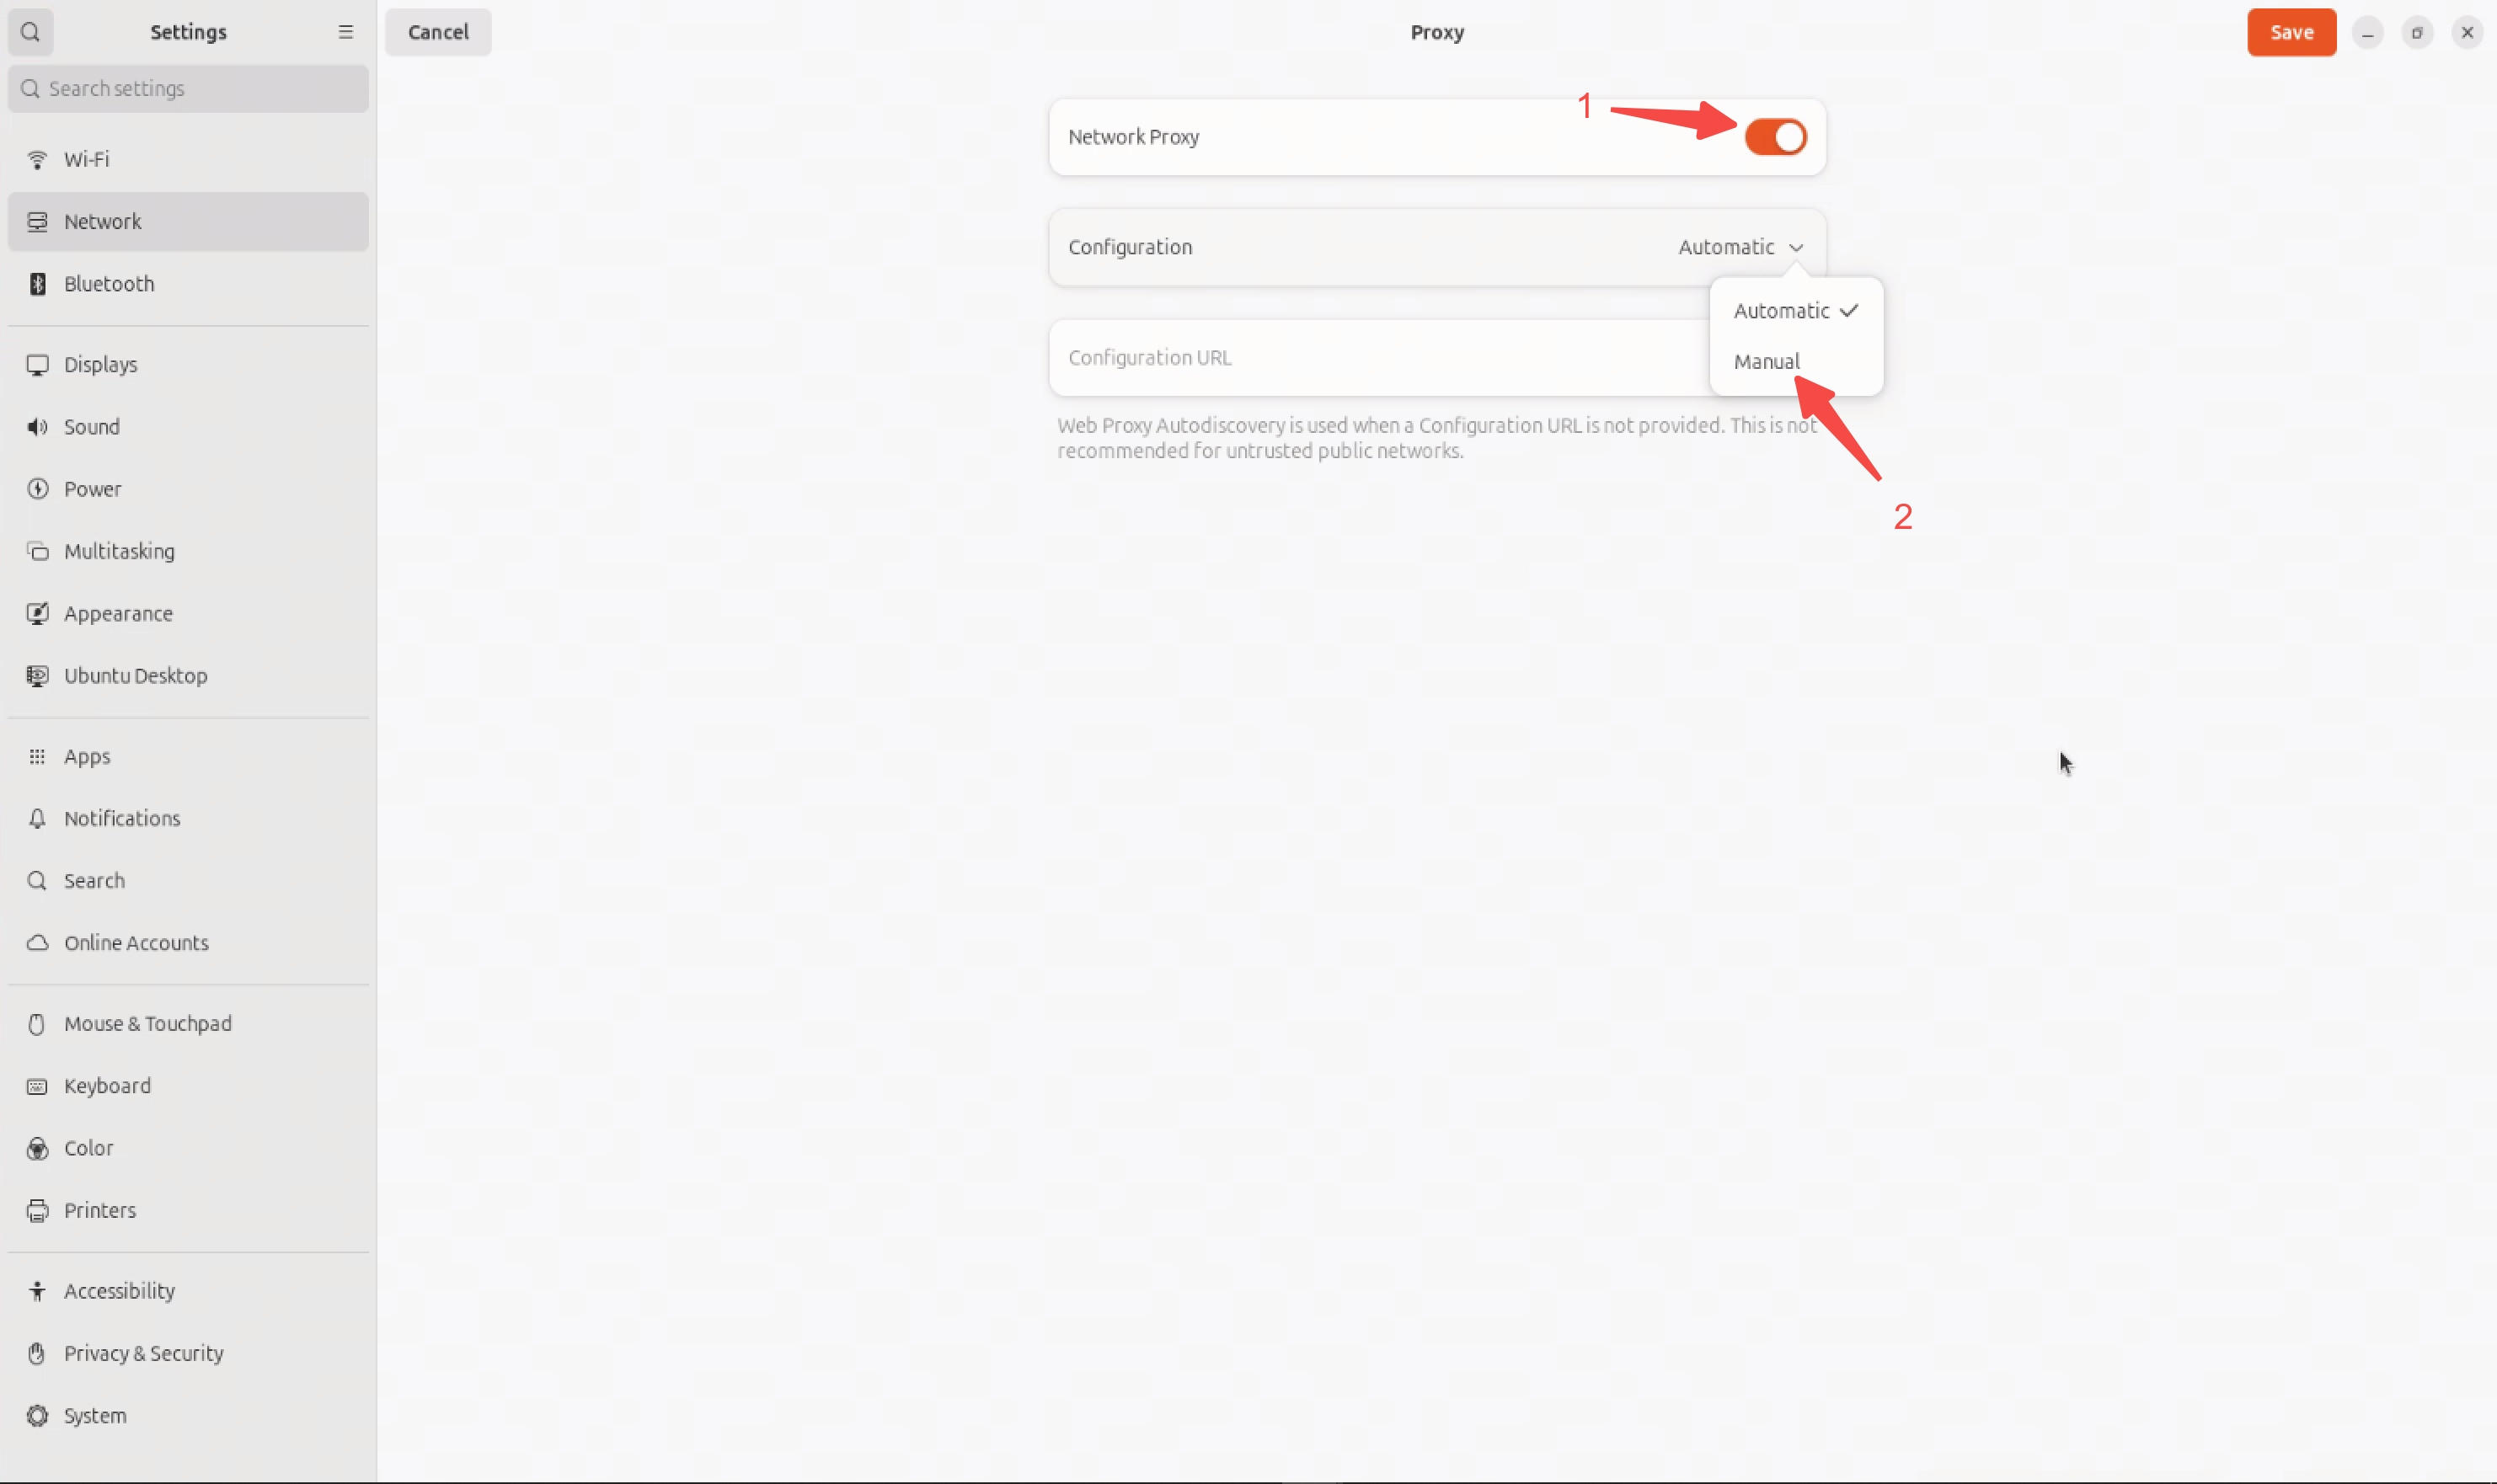
Similar to configuring a static IP, follow these steps to modify the Proxy settings:
-
After entering the desktop, click the bottom-left corner to open the application list and select the
Settingsapp. In the pop-up window, chooseNetwork. -
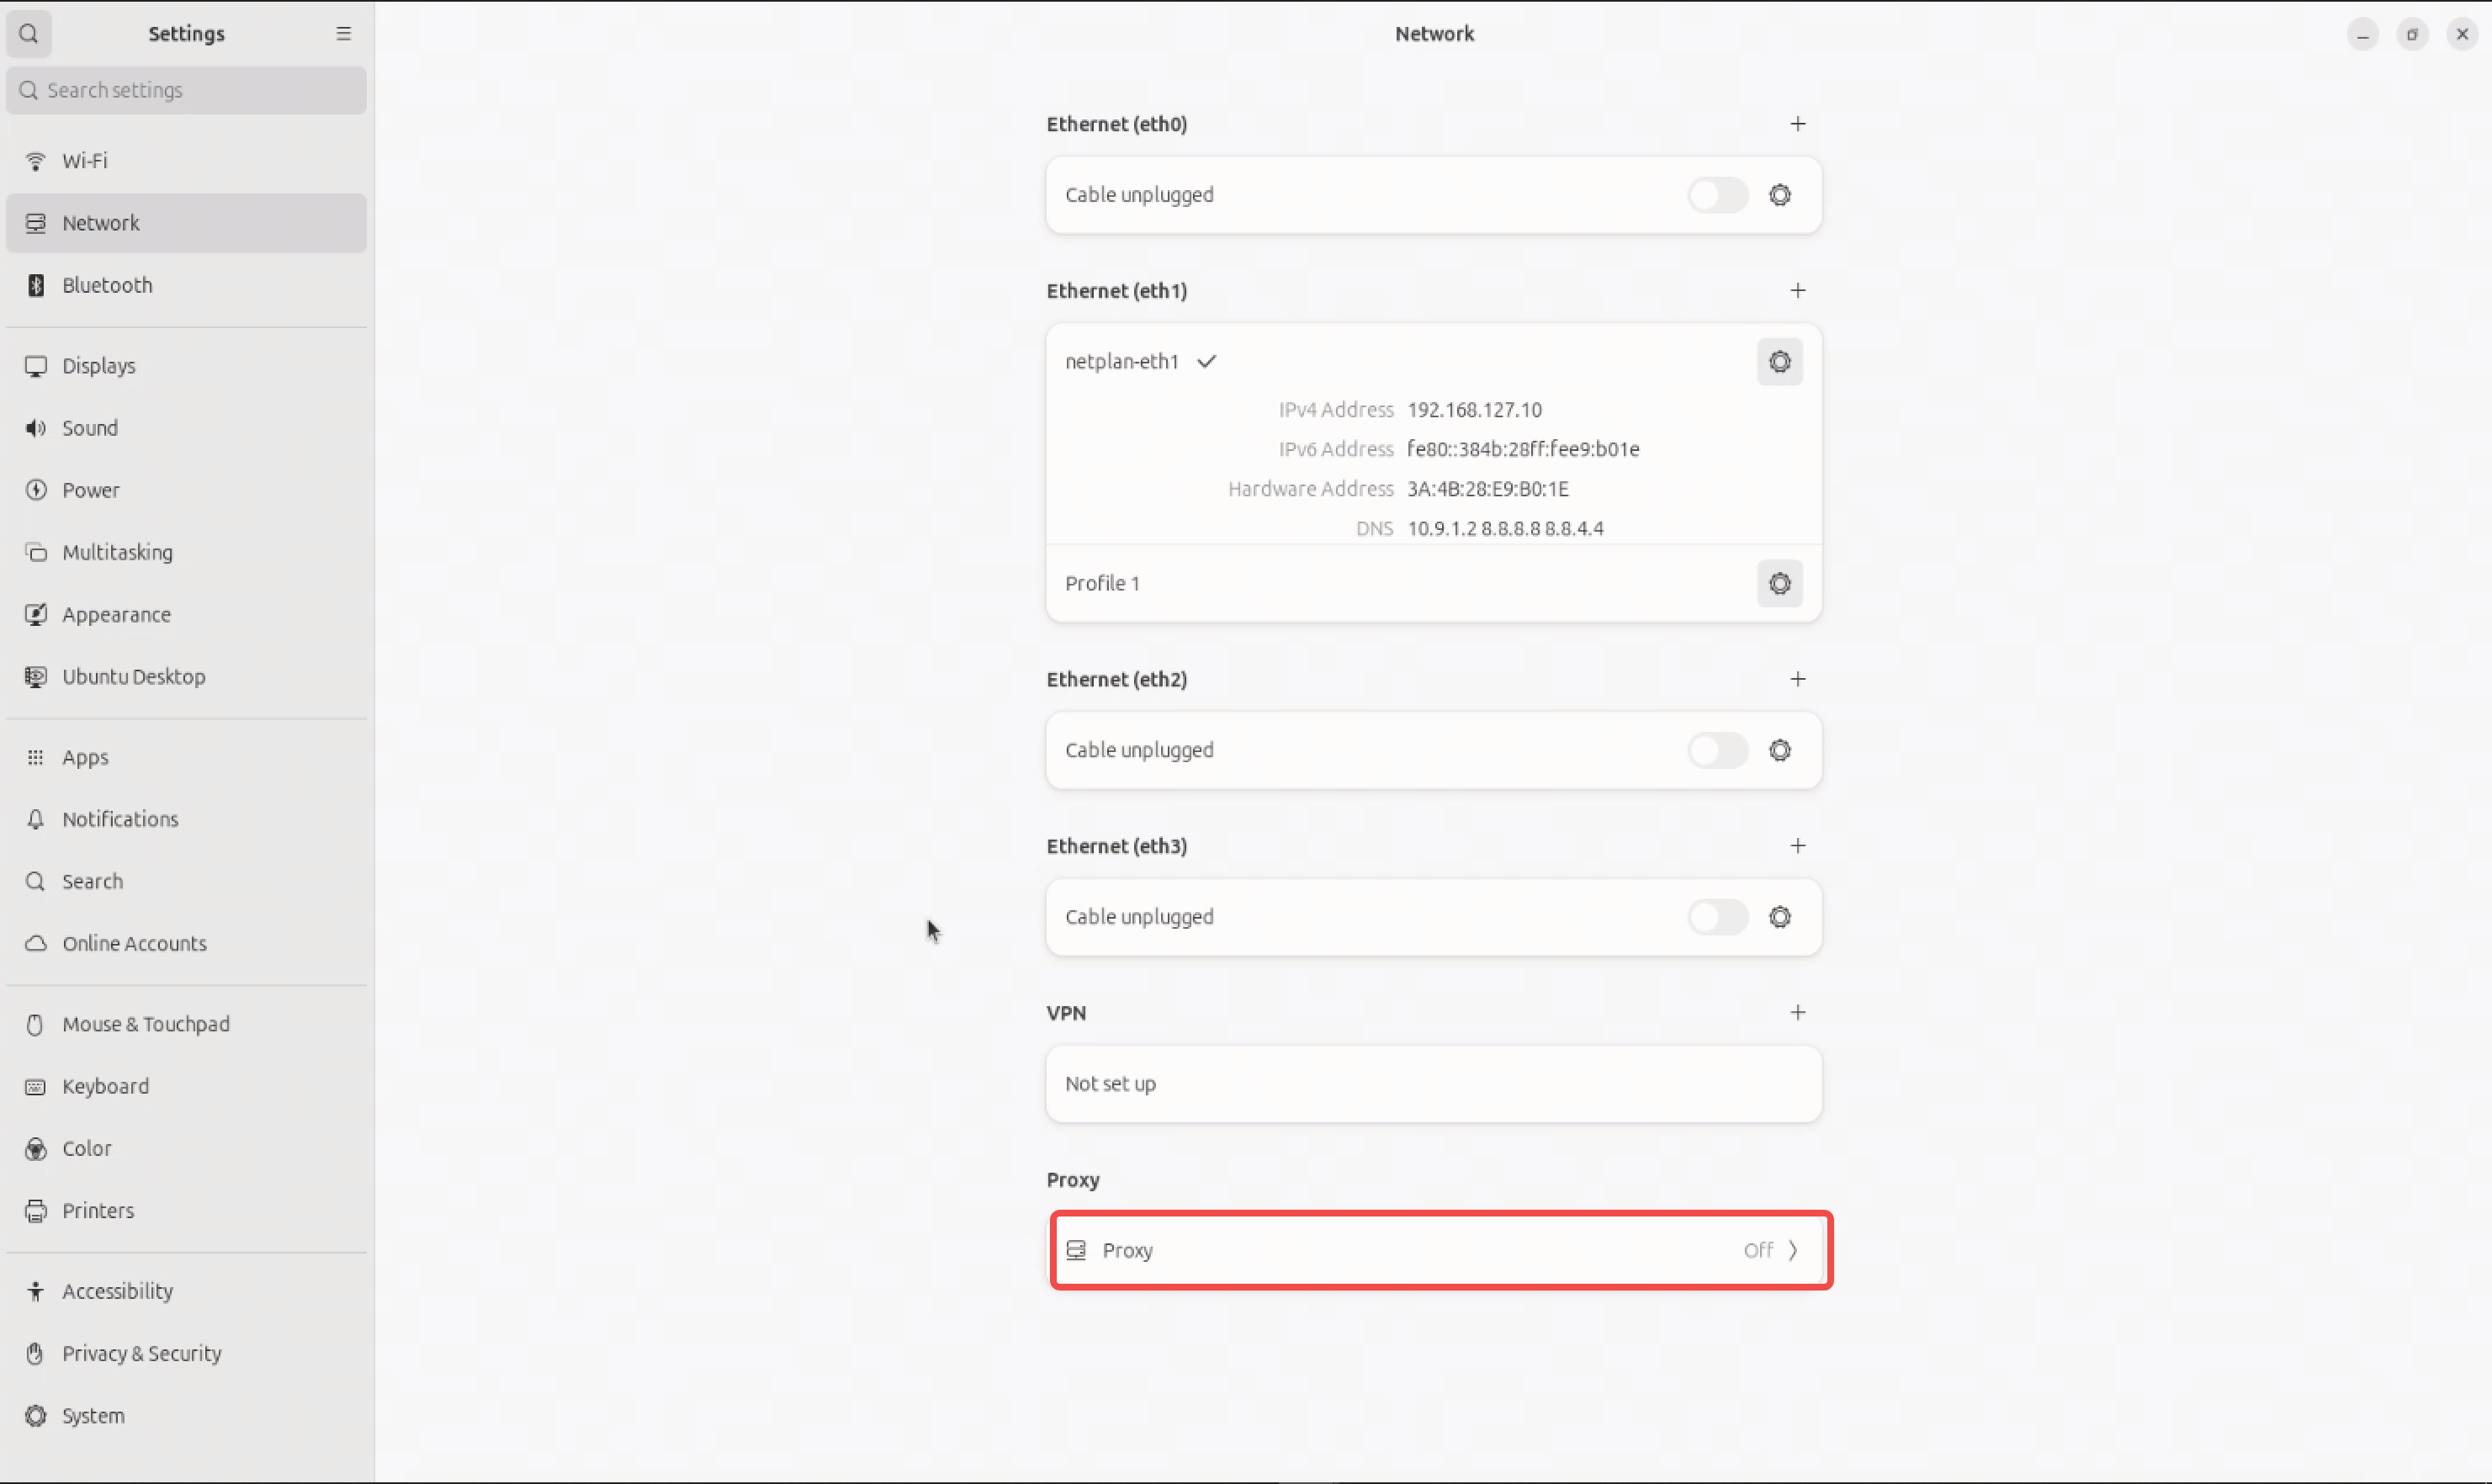
Scroll down and click the gear icon next to
Network Proxyto access its configuration.
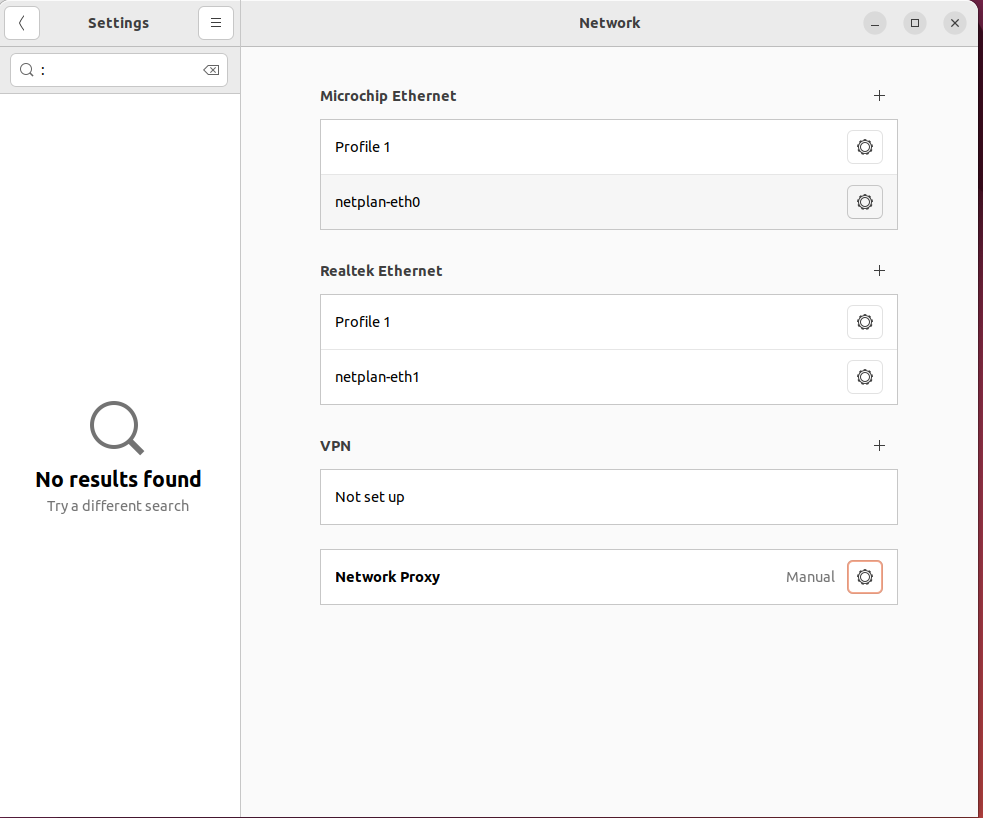
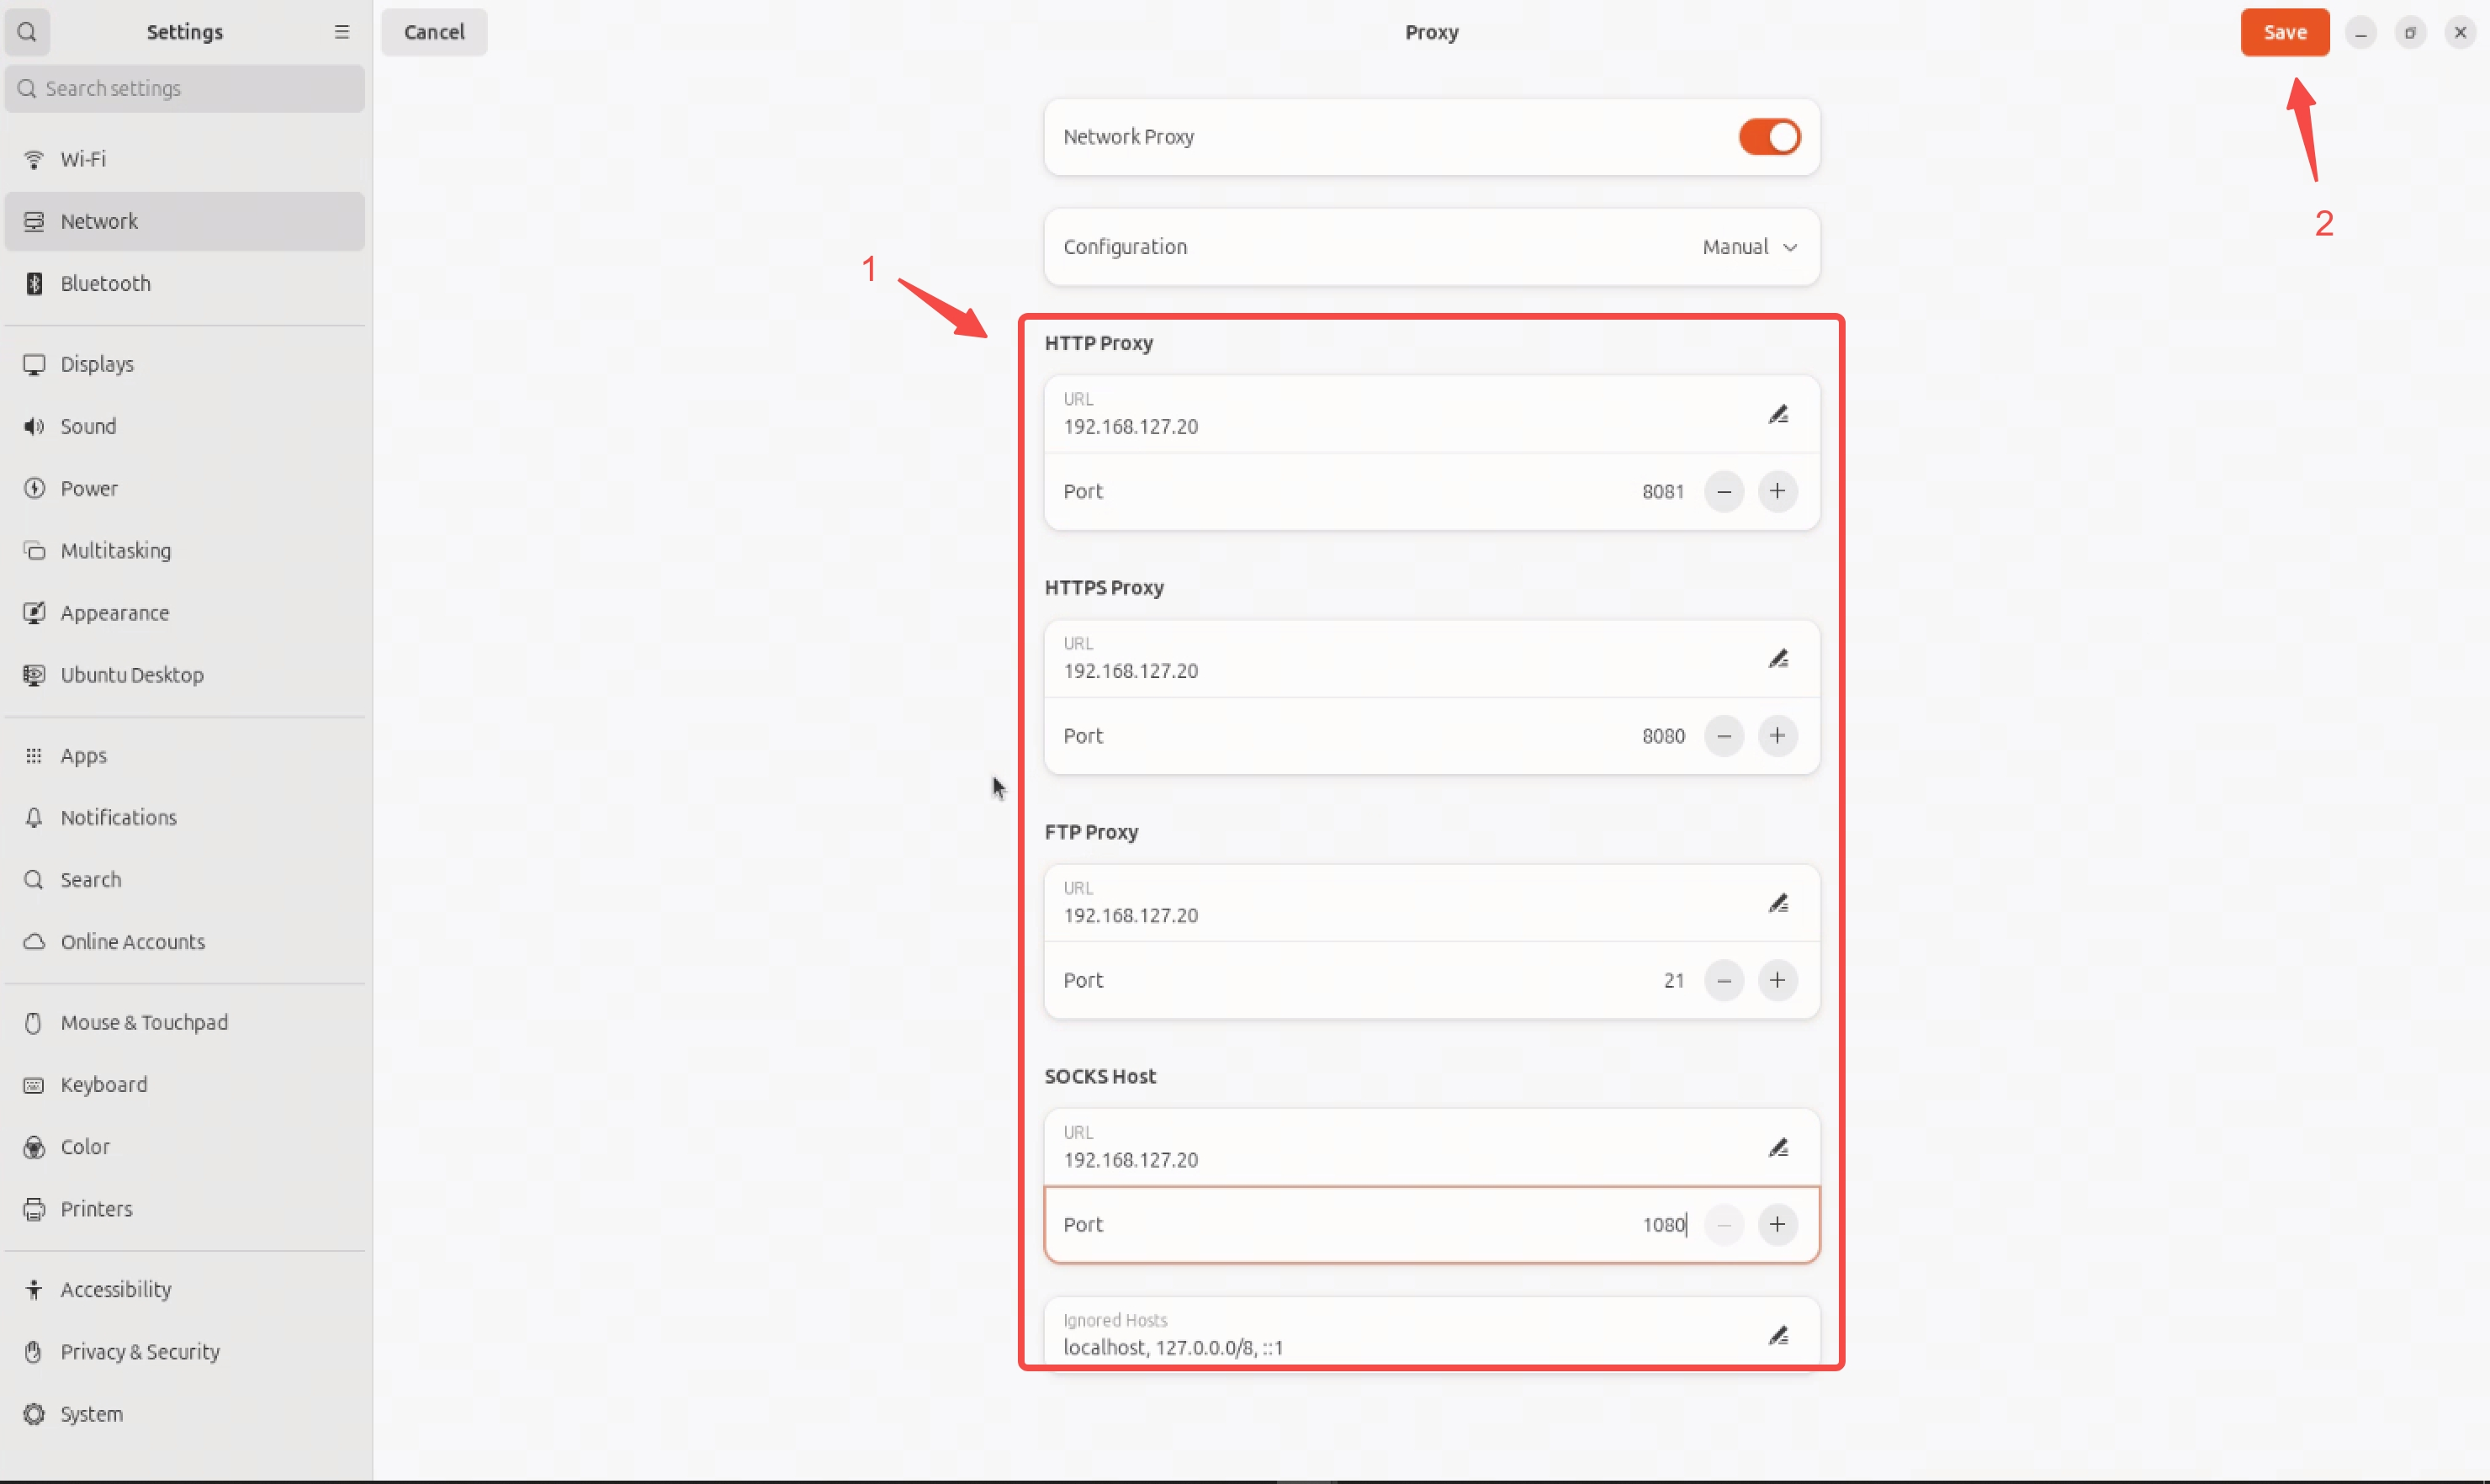
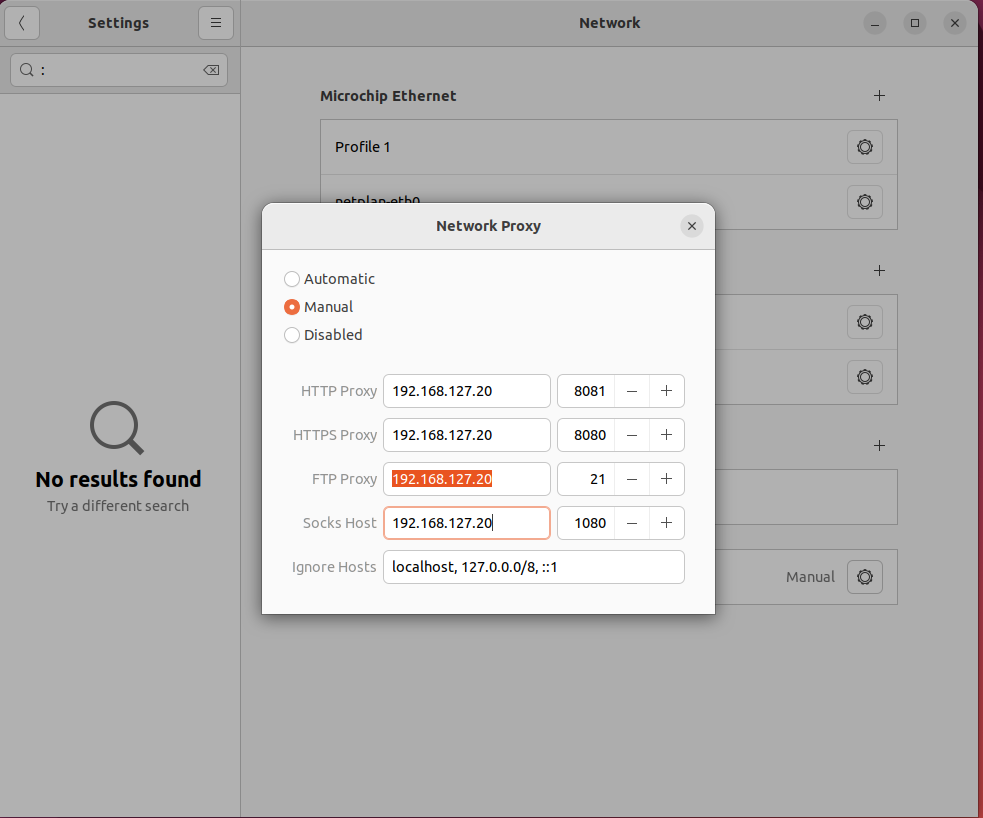
- Enter the required proxy settings in the pop-up window.
Modify Static IP, DNS Configuration
- After entering the desktop, click the bottom left corner to open the application list, select the
settingsapplication, and in the pop-up interface, chooseNetwork.
Ethernet (eth0),Ethernet (eth1),Ethernet (eth3), andEthernet (eth4)correspond to different physical network port configurations. The mapping between configuration and physical ports is as follows:
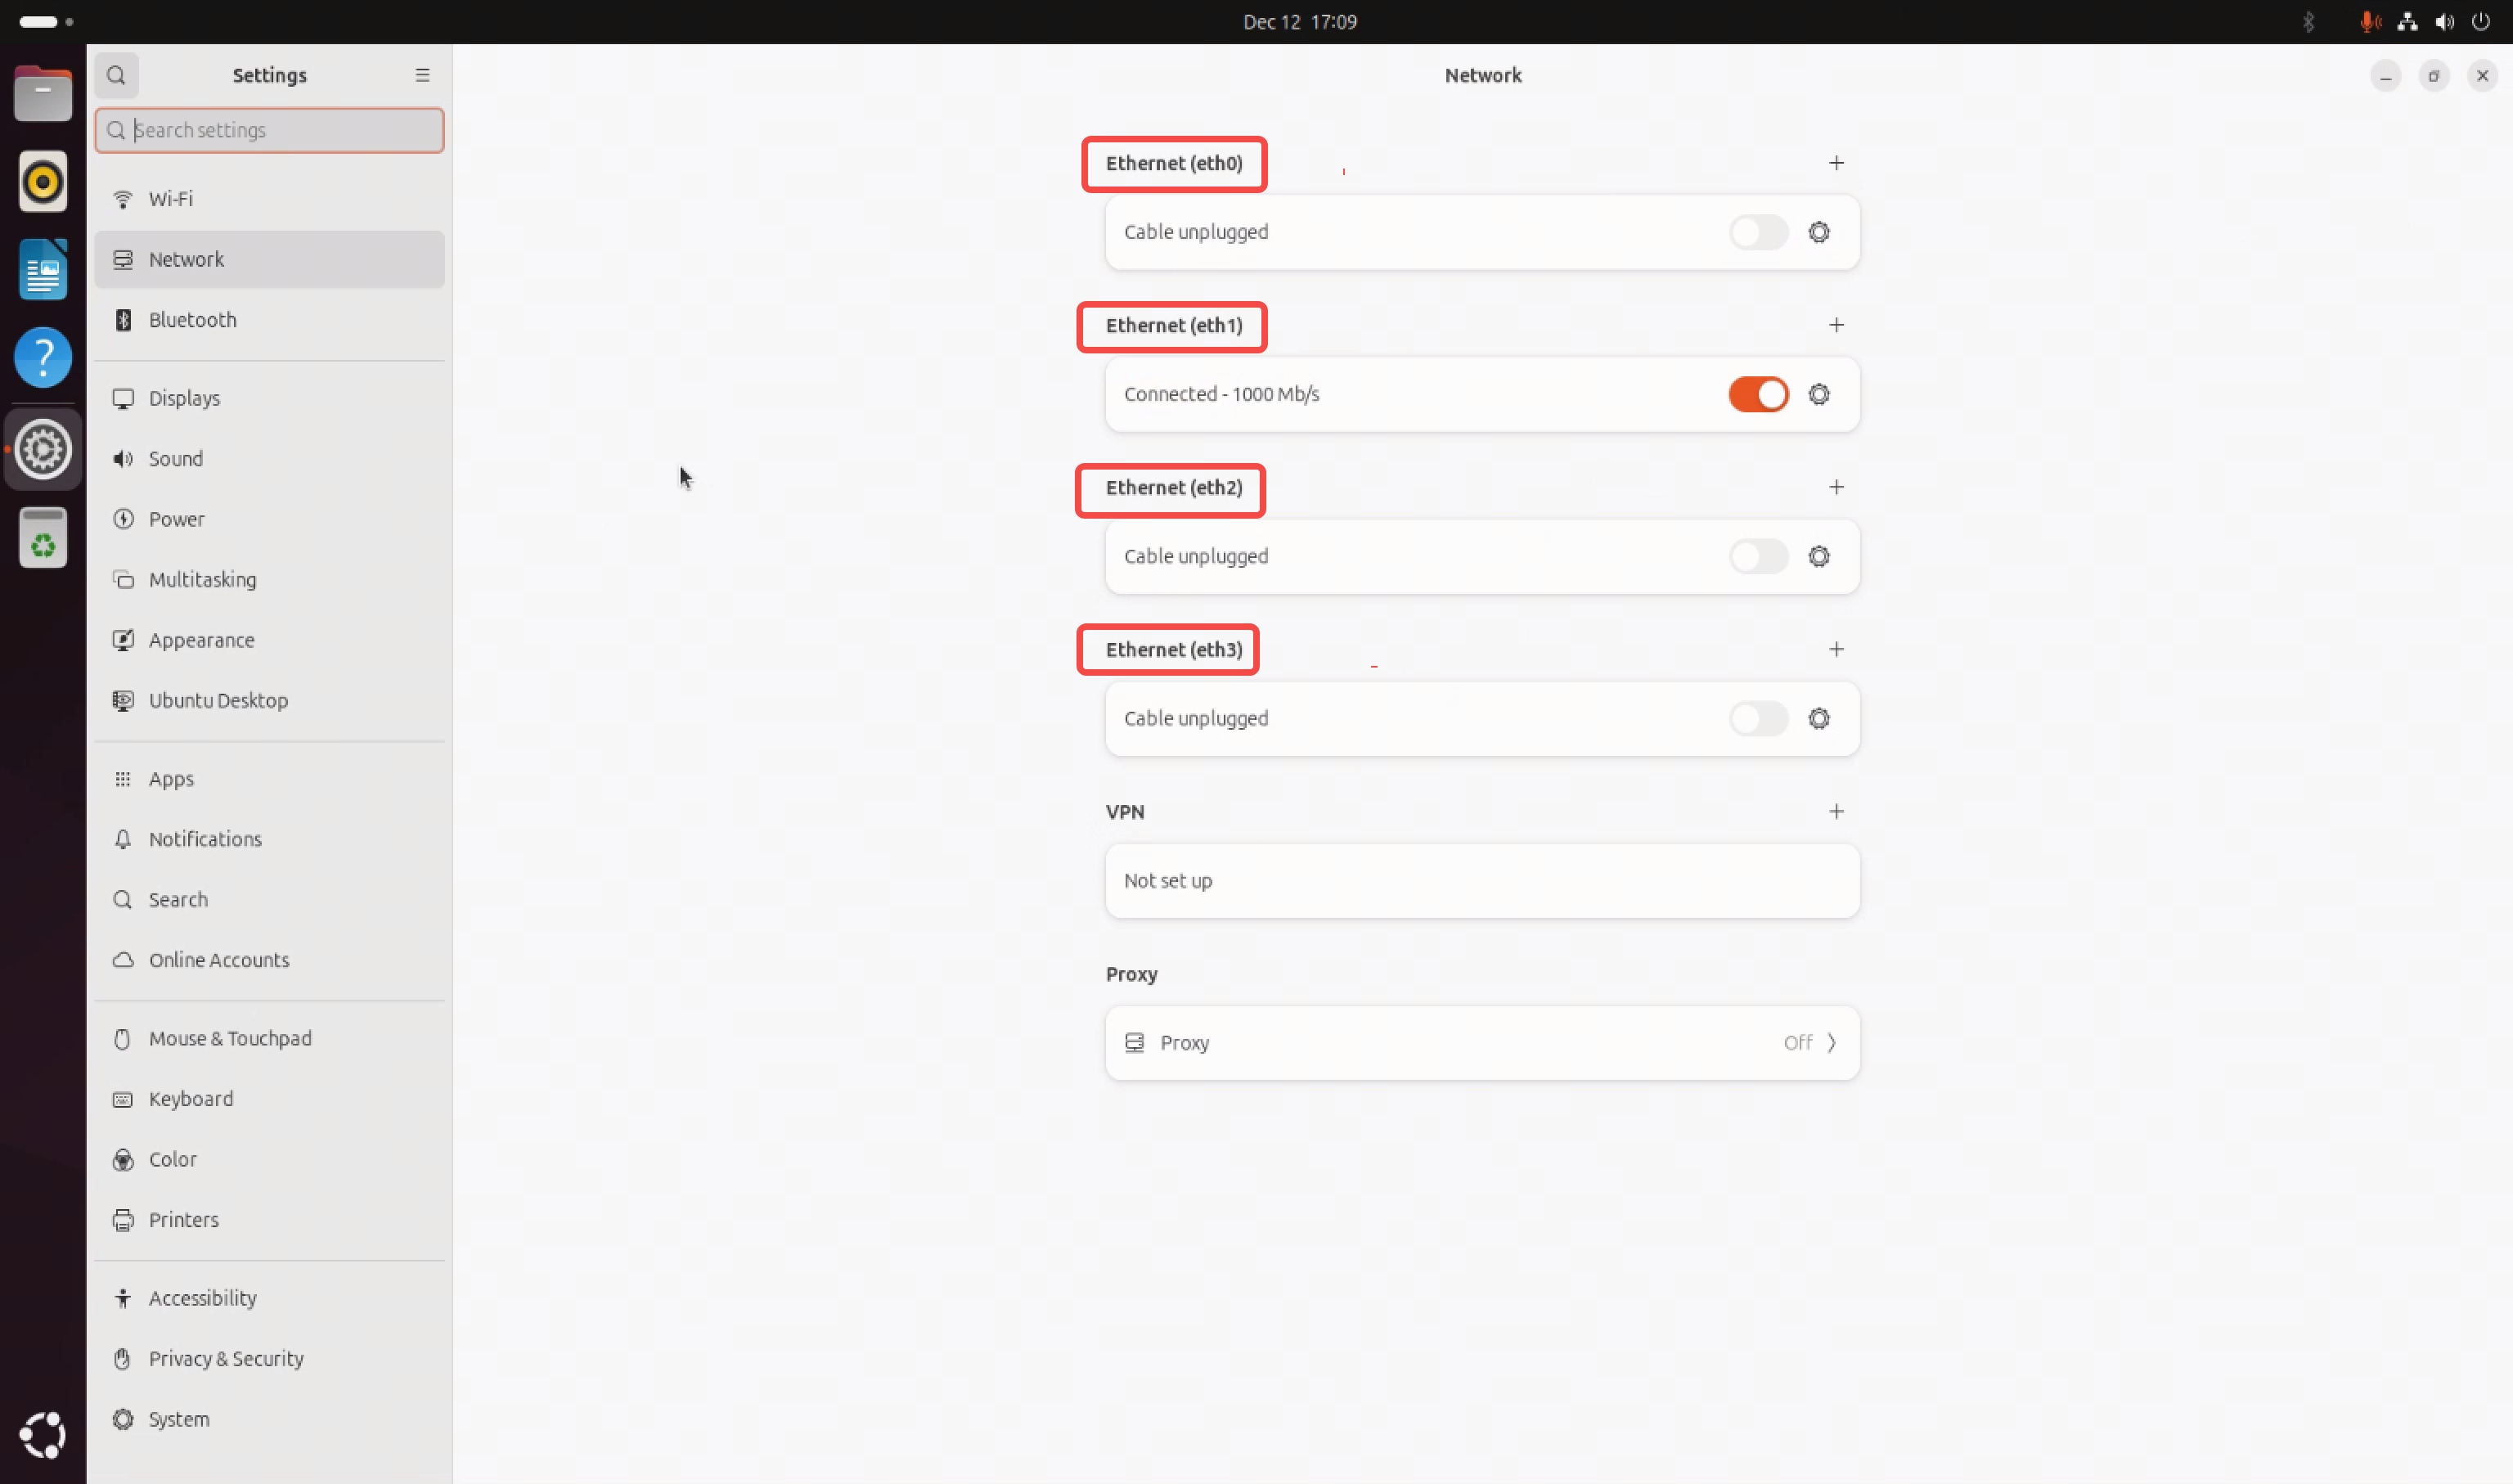
- Take modifying
Ethernet (eth1)as an example. Click the gear icon in the options on the right side of the modify button. In the pop-up interface, selectIPV4, chooseManualfor manual configuration, and enter theIPaddress, subnet mask, and gateway in theAddresserfield below.

- Enter the DNS configuration in the DNS field below.

- To configure multiple IP addresses for a single network card, take
Ethernet (eth1)as an example. Click the plus sign on the right, configure the IP address following the same steps as in steps 3 and 4. After completing the configuration, make sure to selectnetplan-eth1and verify that the√option appears.
Modify Proxy Configuration
Similar to modifying a static IP, the steps to modify the Proxy configuration are as follows:
-
After entering the desktop, click the bottom left corner to open the application list, select the
settingsapplication, and in the pop-up interface, chooseNetwork. -
Select
Proxyand click to enter the configuration.
- Fill in the required configuration in the redirected interface.